# Welcome to the Conexio Platform Guides

Welcome! The Conexio docs are a great place to explore our hardware, firmware, & developer tools, and find all the information you need to build your own connected product with Conexio devices.

## Cellular Hardware Series

Select the device type below to see the guide on getting started.

<table data-view="cards"><thead><tr><th></th><th></th><th></th><th data-hidden data-card-cover data-type="files"></th><th data-hidden data-card-target data-type="content-ref"></th></tr></thead><tbody><tr><td><strong>Stratus Pro nRF9151</strong></td><td><strong>Global Celular</strong></td><td>Gen 3 (2026)</td><td><a href="https://3229153654-files.gitbook.io/~/files/v0/b/gitbook-x-prod.appspot.com/o/spaces%2F-MXjGw-Z8_tCuNQB93OW%2Fuploads%2F1cG5eVk5uo6KN0IqKpre%2FStratispro-cp2102.jpg?alt=media&amp;token=d0699aa9-7a3a-4ebf-ae01-0750d12e80fe">Stratispro-cp2102.jpg</a></td><td><a href="https://docs.conexiotech.com/master/stratus-overview">https://docs.conexiotech.com/master/stratus-overview</a></td></tr><tr><td><strong>Stratus Pro nRF9161</strong></td><td><strong>Global Cellular</strong></td><td>Gen 2 (2025)</td><td><a href="https://3229153654-files.gitbook.io/~/files/v0/b/gitbook-x-prod.appspot.com/o/spaces%2F-MXjGw-Z8_tCuNQB93OW%2Fuploads%2F92o9jxabu86YxWicRCkm%2F1733541391978.jpeg?alt=media&amp;token=f4894d30-308a-48dd-b8ac-14a72311532e">1733541391978.jpeg</a></td><td><a href="/master">Getting Started with Conexio Stratus</a></td></tr><tr><td><strong>Stratus nRF9160</strong></td><td><strong>Global Cellular</strong></td><td>Gen 1 (2022)</td><td><a href="https://3229153654-files.gitbook.io/~/files/v0/b/gitbook-x-prod.appspot.com/o/spaces%2F-MXjGw-Z8_tCuNQB93OW%2Fuploads%2FDCY9sJta5jSCUAYOVUS3%2FStratispro-reset-button.jpg?alt=media&amp;token=4514720a-29ce-4e89-914c-cd7d405ea8b4">Stratispro-reset-button.jpg</a></td><td><a href="/master/stratus-overview-2">Stratus nRF9160 (Gen 1) Overview</a></td></tr></tbody></table>

## Expansion Dock

<table data-view="cards"><thead><tr><th></th><th data-hidden data-card-target data-type="content-ref"></th><th data-hidden data-card-cover data-type="files"></th></tr></thead><tbody><tr><td><p>Stratus Pro </p><p>Expansion Dock</p></td><td><a href="https://docs.conexiotech.com/master/expansion-dock">https://docs.conexiotech.com/master/expansion-dock</a></td><td><a href="https://3229153654-files.gitbook.io/~/files/v0/b/gitbook-x-prod.appspot.com/o/spaces%2F-MXjGw-Z8_tCuNQB93OW%2Fuploads%2FGqYJ1MetIoSkI8J7gz8M%2F1733541392475.jpeg?alt=media&amp;token=e2643854-f2ee-496e-bad1-0d148787726d">1733541392475.jpeg</a></td></tr></tbody></table>

## Software Development Kit and Sample Applications

<table data-view="cards"><thead><tr><th></th><th></th><th></th><th data-hidden data-card-target data-type="content-ref"></th></tr></thead><tbody><tr><td><strong>SDK &#x26;</strong> <strong>Sample Applications</strong></td><td><a href="https://github.com/Conexiotechnologies/conexio-firmware-sdk">Official Git Repo</a></td><td></td><td><a href="https://github.com/Conexiotechnologies/conexio-firmware-sdk">https://github.com/Conexiotechnologies/conexio-firmware-sdk</a></td></tr></tbody></table>

## Conexio Device Reference Schematic and PCB Design

<table data-view="cards"><thead><tr><th></th><th></th><th></th><th data-hidden data-card-target data-type="content-ref"></th></tr></thead><tbody><tr><td><strong>Stratus Pro nRF9161 Reference Design</strong></td><td><p></p><p><a href="https://github.com/Conexiotechnologies/conexio-stratus-board-schematics/tree/main/conexio-stratus-pro-nRF9161">Official Git Repo</a></p></td><td></td><td></td></tr><tr><td><strong>Stratus nRF9160 Reference Design</strong></td><td><p></p><p><a href="https://github.com/Conexiotechnologies/conexio-stratus-board-schematics">Official Git Repo</a></p></td><td></td><td><a href="https://github.com/Conexiotechnologies/conexio-stratus-board-schematics">https://github.com/Conexiotechnologies/conexio-stratus-board-schematics</a></td></tr></tbody></table>


# Getting Started with Conexio Stratus

Global Cellular: LTE + NB-IoT + GPS + DECT NR+

## What is Conexio Stratus Pro?

<figure><img src="https://3229153654-files.gitbook.io/~/files/v0/b/gitbook-x-prod.appspot.com/o/spaces%2F-MXjGw-Z8_tCuNQB93OW%2Fuploads%2Fwg0JStFfh7Gt6sAUlloC%2Fconexio-stratus-pro.png?alt=media&amp;token=b14f51f5-a495-49f7-8214-489a5cd631b2" alt=""><figcaption></figcaption></figure>

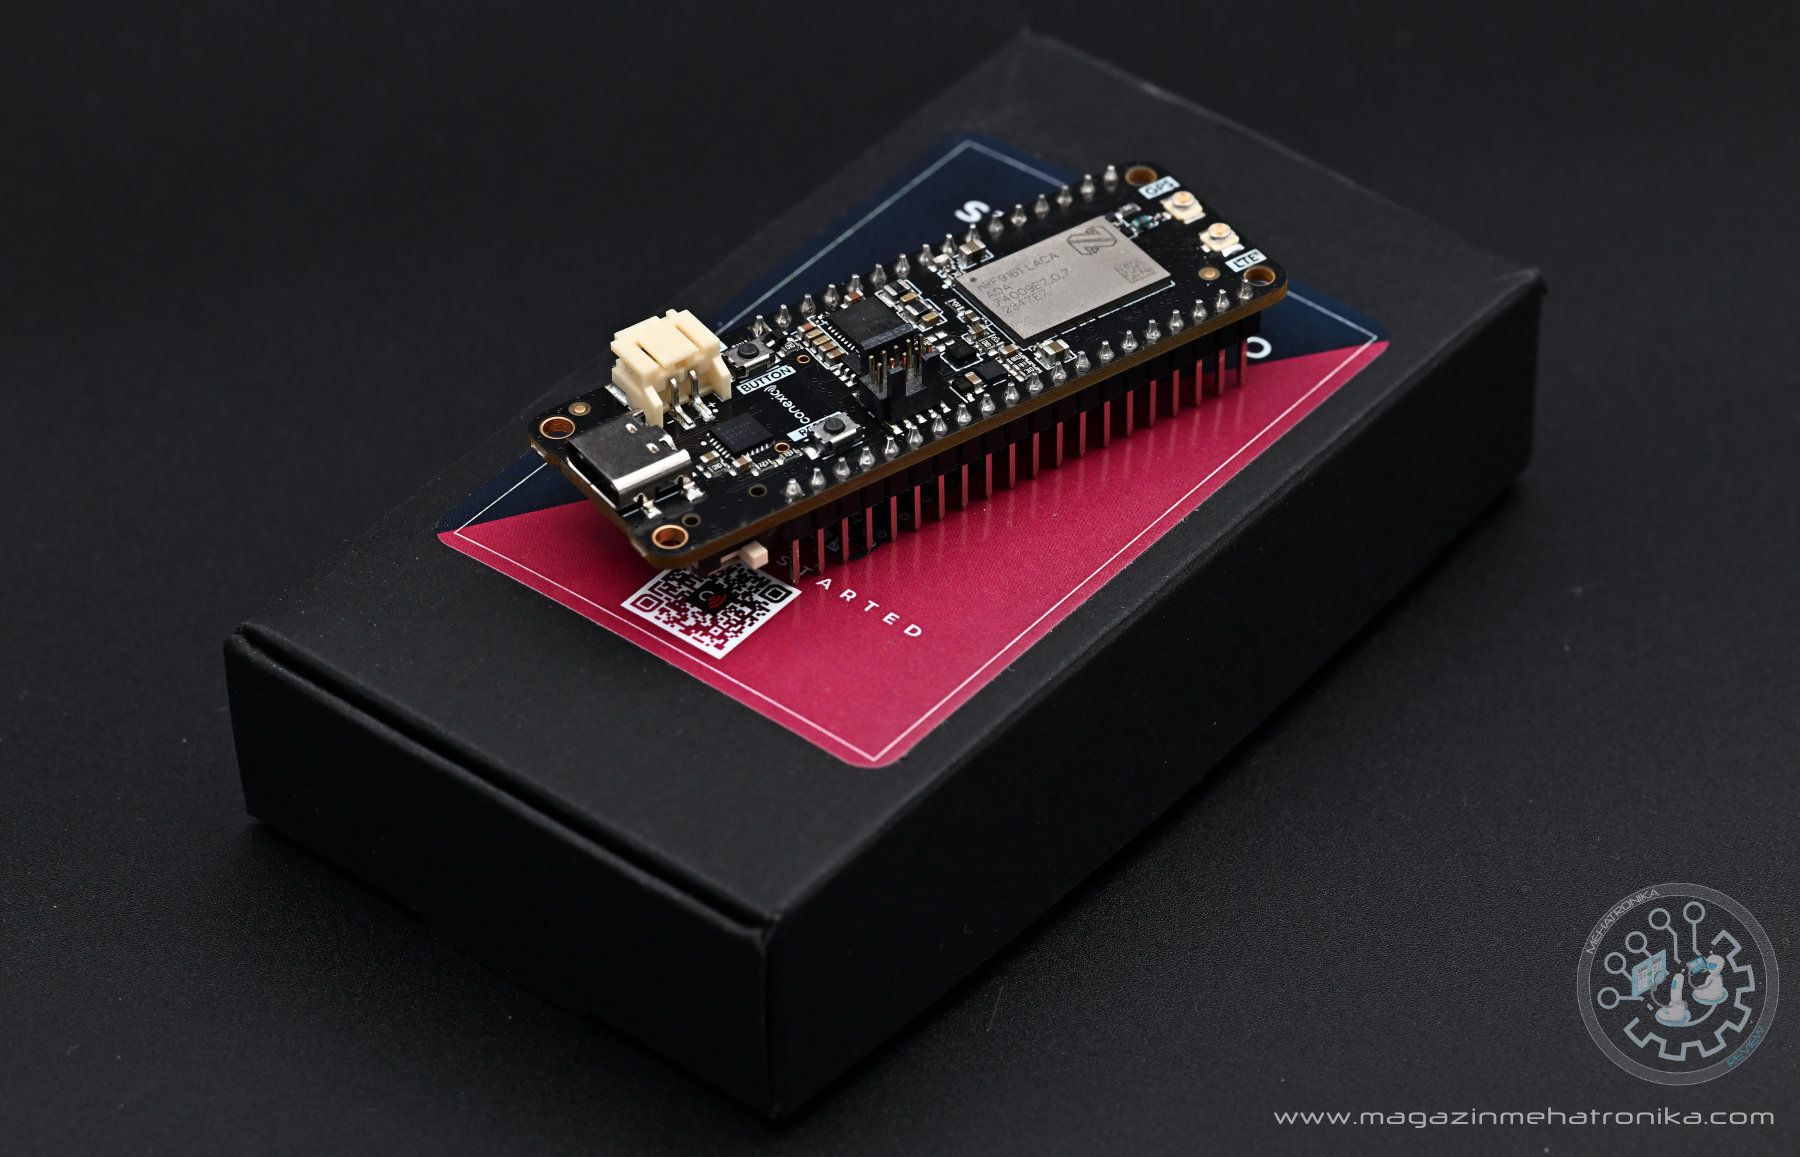
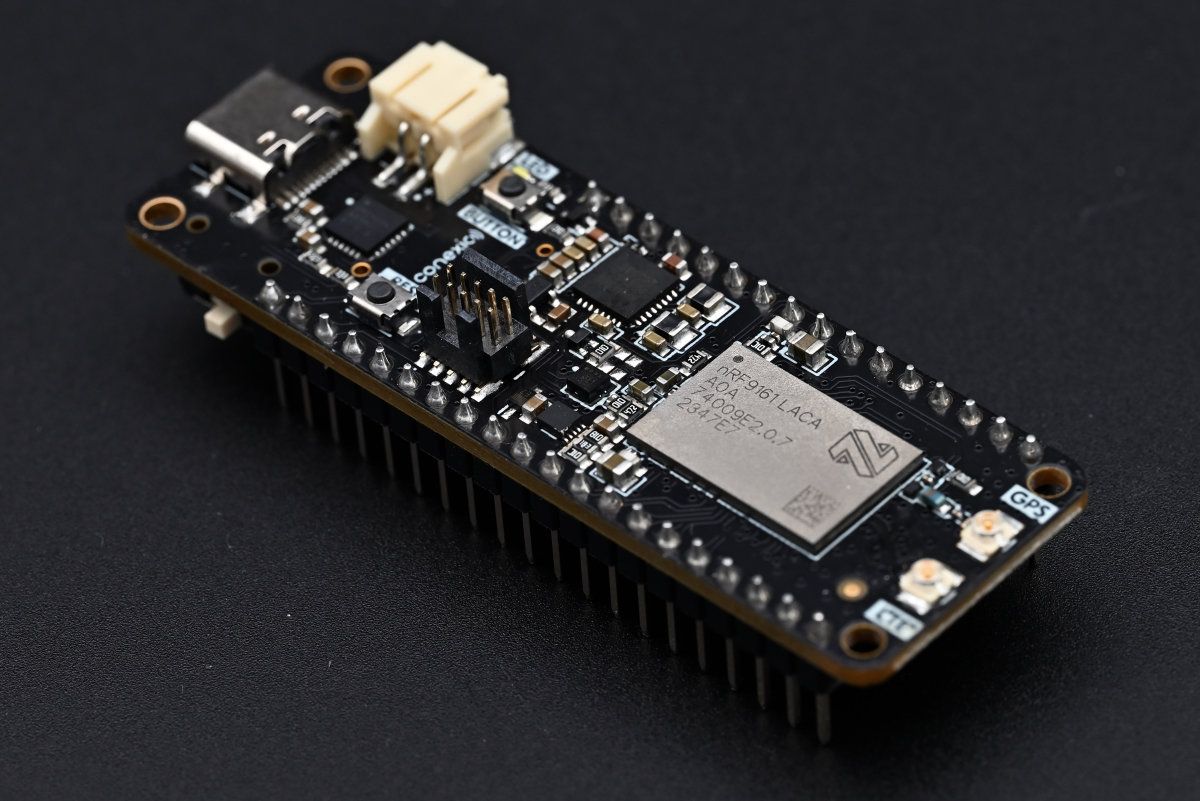
The Stratus series is our flagship IoT Development Board for cellular-connected products. It is a battery-operated platform making it ideal for prototyping cellular IoT systems, for instance, asset tracking applications, environmental monitoring, and smart meter monitoring to name a few.&#x20;

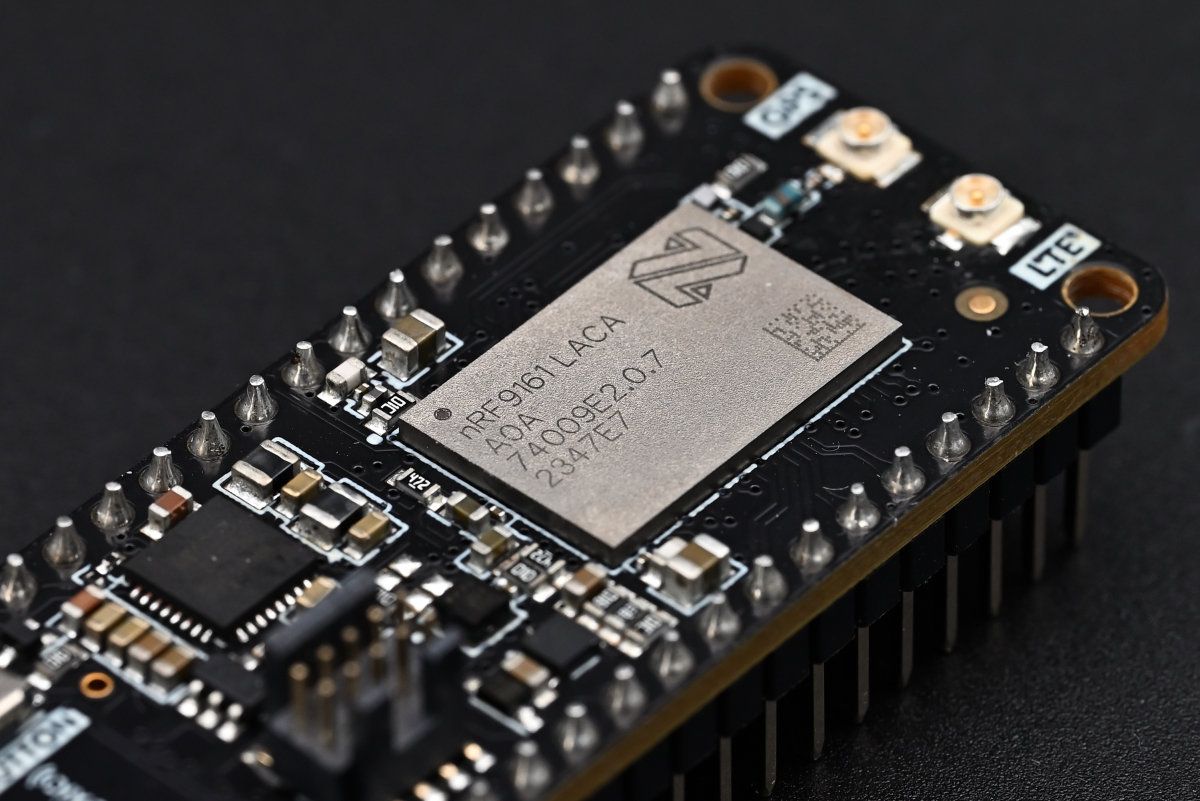
Equipped with the Nordic Semi's nRF9151 & nRF9161 (Gen 2 devices) and nRF9160 (Gen 1 device) System in Package (SiP), it supports LTE-M, NB-IoT, and Global Positioning System (GPS). Stratus has two onboard external U.FL antennas, one for the GPS and the other for LTE-M/NB-IoT enabling it to support a global range of LTE bands.

Stratus has built-in battery charging, monitoring, and energy-harvesting circuitry which makes it easier to connect and recharge a Li-Po battery without having to replace the battery, creating fully energy-autonomous applications. In addition, Stratus incorporates an accelerometer and a temperature and humidity sensor for detecting movements and sensing the surrounding environment, right out of the box. Finally, Stratus provides 26 mixed-signal GPIOs for interfacing with external sensors, actuators, and other electronics.

To connect to the IoT cellular networks, Stratus comes preloaded with 500 MB of data and a total of 250 SMS valid for 10 years with service in more than 100 countries worldwide without additional costs, making it the most versatile IoT development kit in the market.

Stratus is great for connecting existing projects to the Cloud or as a gateway to connect other local endpoints without having to worry about the infrastructure cost.

## Stratus Sample Applications Repo

{% embed url="<https://github.com/Conexiotechnologies/conexio-firmware-sdk>" %}

## Stratus Discord Channel

{% embed url="<https://discord.gg/2CZJTrt6Z5>" fullWidth="false" %}

***

## Stratus Pro nRF9161 Image Gallery

<figure><img src="https://3229153654-files.gitbook.io/~/files/v0/b/gitbook-x-prod.appspot.com/o/spaces%2F-MXjGw-Z8_tCuNQB93OW%2Fuploads%2FGqYJ1MetIoSkI8J7gz8M%2F1733541392475.jpeg?alt=media&amp;token=e2643854-f2ee-496e-bad1-0d148787726d" alt=""><figcaption></figcaption></figure>

<div><figure><img src="https://3229153654-files.gitbook.io/~/files/v0/b/gitbook-x-prod.appspot.com/o/spaces%2F-MXjGw-Z8_tCuNQB93OW%2Fuploads%2FQ3BBkn2i7xnWAs0DUgkl%2F1733541392175.jpeg?alt=media&amp;token=5bb28353-34d9-4e04-96a9-90cd16e2d15c" alt=""><figcaption></figcaption></figure> <figure><img src="https://3229153654-files.gitbook.io/~/files/v0/b/gitbook-x-prod.appspot.com/o/spaces%2F-MXjGw-Z8_tCuNQB93OW%2Fuploads%2F92o9jxabu86YxWicRCkm%2F1733541391978.jpeg?alt=media&amp;token=f4894d30-308a-48dd-b8ac-14a72311532e" alt=""><figcaption></figcaption></figure></div>

<div><figure><img src="https://3229153654-files.gitbook.io/~/files/v0/b/gitbook-x-prod.appspot.com/o/spaces%2F-MXjGw-Z8_tCuNQB93OW%2Fuploads%2F1cG5eVk5uo6KN0IqKpre%2FStratispro-cp2102.jpg?alt=media&amp;token=d0699aa9-7a3a-4ebf-ae01-0750d12e80fe" alt=""><figcaption></figcaption></figure> <figure><img src="https://3229153654-files.gitbook.io/~/files/v0/b/gitbook-x-prod.appspot.com/o/spaces%2F-MXjGw-Z8_tCuNQB93OW%2Fuploads%2FDCY9sJta5jSCUAYOVUS3%2FStratispro-reset-button.jpg?alt=media&amp;token=4514720a-29ce-4e89-914c-cd7d405ea8b4" alt=""><figcaption></figcaption></figure></div>

<div><figure><img src="https://3229153654-files.gitbook.io/~/files/v0/b/gitbook-x-prod.appspot.com/o/spaces%2F-MXjGw-Z8_tCuNQB93OW%2Fuploads%2FaRV6XeuYqMFtP2HyZquh%2FStratispro-QWIIC.jpg?alt=media&amp;token=ba83a5eb-ea6e-48cc-b0fd-70965a5a3163" alt=""><figcaption></figcaption></figure> <figure><img src="https://3229153654-files.gitbook.io/~/files/v0/b/gitbook-x-prod.appspot.com/o/spaces%2F-MXjGw-Z8_tCuNQB93OW%2Fuploads%2FZVmhWwL4k6sgB2nET6LJ%2FStratispro-back.jpg?alt=media&amp;token=619ab647-2070-41c1-9ebd-5f1943a4cf58" alt=""><figcaption></figcaption></figure></div>

<div><figure><img src="https://3229153654-files.gitbook.io/~/files/v0/b/gitbook-x-prod.appspot.com/o/spaces%2F-MXjGw-Z8_tCuNQB93OW%2Fuploads%2FTvsFJbdncDHxzWGnJ7uf%2FStratispro-NPM1300.jpg?alt=media&amp;token=5188e4d2-3bf6-4a05-a777-50808eb3afce" alt=""><figcaption></figcaption></figure> <figure><img src="https://3229153654-files.gitbook.io/~/files/v0/b/gitbook-x-prod.appspot.com/o/spaces%2F-MXjGw-Z8_tCuNQB93OW%2Fuploads%2FUX2MHrDIIZCNZy5iNKUL%2FStratispro-top.jpg?alt=media&amp;token=d4332257-4b4a-4a78-8bb9-a1e3feb603ac" alt=""><figcaption></figcaption></figure></div>


# Stratus Pro nRF9151 Overview

nRF9151 + nPM1300

## Board Layout

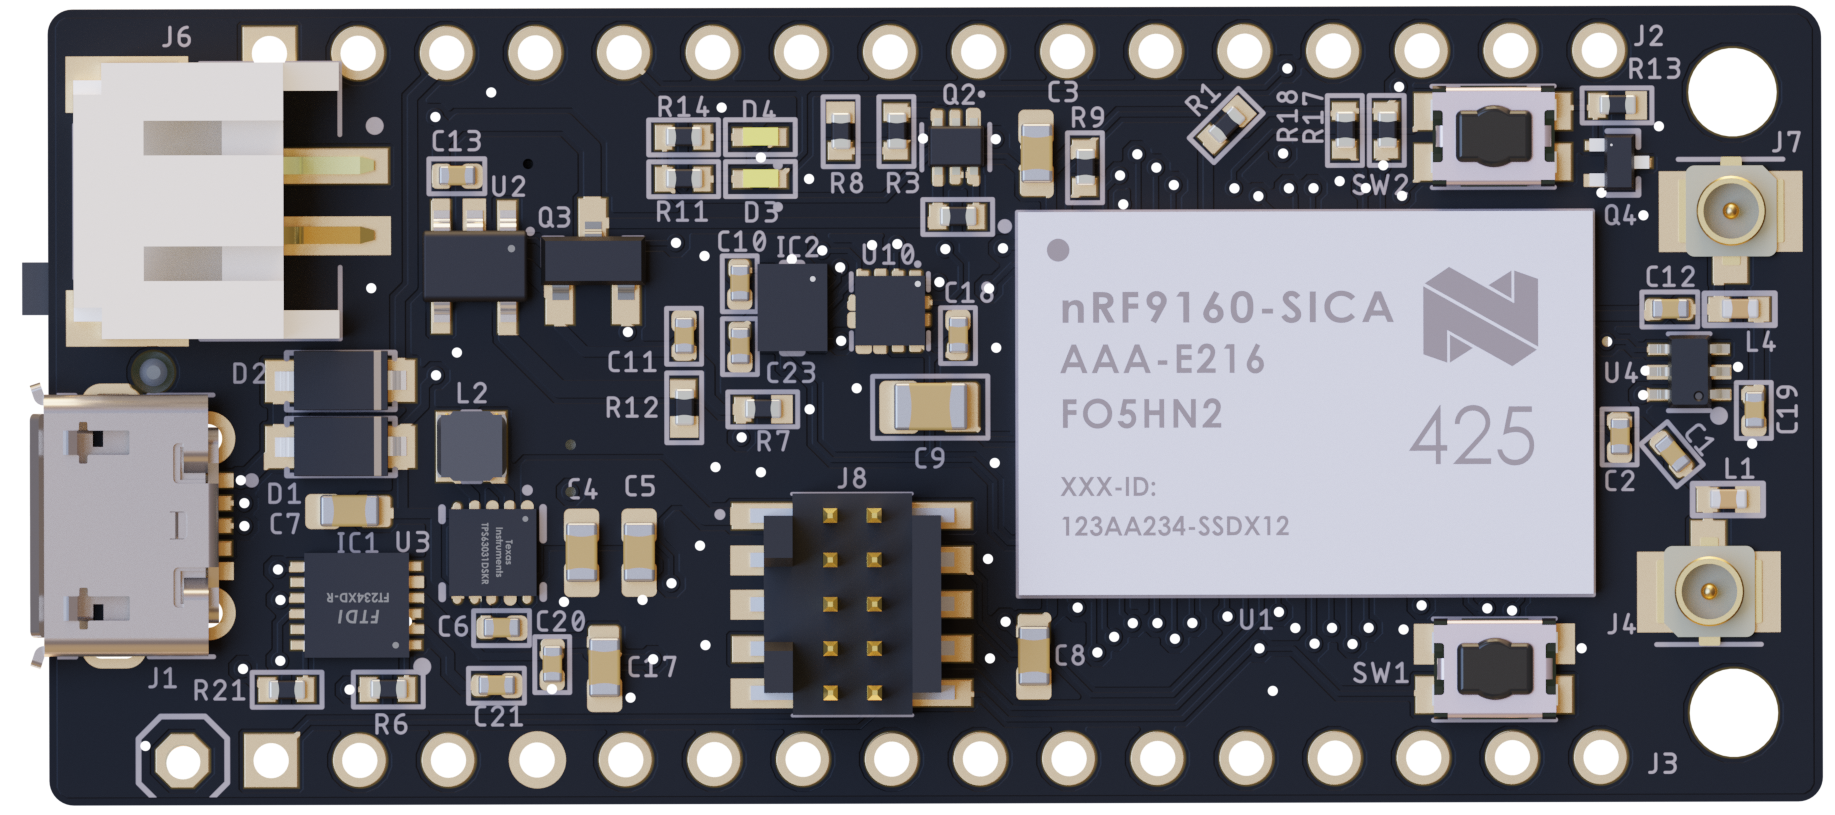
![Conexio Stratus Pro nRF9151 V1.0 top view.](https://3229153654-files.gitbook.io/~/files/v0/b/gitbook-x-prod.appspot.com/o/spaces%2F-MXjGw-Z8_tCuNQB93OW%2Fuploads%2FpZqQYqRJDu780IMcWRkK%2Fstratus%20pro%20transparency%203.png?alt=media\&token=7dca7945-db65-4425-96e0-db8ba6b82a43)

![Conexio Stratus Pro nRF9151 V1.0 bottom view.](https://3229153654-files.gitbook.io/~/files/v0/b/gitbook-x-prod.appspot.com/o/spaces%2F-MXjGw-Z8_tCuNQB93OW%2Fuploads%2FBmdL3xHvfunXJa6MCrjf%2Fstratus%20pro%20transparency%202.png?alt=media\&token=e79d0bf3-f205-49ad-a664-06bb2d73d584)

## Hardware Version V1.4 2026

## Technical specifications and features

Most of the specifications outlined below are based on Nordic's [<mark style="color:red;">nRF9151 Product Specification</mark>](https://www.nordicsemi.com/Products/nRF9151).

**MCU**: Latest Gen Nordic nRF9151 SiP

* ARM Cortex-M33 with 1MB Flash
* 256kB RAM
* ARM® TrustZone®
* ARM® Cryptocell 310
* Up to 4x SPI, I2C, and UART with Easy DMA
* I2S w/ EasyDMA
* 4x PWM with EasyDMA
* 12bit SADC with EasyDMA
* 2x RTC
* PPI (Programmable peripheral interconnect) interface

**Modem**

* Transceiver and baseband
* 3GPP LTE release 14 LTE-M/NB-IoT support
* DECT NR+ ready
* NTN ready
* GPS/GNSS receiver
* RF Transceiver for global coverage supporting bands:
* B1, B2, B3, B4, B5, B8, B12, B13, B17, B18, B19, B20, B25, B26, B28, B65 (new), B66, and B85 (new)
* Supports 4FF Nano SIM
* Pre-programmed MCUBoot bootloader

**nPM1300 Power Management IC**

* 800 mA battery charger
* Dual 200 mA buck DCDC regulator
* Battery fuel gauge controlled via I2C
* Battery charge status and protection
* Battery charging over USB-C

**Energy harvester IC**

* Onboard battery charger with solar energy harvester
* Continuous Charge Current Up to 1A
* Input supply voltage of 4.4-6V
* Supports battery types Li-ion, Li-Poly, and LiFePO4 chemistries
* Automatic charge current adjustment based on the output capability of the input power supply

**Board Operating Power Supply**

* Operating range 1.8 to 5.5V
* External LiPo battery connection (2 Pin JST type)
* Maximum output current: 800mA

**Stratus Output Voltages (Accessible via Headers)**

* 1.8V
* 3.3V
* 5V (VUSB)
* VBAT

**USB-TYPE-C**

* USB-to-Serial communication
* Device Firmware Update (DFU) over USB
* Application firmware programming and debugging over USB
* LiPo battery charging

**Debugger & Programmer**

* Supports J-Link and CMSIS-DAP-based programmers
* Onboard 10-pin 0.05" (1.27mm) SWD/JTAG pin connector

**User I/O**

* Feather compatible header
* 28 user-programmable GPIOs
* 2 x push buttons (1 x Reset, 1 x user-programmable)
* 1 x user-programmable LED
* 1 x RGB LED connected to nPM1300 PMIC (V1.4 Hardware only)

**Antenna connections**

* 1 x U.FL for LTE-M/NB-IoT
* 1 x U.FL for passive GPS antenna

**Onboard sensors**

* nPM1300 Battery fuel gauge
* The internal temperature sensor of nRF9151

**External Storage**

* 16 KBit I2C EEPROM memory (24CW160T)

**External Peripheral Interface**

* Stratus Pro board has a QWIIC connector to interface external shields, sensors, and much more.

**Power switch**

* SPDT slide switch for turning ON/OFF the power to the Stratus Pro board

**SIM Compatibility**

* 4FF Nano SIM card holder
* eSIM footprint to solder your own
* Software-based SIM support

**Prepaid Data (Not shipped with Bring Your SIM Version BYOS)**

* 500 MB of cellular data
* 250 SMS
* 10-year data validity
* Service available in 100+ countries (LTE + NB-IoT)

**Operating Voltage Selector**

* Hardware jumper for selecting between 1.8B and 3.3V operating voltage.

**Physical Size**

* 67.04 mm x 22 mm

### Hardware Revision Changes V1.4 (2026)

**Addition**

* nRF9151-LACA-A1A chipset
* 1 x RGB LED connected to nPM1300 PMIC
* Hardware jumper for voltage selection (1.8V/3.3V)

**Removed**

* LIS2DH sensor

**Bug**

* Fixed back power introduced by the CP2102N chipset when USB is connected

## Download the Full Datasheet

{% file src="/files/s0Wwqywvuc1L0RhMoVyr" %}
Stratus Pro Reference Manual
{% endfile %}


# Stratus Pro nRF9151 Pin Diagram

![Stratus Pro nRF9151 Pinouts](https://3229153654-files.gitbook.io/~/files/v0/b/gitbook-x-prod.appspot.com/o/spaces%2F-MXjGw-Z8_tCuNQB93OW%2Fuploads%2Fcsfn7JKOsG7UKq5jtWgg%2Fstratus_pro_nrf9151_pinouts_2025.jpg?alt=media\&token=18d8ca2d-6244-45bf-8fdb-85ad02092184)

### General Purpose I/Os (GPIOS)

The header pins provide access to 28 versatile General-Purpose I/Os (GPIOs), with 8 configurable as ADC inputs (A0–A7). These GPIOs operate at 1.8V, sourced from the nRF9151 **VDD\_GPIO** rail. For maximum flexibility, any GPIO can be assigned to digital peripherals, including SPI, UART, TWI, PDM, I2S, and PWM.

### Buttons

Stratus Pro nRF9151 Kit has two on-board push-buttons, one labeled as **MODE,** connected to the **`P0.31`** of nRF9151 SiP, the other is labeled with **RESET** and is connected to the **`nRESET`** of the nRF9151.

The following table describes the function of the buttons:

<table><thead><tr><th width="139.375">Button</th><th width="121.7578125">nRF9151 GPIO</th><th>Description</th></tr></thead><tbody><tr><td>MODE</td><td>P0.31</td><td>User-programmable push-button. Holding down MODE button while pressing and releasing RESET button puts the device into DFU mode. </td></tr><tr><td>RESET</td><td>nRESET</td><td>Resets the nRF9151 SiP. </td></tr></tbody></table>

### LED

Stratus Pro has one onboard user-programmable White LED labeled as **LED.** The LED is connected to **`P0.25`** of nRF9151 SiP.

<table><thead><tr><th width="137.19921875">LED</th><th width="126.25390625">nRF9151 GPIO</th><th>Description</th></tr></thead><tbody><tr><td>LED</td><td>P0.25</td><td>User-programmble LED. Asserting GPIO HIGH turns ON the LED while LOW turns it OFF. </td></tr></tbody></table>

### SIM and eSIM

Stratus Pro supports both nanoSIM and eSIM options. Out of the box, it includes a SIM socket compatible with a nano-sized SIM (4FF). Additionally, the board features an unpopulated eSIM (MFF2) footprint, allowing users to add a compatible eSIM IC if needed.

<figure><img src="https://3229153654-files.gitbook.io/~/files/v0/b/gitbook-x-prod.appspot.com/o/spaces%2F-MXjGw-Z8_tCuNQB93OW%2Fuploads%2FET7t27FvIfnoP1F5WZ8z%2Fstratus_pro_sim.jpg?alt=media&amp;token=c1ff7047-3c26-4b54-9f51-ed81689d0f02" alt=""><figcaption><p>Stratus Pro SIM Options</p></figcaption></figure>

{% hint style="warning" %}
Only one SIM can be active at a time. By default, the device uses a nanoSIM. If an eSIM is soldered onto the board, the nanoSIM socket must remain unused.
{% endhint %}

The following table describes the PIN connections of the eSIM footprint:

| eSIM PIN Number | Connection |
| :-------------: | :--------: |
|        1        |     GND    |
|        2        |     NC     |
|        3        |  SIM\_DIO  |
|        4        |     NC     |
|        5        |     NC     |
|        6        |  SIM\_CLK  |
|        7        |  SIM\_RST  |
|        8        |  SIM\_1V8  |

## Selectable nRF9151 Operating Voltage (Hardware v1.4 and Later)

Starting with **Stratus Pro Hardware Revision v1.4**, users can select the operating voltage supplied to the **nRF9151**, providing greater flexibility when interfacing with sensors and peripherals that require different logic levels.

Voltage selection is accomplished through a solder jumper, as shown in the image.

* **Default Configuration:** The nRF9151 VDD\_GPIO is connected to the **3.3V rail** generated by the nPM1300.
* **1.8V Operation:** To operate the nRF9151 at **1.8V**, remove the solder bridge from the **3.3V** jumper and create a solder bridge on the **1.8V** jumper.
* The **center pad** is connected directly to the **VDD\_GPIO** supply of the nRF9151, which powers the device's GPIO domain and determines the logic voltage level available to connected peripherals.

This feature enables seamless integration with both **1.8V and 3.3V sensor ecosystems**, eliminating the need for external level-shifting circuitry in many applications.

<figure><img src="https://3229153654-files.gitbook.io/~/files/v0/b/gitbook-x-prod.appspot.com/o/spaces%2F-MXjGw-Z8_tCuNQB93OW%2Fuploads%2FuKcIbglspA9Xz636eBHf%2FTop%20View.png?alt=media&amp;token=79827b9a-50fb-48e0-baad-614f0dfa537a" alt=""><figcaption></figcaption></figure>

### Debugging or Programming onto Stratus Pro Device&#x20;

* Connect the Stratus Pro kit to the debug out port on a 10-pin external debug probe, for example, nRF9160/nRF9161/nRF9151 DK, using a 10-pin JTAG/SWD cable.
* Make sure the direction of the SWD cable on the Stratus Pro kit is correct. Reversing this can damage the board due to reverse polarity.&#x20;
* For the nRF9151-LACA-A1A kits, take a note of the SWD connector and the notch as shown in the image below. The SWD cable should connect in the right direction.
* Connect the external debug probe to the PC using a USB cable.
* Ensure the Stratus Pro kit and the external debug probe are powered on.

<figure><img src="https://3229153654-files.gitbook.io/~/files/v0/b/gitbook-x-prod.appspot.com/o/spaces%2F-MXjGw-Z8_tCuNQB93OW%2Fuploads%2FXRqZ3jJ6HGylmBzk4Cb8%2FScreenshot%202026-05-30%20at%202.44.09%E2%80%AFPM.png?alt=media&amp;token=da15f530-e2f0-46a9-9426-0e182ea79b4a" alt=""><figcaption></figcaption></figure>

### Warnings&#x20;

* This product shall only be connected to an external USB power supply rated at 5V DC.&#x20;
* This product shall only be connected to a LiPo battery rated at 2.8-5.5V with a battery capacity of > 300mAh.&#x20;
* This product should be placed on a stable, flat, non-conductive surface in use and should not be contacted by conductive items.&#x20;
* The connection of unapproved devices to the GPIOs may affect compliance or result in damage to the unit and invalidate the warranty.

### Instructions for Safe Use&#x20;

To avoid malfunction or damage to the Stratus kit please observe the following:

* Do not expose it to water, or moisture, or place it on a conductive surface whilst in operation.&#x20;
* Do not expose it to heat from any source; the Conexio Stratus is designed for reliable operation between temperatures -20℃ to 85℃.&#x20;
* Take care whilst handling to avoid mechanical or electrical damage to the printed circuit board and connectors.&#x20;
* Avoid handling the Stratus PCB while it is powered. Only handled by the edges to minimize the risk of electrostatic discharge damage.

### **ESD Precautions**

The Conexio Stratus contains highly sensitive electronic circuitry and is an Electrostatic Sensitive Device (ESD). Handling a Conexio Stratus without proper ESD protection may destroy or damage it permanently. Proper ESD handling and packaging procedures must be applied throughout the processing, handling, and operation. ESD precautions should be implemented on the application board where the Conexio Stratus is mounted. Failure to observe these precautions can result in severe damage to the Conexio Stratus board!

### **Connectors**

Three connectors on the Stratus Pro nRF9151 will get damaged with improper usage. The JST connector on the circuit board, where you plug in the LiPo battery, is very durable but the connector on the battery itself is not. When unplugging the battery, take extra precautions to pull the connector using the wires, but instead hold the plug at its base to avoid putting stress on the wires. This can be tricky with bare hands - nose pliers are your friend here.

The USB-C connector on the Conexio Stratus Pro nRF9151 is soldered on the PCB with large surface pads as well as a couple of through-hole anchor points. Despite this reinforcement, it is very easy to rip out the connector if too much stress is put on in the vertical direction.

The U.FL antenna connectors are not designed to be constantly plugged and unplugged. The antenna pin is static sensitive and you can destroy the radio with improper handling. A tiny dab of glue (epoxy, rubber cement, liquid tape, or hot glue) on the connector can be used to securely hold the plug in place.

### **Breadboarding**

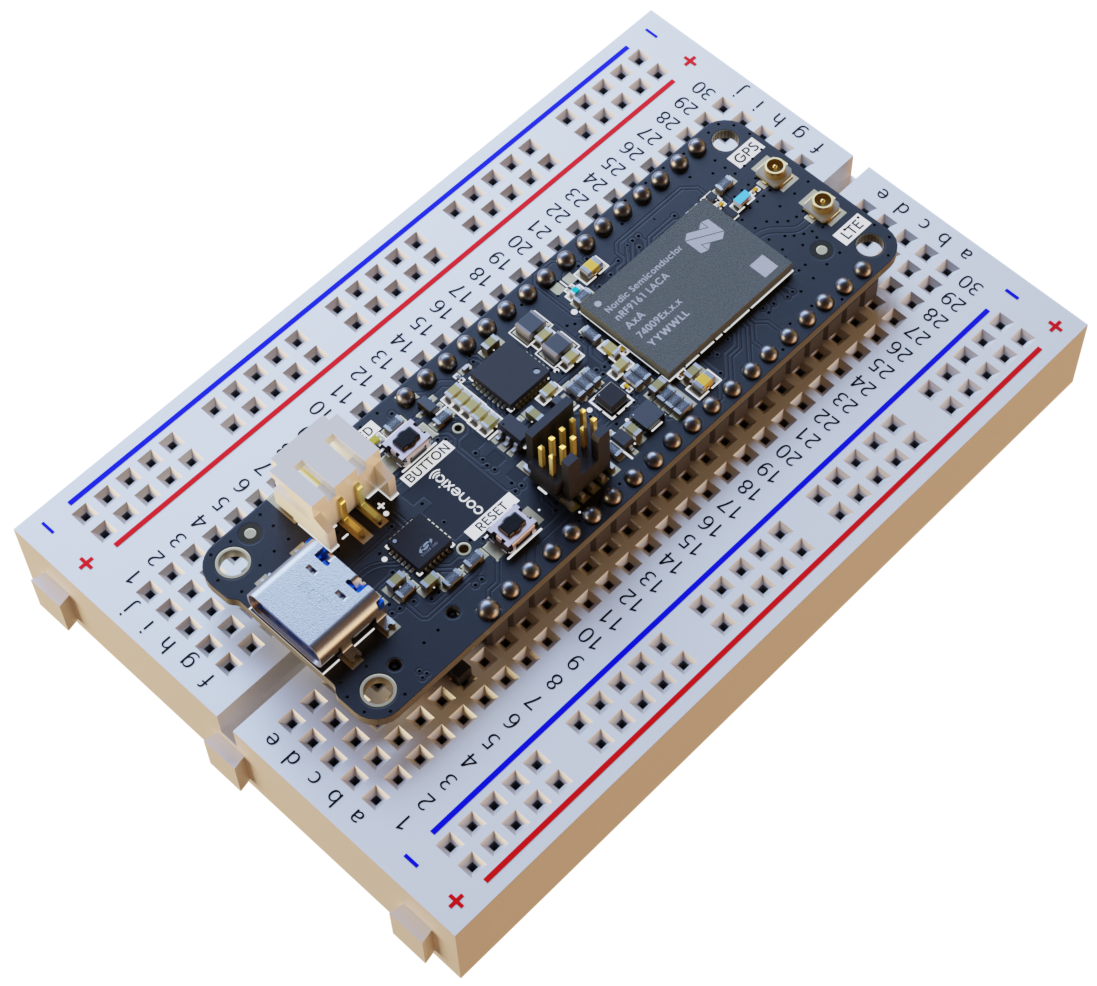
The Stratus Pro nRF9151 is specifically designed to require low insertion force when using a breadboard. This makes it easy to plug the Stratus in and out of the breadboard. Always remember to pinch-hold your precious Stratus by the sides (along with the header pins) when plugging-unplugging and not by the USB or the battery connector.

<figure><img src="https://3229153654-files.gitbook.io/~/files/v0/b/gitbook-x-prod.appspot.com/o/spaces%2F-MXjGw-Z8_tCuNQB93OW%2Fuploads%2Fd7eg6SFmmyKodoXvpVli%2FA.png?alt=media&amp;token=27a68679-73b8-4e80-9dd5-d1330e4f8f94" alt="" width="563"><figcaption></figcaption></figure>

### Battery Charger

The Stratus dev kit can charge a LiPo battery using the USB port or the solar cell connected to the **+PV** pin. The onboard n**PM1300 PMIC** manages the power from the USB port while CN3165 manages the input power from the solar cell.&#x20;

### Battery Voltage Monitoring

The Conexio Stratus Pro nRF9151 provides the user with the ability to monitor the battery voltage using the nPM1300 PMIC. Refer to the PMIC sample application on to how to enable this and read the respective battery and charging-related parameters.

### Stratus Pro nRF9151 GPS Antenna Configurations

{% hint style="warning" %}
Stratus Pro requires a PASSIVE external GPS/GNSS Antenna to work.
{% endhint %}

The GPS receiver on the Conexio Stratus dev kit is embedded into the modem of the nRF9151. To successfully get a GPS fix, and receive location data, a **passive external GPS antenna** must be connected to the u.fl connector labeled <mark style="color:red;">GPS</mark> on the board. A good reference is Molex LTE/GPS COMBO FLEXIBLE ANTENNA,&#x20;

1. [Digikey MPN: 2133530100](https://www.digikey.com/en/products/detail/molex/2133530100/11673870).&#x20;
2. Mouser Electronics MPN: 538-213353-0100

<figure><img src="https://3229153654-files.gitbook.io/~/files/v0/b/gitbook-x-prod.appspot.com/o/spaces%2F-MXjGw-Z8_tCuNQB93OW%2Fuploads%2F6TTO1759ex9GvNIrzcqc%2FMFG_2133530100.jpg?alt=media&amp;token=d2a3ae3b-10cd-4cf5-9acf-009214279bd3" alt=""><figcaption><p>Passive GPS Flex Antenna</p></figcaption></figure>

**Antenna Configurations in nRF SDK**

For proper operation and to activate the GPS antenna, configure the following in your `prj.conf` file before building your application. Refer to [<mark style="color:red;">nRF Connect SDK documentation</mark>](https://developer.nordicsemi.com/nRF_Connect_SDK/doc/1.7.1/nrf/samples/nrf9160/agps/README.html) on how to read GPS data.

Refer to the [GPS sample application](https://github.com/Conexiotechnologies/conexio-stratus-firmware/tree/main/samples/gps) to see all the required configurations for the Stratus device.&#x20;

```
# Configuration of the onboard GPS Antenna 
CONFIG_GPS_SAMPLE_ANTENNA_ONBOARD=y
# COEX0 is used to enable the GPS power supply. We need to enable it first.
CONFIG_GPS_SAMPLE_AT_COEX0="AT\%XCOEX0=1,1,1565,1586"
```

## Stratus Pro nRF9151 PCB

Stratus Pro nRF9151 schematic is the same as that of Stratus Pro nRF9161  with the following changes:

1. nRF9151 SiP instead of nRF9161
2. CN3165 Solar charger instead of TI BQ25185.

**Hardware Files Repo**

{% embed url="<https://github.com/Conexiotechnologies/conexio-stratus-board-schematics>" %}


# Stratus Pro nRF9161 Overview

nRF9161 + nPM1300

## Board Layout

![Conexio Stratus Pro nRF9161 V1.0 top view.](https://3229153654-files.gitbook.io/~/files/v0/b/gitbook-x-prod.appspot.com/o/spaces%2F-MXjGw-Z8_tCuNQB93OW%2Fuploads%2FOlCi7m34kY7p0vPJuLZI%2Ftop-view.png?alt=media\&token=d8635e8f-04ce-4864-9972-9e8f7aa6eb0b)

![Conexio Stratus Pro nRF9161 V1.0 bottom view.](https://3229153654-files.gitbook.io/~/files/v0/b/gitbook-x-prod.appspot.com/o/spaces%2F-MXjGw-Z8_tCuNQB93OW%2Fuploads%2FJbwt0zg5pXsKvvPQb0kJ%2FE%20copy.png?alt=media\&token=c5ee4523-df39-4638-a11d-e693f98f15f0)

## Technical specifications and features

Most of the specifications outlined below are based on Nordic's [<mark style="color:red;">nRF9161 Product Specification</mark>](https://www.nordicsemi.com/Products/nRF9161).

**MCU**: Latest Gen Nordic nRF9161 SiP

* ARM Cortex-M33 with 1MB Flash
* 256kB RAM
* ARM® TrustZone®
* ARM® Cryptocell 310
* Up to 4x SPI, I2C, and UART with Easy DMA
* I2S w/ EasyDMA
* 4x PWM with EasyDMA
* 12bit SADC with EasyDMA
* 2x RTC
* PPI (Programmable peripheral interconnect) interface

**Modem**

* Transceiver and baseband
* 3GPP LTE release 14 LTE-M/NB-IoT support
* DECT NR+ ready
* GPS/GNSS receiver
* RF Transceiver for global coverage supporting bands:
* B1, B2, B3, B4, B5, B8, B12, B13, B17, B18, B19, B20, B25, B26, B28, B65 (new), B66, and B85 (new)
* Supports 4FF Nano SIM
* Pre-programmed MCUBoot bootloader

**nPM1300 Power Management IC**

* 800 mA battery charger
* Dual 200 mA buck DCDC regulator
* Battery fuel gauge controlled via I2C
* Battery charge status and protection

**Energy harvester IC**

* BQ25185 battery charger with solar input from Texas Instruments
* Charge Vin: 3V to 18V
* Dynamic Power Management
* Supports battery types Li-ion, Li-Poly, and LiFePO4 chemistries
* Integrated full battery protection

**Board Operating Power Supply**

* Operating range 1.8 to 5.5V
* External LiPo battery connection (2 Pin JST type)
* Maximum output current: 800mA

**Stratus Output Voltages (Accessible via Headers)**

* 1.8V
* 3.3V
* 5V (VUSB)
* VBAT

**USB-TYPE-C**

* For USB-to-Serial, DFU, and application firmware programming and debugging plus LiPo battery charging

**Debugger & Programmer**

* Supports J-Link and CMSIS-DAP-based programmers
* Onboard 10-pin 0.05" (1.27mm) SWD/JTAG pin connector

**User I/O**

* Feather compatible header
* 28 user-programmable GPIOs
* 2 x push buttons (1 x Reset, 1 x user-programmable)
* 1 x user-programmable LED

**Antenna connections**

* 1 x U.FL for LTE-M/NB-IoT
* 1 x U.FL for passive GPS antenna

**Onboard sensors**

* STMicroelectronics LIS2DH MEMS digital output motion sensor: ultra-low-power high-performance 3-axis Femto accelerometer
* Battery fuel gauge
* Temperature sensor (enabled by nPM1300)

**External Storage**

* 16 KBit I2C EEPROM memory (24CW160T)

**External Peripheral Interface**

* Stratus Pro board has a QWIIC connector to interface external shields, sensors, and much more.

**Power switch**

* SPDT slide switch for turning ON/OFF the power to the Stratus Pro board

**SIM Compatibility**

* 4FF Nano SIM card holder
* eSIM footprint to solder your own
* Software-based SIM support

**Prepaid Data**

* 500 MB of cellular data
* 250 SMS
* 10-year data validity
* Service available in 100+ countries (LTE + NB-IoT)

**Physical Size**

* 66.04 mm x 25.40 mm

## Download the Full Datasheet

{% file src="/files/TFbjq6Lnqei75ZIo4Occ" %}
Stratus Pro Reference Manual
{% endfile %}

## What's included in the box

Congratulations on receiving your Conexio Stratus Pro kit. Your package includes:

**Hardware**

* 1 x Conexio Stratus Pro dev kit.
* 1 x 1NCE IoT SIM card&#x20;
* 1 x Safety instructions card

**Preloaded Firmware**

Out-of-the-box, Stratus Pro kit comes with pre-loaded firmware that periodically blinks the LED.&#x20;


# Stratus Pro nRF9161 Pin Diagram

![Stratus Pro nRF9161 Pinouts](https://3229153654-files.gitbook.io/~/files/v0/b/gitbook-x-prod.appspot.com/o/spaces%2F-MXjGw-Z8_tCuNQB93OW%2Fuploads%2FFP0tAXFZDAHhf15pr8rm%2Fstratus_pro_nrf9161_pinouts.jpg?alt=media\&token=cc316515-c039-4427-b579-ae35c9be5f89)

### Debugging or Programming onto Stratus Pro Device&#x20;

* Connect the Stratus Pro kit to the debug out port on a 10-pin external debug probe, for example, nRF9160/nRF9161/nRF9151 DK, using a 10-pin JTAG/SWD cable.

{% hint style="info" %}
If you use nRF91xx DK as the debug probe, ensure **VDD\_IO (SW11)** is set to 1.8 V.
{% endhint %}

* Connect the external debug probe to the PC using a USB cable.
* Ensure the Stratus Pro kit and the external debug probe are powered on.

### Warnings&#x20;

* This product shall only be connected to an external USB power supply rated at 5V DC.&#x20;
* This product shall only be connected to a LiPo battery rated at 2.8-5.5V with a battery capacity of > 300mAh.&#x20;
* This product should be placed on a stable, flat, non-conductive surface in use and should not be contacted by conductive items.&#x20;
* The connection of unapproved devices to the GPIOs may affect compliance or result in damage to the unit and invalidate the warranty.

### Instructions for Safe Use&#x20;

To avoid malfunction or damage to the Stratus kit please observe the following:

* Do not expose it to water, or moisture, or place it on a conductive surface whilst in operation.&#x20;
* Do not expose it to heat from any source; the Conexio Stratus is designed for reliable operation between temperatures -20℃ to 85℃.&#x20;
* Take care whilst handling to avoid mechanical or electrical damage to the printed circuit board and connectors.&#x20;
* Avoid handling the Stratus PCB while it is powered. Only handled by the edges to minimize the risk of electrostatic discharge damage.

### **ESD Precautions**

The Conexio Stratus contains highly sensitive electronic circuitry and is an Electrostatic Sensitive Device (ESD). Handling a Conexio Stratus without proper ESD protection may destroy or damage it permanently. Proper ESD handling and packaging procedures must be applied throughout the processing, handling, and operation. ESD precautions should be implemented on the application board where the Conexio Stratus is mounted. Failure to observe these precautions can result in severe damage to the Conexio Stratus board!

### **Connectors**

Three connectors on the Stratus Pro nRF9161 will get damaged with improper usage. The JST connector on the circuit board, where you plug in the LiPo battery, is very durable but the connector on the battery itself is not. When unplugging the battery, take extra precautions to pull the connector using the wires, but instead hold the plug at its base to avoid putting stress on the wires. This can be tricky with bare hands - nose pliers are your friend here.

The USB-C connector on the Conexio Stratus Pro is soldered on the PCB with large surface pads as well as a couple of through-hole anchor points. Despite this reinforcement, it is very easy to rip out the connector if too much stress is put on in the vertical direction.

The U.FL antenna connectors are not designed to be constantly plugged and unplugged. The antenna pin is static sensitive and you can destroy the radio with improper handling. A tiny dab of glue (epoxy, rubber cement, liquid tape, or hot glue) on the connector can be used to securely hold the plug in place.

### **Breadboarding**

The Stratus Pro nRF9161 is specifically designed to require low insertion force when using a breadboard. This makes it easy to plug the Stratus in and out of the breadboard. Always remember to pinch-hold your precious Stratus by the sides (along with the header pins) when plugging-unplugging and not by the USB or the battery connector.

<figure><img src="https://3229153654-files.gitbook.io/~/files/v0/b/gitbook-x-prod.appspot.com/o/spaces%2F-MXjGw-Z8_tCuNQB93OW%2Fuploads%2Fd7eg6SFmmyKodoXvpVli%2FA.png?alt=media&amp;token=27a68679-73b8-4e80-9dd5-d1330e4f8f94" alt="" width="563"><figcaption></figcaption></figure>

### Battery Charger

The Stratus dev kit can charge a LiPo battery using the USB port or the solar cell connected to the **+PV** pin. The onboard n**PM1300 PMIC** manages the power from the USB port while TI **BQ25185** manages the input power from the solar cell.&#x20;

### Battery Voltage Monitoring

The Conexio Stratus Pro provides the user with the ability to monitor the battery voltage using the nPM1300 PMIC. Refer to the PMIC sample application on to how to enable this and read the respective battery and charging-related parameters.

### Stratus Pro GPS Antenna Configurations

{% hint style="warning" %}
Stratus Pro requires a PASSIVE external GPS/GNSS Antenna to work.
{% endhint %}

The GPS receiver on the Conexio Stratus dev kit is embedded into the modem of the nRF9161. To successfully get a GPS fix, and receive location data, a **passive external GPS antenna** must be connected to the u.fl connector labeled <mark style="color:red;">GPS</mark> on the board. A good reference is Molex LTE/GPS COMBO FLEXIBLE ANTENNA, [Digikey MPN: 2133530100](https://www.digikey.com/en/products/detail/molex/2133530100/11673870).&#x20;

<figure><img src="https://3229153654-files.gitbook.io/~/files/v0/b/gitbook-x-prod.appspot.com/o/spaces%2F-MXjGw-Z8_tCuNQB93OW%2Fuploads%2F6TTO1759ex9GvNIrzcqc%2FMFG_2133530100.jpg?alt=media&amp;token=d2a3ae3b-10cd-4cf5-9acf-009214279bd3" alt=""><figcaption><p>Passive GPS Flex Antenna</p></figcaption></figure>

**Antenna Configurations in nRF SDK**

For proper operation and to activate the GPS antenna, configure the following in your `prj.conf` file before building your application. Refer to [<mark style="color:red;">nRF Connect SDK documentation</mark>](https://developer.nordicsemi.com/nRF_Connect_SDK/doc/1.7.1/nrf/samples/nrf9160/agps/README.html) on how to read GPS data.

Refer to the [GPS sample application](https://github.com/Conexiotechnologies/conexio-stratus-firmware/tree/main/samples/gps) to see all the required configurations for the Stratus device.&#x20;

```
# Configuration of the onboard GPS Antenna 
CONFIG_GPS_SAMPLE_ANTENNA_ONBOARD=y
# COEX0 is used to enable the GPS power supply. We need to enable it first.
CONFIG_GPS_SAMPLE_AT_COEX0="AT\%XCOEX0=1,1,1565,1586"
```

## Stratus Pro nRF9161 PCB

{% embed url="<https://github.com/Conexiotechnologies/conexio-stratus-board-schematics>" %}


# Stratus nRF9160 (Gen 1) Overview

nRF9160 + AEM10941

## Board Layout

![Conexio Stratus V1.0 top view.](https://3229153654-files.gitbook.io/~/files/v0/b/gitbook-legacy-files/o/assets%2F-MXjGw-Z8_tCuNQB93OW%2F-MfzSNfCkHLwn1R6N_Vu%2F-MfzSZ8jGuQ9ZC49vv2Y%2Ftop.png?alt=media\&token=dbabdb3e-1b8a-482f-90c2-163274870317)

![Conexio Stratus V1.0 bottom view.](https://3229153654-files.gitbook.io/~/files/v0/b/gitbook-x-prod.appspot.com/o/spaces%2F-MXjGw-Z8_tCuNQB93OW%2Fuploads%2FLbhi5syEOdf2zG5O7ZAi%2Fbottom.png?alt=media\&token=a046e6c5-685f-439c-9a18-f4d0e3b0234d)

## Technical specifications and features

Most of the specifications outlined below are based on Nordic's [<mark style="color:red;">nRF9160 Product Specification</mark>](https://infocenter.nordicsemi.com/pdf/nRF9160_PS_v1.2.pdf).

**MCU**: Nordic nRF9160 Microcontroller with ARM Cortex M33

* 1MB Flash
* 256kB RAM
* ARM® TrustZone®
* ARM® Cryptocell 310
* Up to 4x SPI, I2C, and UART with Easy DMA
* I2S w/ EasyDMA
* 4x PWM with EasyDMA
* 12bit SADC with EasyDMA
* 2x RTC
* PPI (Programmable peripheral interconnect) interface
* **Modem**
  * Transceiver and baseband
  * 3GPP LTE release 13 Category M1 and NB1 compliant
  * 3GPP release 14 NB2 compliant
  * GPS receiver (GPS L1 C/A supported) - Active antenna only.
  * RF Transceiver for global coverage supporting bands:
    * Cat-M1: B1, B2, B3, B4, B5, B8, B12, B13, B14, B17, B18, B19, B20, B25, B26, B28, B66
    * Cat-NB1/NB2: B1, B2, B3, B4, B5, B8, B12, B13, B17, B18, B20, B25, B26, B28, B66
  * Supports 4FF Nano SIM
* Pre-programmed MCUBoot bootloader

**USB-C**

* For USB-to-Serial, DFU, and application firmware programming and debugging plus LiPo battery charging

**Energy harvester IC**

* AEM10941 solar energy harvester from E-peas Semiconductors
* Vin: 50 mV to 5 V
* Cold start: 3 μW @ 380 mV
* Power input: 3 μW to 550 mW
* Maximum power point tracking (MPPT)&#x20;
* Supports battery types Li-ion and NiMH
* Max solar panels: up to 7 solar cells simultaneously

**Board power supply**

* 3.3V Buck/Boost up to 0.9A of current draw
* Operating range 2.8 to 5.5V
* External LiPo battery connection (2 Pin JST type)
* Charge rate set to 300mA with RED LED indication
* Maximum output current: 800mA

**Debugger & Programmer**

* Supports J-Link and CMSIS-DAP-based programmers
* 10-pin 0.05" (1.27mm) pin connector

**User I/O**

* 32 Standard GPIOs (0.1" pitch)
* 26 user-programmable GPIOs
* 2 x push buttons (1 Reset, 1 General Purpose connected to P0.12)
* 1 x user-programmable Green LED connected to D7 (P0.03)

**Antenna connections**

* 1 x U.FL for LTE-M/NB-IoT with matching network
* 1 x U.FL for active GPS antenna

**Onboard sensors**

* Latest SHT4x temperature and humidity sensor from Sensirion
* ST Microelectronics LIS2DH MEMS digital output motion sensor: ultra-low-power high-performance 3-axis Femto accelerometer

**Power switch**

* SPDT slide switch for turning ON/OFF the power to the Stratus board

**Physical**

* 50.8mm x 22.86mm (2.0" x 0.9")
* Weight: \~5 grams.

## Stratus Shield

For expansion and interfacing various sensors and hardware peripherals, Conexio Stratus also comes with a shield (which can be purchased separately).&#x20;

Forget about breadboard and soldering iron, working with a Straus shield requires no soldering and minimal wiring. Just plug the sensors, actuators, or displays into this shield via the standard cables, allowing you to focus on coding and application creation. Isn't that cool!

The shield supports:

* 1 x mikro BUS: add-on board standard from [<mark style="color:red;">Mikroe</mark>](https://www.mikroe.com/click/sensors), allowing to connect over 800+ click boards.
* 2 x Sparkfun Qwiic connector: [<mark style="color:red;">SparkFun's Qwiic</mark>](https://www.sparkfun.com/qwiic#products) Connect System, allows connecting over 100+ Qwiic products.
* 1 x Grove I2C connector: Grove is a modular, standardized connector prototyping system by [<mark style="color:red;">Seeedstudio</mark>](https://www.seeedstudio.com/category/Grove-c-1003.html).
* 1 x 2 Pin JST connector for plugging the solar panel input.

![Stratus Shield without Main board.](https://3229153654-files.gitbook.io/~/files/v0/b/gitbook-legacy-files/o/assets%2F-MXjGw-Z8_tCuNQB93OW%2F-MfzV6VwA6qEK50HYJ62%2F-MfzVkNRzyVg50NVxb2I%2FH.png?alt=media\&token=4c18df4b-490e-4189-82b8-aa373e8318b7)

![ Shield with Conexio Stratus plugged-in.](https://3229153654-files.gitbook.io/~/files/v0/b/gitbook-legacy-files/o/assets%2F-MXjGw-Z8_tCuNQB93OW%2F-MfzV6VwA6qEK50HYJ62%2F-MfzVz5bq7-0goHt03ZR%2FG.png?alt=media\&token=563ccc1f-b17f-46bb-8858-6258b8417f76)

## What's included in the box

Congratulations on receiving your Conexio Stratus kit. Your package includes:

**Hardware**

* 1 x Conexio Stratus dev kit.
* 1 x 1NCE IoT Sim card&#x20;
* 1 x Getting started instructions card

**Preloaded Firmware**

Out-of-the-box, Stratus kit comes with the pre-loaded firmware that periodically samples all the onboard sensors (temperature, humidity, accelerometer, and battery) and blinks the LEDs.&#x20;

To view the serial logs, start your favorite serial terminal such as putty or CoolTerm, set the baud rate to 115200 and you should see the following output:

```
SPM: NS image at 0x20200
SPM: NS MSP at 0x20015a40
SPM: NS reset vector at 0x22d75
SPM: prepare to jump to Non-Secure image.
*** Booting Zephyr OS build v2.6.99-ncs1  ***
Hello from conexio_stratus
x: 0.229824, y: 0.344736, z: 9.690912
temp: 25.197604, humidity: 30.781860
Battery level: 4.384 V, 10000 pptt
x: 0.114912, y: 0.383040, z: 9.729216
temp: 25.242999, humidity: 30.596847
Battery level: 4.514 V, 10000 pptt
x: 0.076608, y: 0.459648, z: 9.614304
temp: 25.253681, humidity: 30.348892
Battery level: 4.470 V, 10000 pptt
```


# Stratus nRF9160 Pin Diagram

![Stratus nRF9160 Pinouts](https://3229153654-files.gitbook.io/~/files/v0/b/gitbook-x-prod.appspot.com/o/spaces%2F-MXjGw-Z8_tCuNQB93OW%2Fuploads%2Ffdhrha3DAV6g8Ap0Lrv2%2Fconexio-stratus-pinouts.png?alt=media\&token=29e32db0-e751-4144-b7d8-c22bc7794ba8)

## Supported Features

![](https://3229153654-files.gitbook.io/~/files/v0/b/gitbook-x-prod.appspot.com/o/spaces%2F-MXjGw-Z8_tCuNQB93OW%2Fuploads%2F6JzrKjc1567HX3Mfy4Q5%2Fstratus_features.png?alt=media\&token=6b718f94-5877-46c0-816b-30a7ef93a97f)

## Recommended Operating Conditions

<table><thead><tr><th>Parameter</th><th>MIN</th><th>TYP</th><th>MAX</th><th data-hidden></th></tr></thead><tbody><tr><td>Operating Temperature</td><td>-20 °C</td><td>25 °C</td><td>85 °C</td><td></td></tr><tr><td>Battery Voltage</td><td>3.2 V</td><td>3.7 V</td><td>4.2 V</td><td></td></tr><tr><td>USB Input</td><td>3.0 V</td><td>5.0 V</td><td>5.25 V</td><td></td></tr></tbody></table>

### Warnings&#x20;

* This product shall only be connected to an external USB power supply rated at 5V DC and a maximum current of 500-700mA.&#x20;
* This product shall only be connected to a LiPo battery rated at 2.8-5.5V with a battery capacity of > 300mAh.&#x20;
* This product should be placed on a stable, flat, non-conductive surface in use and should not be contacted by conductive items.&#x20;
* The connection of unapproved devices to the GPIOs may affect compliance or result in damage to the unit and invalidate the warranty.

### Instructions for Safe Use&#x20;

To avoid malfunction or damage to the Stratus kit please observe the following:

* Do not expose it to water, or moisture, or place it on a conductive surface whilst in operation.&#x20;
* Do not expose it to heat from any source; the Conexio Stratus is designed for reliable operation between temperatures -20℃ to 85℃.&#x20;
* Take care whilst handling to avoid mechanical or electrical damage to the printed circuit board and connectors.&#x20;
* Avoid handling the Stratus PCB while it is powered. Only handled by the edges to minimize the risk of electrostatic discharge damage.

### **ESD Precautions**

The Conexio Stratus contains highly sensitive electronic circuitry and is an Electrostatic Sensitive Device (ESD). Handling a Conexio Stratus without proper ESD protection may destroy or damage it permanently. Proper ESD handling and packaging procedures must be applied throughout the processing, handling, and operation. ESD precautions should be implemented on the application board where the Conexio Stratus is mounted. Failure to observe these precautions can result in severe damage to the Conexio Stratus board!

### **Connectors**

Three connectors on the Conexio Stratus will get damaged with improper usage. The JST connector on the circuit board, where you plug in the LiPo battery, is very durable but the connector on the battery itself is not. When unplugging the battery, take extra precautions to pull the connector using the wires, but instead hold the plug at its base to avoid putting stress on the wires. This can be tricky with bare hands - nose pliers are your friend here.

The USB-C connector on the Conexio Stratus is soldered on the PCB with large surface pads as well as a couple of through-hole anchor points. Despite this reinforcement, it is very easy to rip out the connector if too much stress is put on in the vertical direction.

The U.FL antenna connectors are not designed to be constantly plugged and unplugged. The antenna pin is static sensitive and you can destroy the radio with improper handling. A tiny dab of glue (epoxy, rubber cement, liquid tape, or hot glue) on the connector can be used to securely hold the plug in place.

### **Breadboarding**

The Conexio Stratus is specifically designed to require low insertion force when using a breadboard. This makes it easy to plug the Stratus in and out of the breadboard. Always remember to pinch-hold your precious Stratus by the sides (along with the header pins) when plugging-unplugging and not by the USB or the battery connector.

### Battery Charger

The Stratus dev kit can charge a LiPo battery using the USB port or the solar cell connected to the **SOLAR** pin. The onboard **MCP73831** USB charger manages the power from the USB port while E-peas **AEM10941** manages the input power from the solar cell.&#x20;

### Charging LED Indicator

When the battery is charged via the USB port only, it is indicated by a **yellow** LED on the Stratus board. This LED does not turn on when charged via the solar cell to save power.

### Battery Voltage Monitoring

The Conexio Stratus provides the user with the ability to monitor the battery voltage through one of the nRF9160's ADC pins. The battery voltage is measured through a voltage divider circuit which can be seen in the schematic below. This circuit connects **VBAT** to the **AIN7** pin of the nRF9160 (`P0.20`).

Refer to the [<mark style="color:red;">battery voltage measurement</mark>](https://github.com/Conexiotechnologies/conexio-stratus-firmware/tree/main/samples/battery) sample application for more information on how to use the ADC as well as the conversion for the voltage divider on the Stratus device.

### Stratus GPS Antenna Configurations

The GPS receiver on the Conexio Stratus dev kit is embedded into the modem of the nRF9160. To successfully get a GPS fix, and receive location data, an **active external GPS antenna** must be connected to the u.fl connector labeled <mark style="color:red;">GPS</mark> on the board.

<figure><img src="https://3229153654-files.gitbook.io/~/files/v0/b/gitbook-x-prod.appspot.com/o/spaces%2F-MXjGw-Z8_tCuNQB93OW%2Fuploads%2Fc6H2yfRG1H897IGldbML%2F1636454803235.jpeg?alt=media&amp;token=dda088ef-2236-40fc-b95f-70b2b0aad467" alt=""><figcaption><p>Active GPS Patch Antenna</p></figcaption></figure>

**Antenna Configurations for SDK v1.7.0**

For proper operation and to activate the GPS antenna, configure the following in your `prj.conf` file before building your application for SDK **v1.7.0**. Refer to [<mark style="color:red;">nRF Connect SDK documentation</mark>](https://developer.nordicsemi.com/nRF_Connect_SDK/doc/1.7.1/nrf/samples/nrf9160/agps/README.html) on how to read GPS data.

Refer to the [GPS sample application](https://github.com/Conexiotechnologies/conexio-stratus-firmware/tree/main/samples/gps) to see all the required configurations for the Stratus device.&#x20;

```
# Configuration of the onboard GPS Antenna 
CONFIG_GPS_SAMPLE_ANTENNA_ONBOARD=y
# COEX0 is used to enable the GPS power supply. We need to enable it first.
CONFIG_GPS_SAMPLE_AT_COEX0="AT\%XCOEX0=1,1,1565,1586"
```

**Antenna Configurations for SDK v2.5.x**

Refer to the [GNSS sample application](https://github.com/Conexiotechnologies/conexio-stratus-firmware/tree/v2.1.1/samples/gnss) to see all the required configurations.&#x20;

```
#Enable modem GPS mode
CONFIG_LTE_NETWORK_MODE_LTE_M_NBIOT_GPS=y
# Stratus DK GPS configurations
CONFIG_MODEM_ANTENNA=y
# Enable onboard GPS antenna
CONFIG_MODEM_ANTENNA_GNSS_ONBOARD=y
CONFIG_MODEM_ANTENNA_AT_MAGPIO="AT\%XMAGPIO=1,0,0,1,1,1574,1577"
# Stratus GPS external antenna configuration with LNA enabled
CONFIG_MODEM_ANTENNA_AT_COEX0="AT\%XCOEX0=1,1,1565,1586"
```

{% hint style="info" %}
Note: GPS antenna configurations are slightly different depending on the nRF Connect SDK that you choose above.&#x20;
{% endhint %}

## Stratus PCB

The PCB is the heart of nRF9160 Stratus. It is a 4 layer board with components placed on both sides of the PCB.

<figure><img src="https://3229153654-files.gitbook.io/~/files/v0/b/gitbook-x-prod.appspot.com/o/spaces%2F-MXjGw-Z8_tCuNQB93OW%2Fuploads%2FPfR4vHfpNmpAj7N1pfQf%2FPCB.png?alt=media&amp;token=17decc26-5469-41eb-8cf3-0dbba7a1a746" alt=""><figcaption></figcaption></figure>

## Schematic

![Sheet 1](https://3229153654-files.gitbook.io/~/files/v0/b/gitbook-x-prod.appspot.com/o/spaces%2F-MXjGw-Z8_tCuNQB93OW%2Fuploads%2FHVj7k4VPrYW53RzRBI6v%2Fpage_1.png?alt=media\&token=81f109fc-4f1d-4c27-83c1-12b10ab2e1c0)

![Sheet 2](https://3229153654-files.gitbook.io/~/files/v0/b/gitbook-x-prod.appspot.com/o/spaces%2F-MXjGw-Z8_tCuNQB93OW%2Fuploads%2FwO0RSrlIzr7joBr5Z4ff%2Fpage_2.png?alt=media\&token=ae02b1d0-cb98-41f2-8a80-b0ec572131c8)

![Sheet 3](https://3229153654-files.gitbook.io/~/files/v0/b/gitbook-x-prod.appspot.com/o/spaces%2F-MXjGw-Z8_tCuNQB93OW%2Fuploads%2FQmH0fkZBmjyBmnJq9yPq%2Fpage_3.png?alt=media\&token=fc0ae785-8b17-4de6-8fb7-000668b37b2c)

## Stratus nRF9160 PCB Repo

{% embed url="<https://github.com/Conexiotechnologies/conexio-stratus-board-schematics>" %}


# Build Environment and Tools Setup

This section describes the steps to setup the build environment for compiling and flashing the Conexio Stratus device firmware.

### Minimum Requirements

Make sure you have all the required hardware and that your computer has one of the supported operating systems.

### Hardware

* Conexio Stratus Pro kit
* USB-C cable
* Computer (macOS, Ubuntu Linux, or MS Windows)

### Software

* nRF Connect for VS Code or nRF Connect for Desktop (follow next steps for full installation)


# Installing nRF Connect SDK (NCS) v3.2.1

![](https://3229153654-files.gitbook.io/~/files/v0/b/gitbook-x-prod.appspot.com/o/spaces%2F-MXjGw-Z8_tCuNQB93OW%2Fuploads%2FeiyF6cwEKDmbR4YoLC34%2Fnrfconnect.png?alt=media\&token=6c316a78-5d9d-46a6-8dce-a279ed7b5219)

The Conexio devices currently only support [<mark style="color:red;">ZephyrRTOS</mark>](https://www.zephyrproject.org/). To access all the features and capabilities, Nordic Semiconductor has developed the [<mark style="color:red;">nRF Connect SDK</mark>](https://developer.nordicsemi.com/nRF_Connect_SDK/doc/latest/nrf/introduction.html) (NCS) which enables you to develop applications for nRF91 Series devices that power Conexio cellular devices.

{% hint style="info" %}
To support all the latest power and cellular features of the nRF91xx series SiP, Conexio Stratus device sample applications will only support nRF Connect SDK v3.2.1 or newer.
{% endhint %}

To make nRF Connect SDK installation a breeze, follow the following steps.

1. Download and install [Visual Studio Code](https://code.visualstudio.com/).
2. Next Download and install Nordic's [nRF Connect for VS Code](https://www.nordicsemi.com/Products/Development-tools/nRF-Connect-for-VS-Code) plugin.
3. Once installed successfully, you should see the nRF Connect for VS Code icon on the left side bar  of the VS Code.
4. Click Manage SDKs to install the nRF Connect SDK.<br>

   <figure><img src="https://3229153654-files.gitbook.io/~/files/v0/b/gitbook-x-prod.appspot.com/o/spaces%2F-MXjGw-Z8_tCuNQB93OW%2Fuploads%2FcUhJlpzN9OGHsrPHRUUP%2Finstall%20ncs.png?alt=media&amp;token=bc1329c9-0b09-49c2-a77d-937eebf8d9d0" alt=""><figcaption></figcaption></figure>
5. Click **Install SDK** and Select **nRF Connect SDK v3.2.1**. Depending on your internet speed, it may take a few tens of minutes for the installation to complete, so go and grab yourself a cup of coffee **☕**

**References**

1. [nRF Connect SDK](https://developer.nordicsemi.com/nRF_Connect_SDK/doc/latest/nrf/gs_assistant.html#gs-app-tcm) installation documentation by the Nordic Semiconductor.


# newtmgr Setup

<figure><img src="https://3229153654-files.gitbook.io/~/files/v0/b/gitbook-x-prod.appspot.com/o/spaces%2F-MXjGw-Z8_tCuNQB93OW%2Fuploads%2F1E1LmitlmbxnP4OYzkid%2FApache_Mynewt_Logo.svg.png?alt=media&amp;token=df2e05b1-63f6-4d44-b2cd-89f074339c07" alt=""><figcaption></figcaption></figure>

## Flashing the Firmware through USB

You will be required to flash a new firmware to your Conexio Stratus device in one of the following cases:

* Developing and testing the application firmware (e.g. adding features to the application firmware or bug fixes)
* Updating the nRF91 modem firmware (e.g. updating the main modem core firmware)
* Updating the device bootloader firmware.

To do so successfully, follow these steps.

## 1. Installing SiLab USB VCP Drivers

To recognize the Conexio Stratus COM port properly by your machine, first, download and install the respective driver software for your machine from [<mark style="color:red;">usb-to-uart-bridge-vcp-drivers</mark>](https://www.silabs.com/developers/usb-to-uart-bridge-vcp-drivers).

## 2. newtmgr

`newtmgr` is an image management tool that can be used to interact with the bootloader and images on the device. `newtmgr` will be used to load the application firmware via the USB serial interface to the Stratus device. For full details on the newtmgr tool and the entire command set, see the [<mark style="color:red;">official newtmgr documentation</mark>](https://mynewt.apache.org/latest/newtmgr/index.html).

{% hint style="info" %}
newtmgr will be used to load the application firmware via the USB serial interface to the Stratus device.
{% endhint %}

### 2.1 Installing newtmgr

For details on installing the newtmgr tool on your operating system of choice see:

* [<mark style="color:red;">macOS installation</mark>](https://mynewt.apache.org/latest/newt/install/newt_mac.html).
* [<mark style="color:red;">Linux installation</mark>](https://mynewt.apache.org/latest/newt/install/newt_linux.html).
* [<mark style="color:red;">Windows installation</mark>](https://mynewt.apache.org/latest/newt/install/newt_windows.html).

If the above macOS installation does not work, follow these simple steps to get the newtmgr up and running.

### For macOS Apple Silicon (ARM/M-series Mac)

Build from source with Go (recommended)

```
# Install Go if you don't have it
brew install go

# Install newtmgr via go install
go install mynewt.apache.org/newtmgr/newtmgr@latest
```

Then add Go's bin directory to your PATH if it isn't already:

If you're running bash (nRF Connect for VS Code uses bash)

Add the path to \~/.bash\_profile instead:

```
echo 'export PATH=$PATH:$HOME/go/bin' >> ~/.bash_profile
source ~/.bash_profile
```

Then test:

```
newtmgr version
```

If you're using \~/.zprofile instead of \~/.zshrc

```
echo 'export PATH=$PATH:$HOME/go/bin' >> ~/.zprofile
source ~/.zprofile
```

Great, you're all set. Now you can use newtmgr to upload firmware to your device.

### For macOS x86\_64 only

#### **Option 1:**

```
% brew install newtmgr
```

To install `juullabs-oss/mynewt/mynewt-newtmgr`, run:

```
brew install juullabs-oss/mynewt/mynewt-newtmgr
```

Then check by executing:

```
which newtmgr
```

which should return:

```
/usr/local/bin/newtmgr
```

#### **Option 2:**

{% file src="/files/Bw4tiYPw83UQT6AafatR" %}

Download the above-zipped folder, extract, and place the newtmgr executable inside the directory: **/usr/local/bin/.**

&#x20;**/usr/local/bin/** is normally hidden. To view, it go to **MAC OS HDD** and inside here press command+shift+. to view the hidden **usr** folder.

Then navigate to usr/local/bin. After doing the above steps, in the terminal when you will issue the command: **which newtmgr** should display: **/usr/local/bin/newtmgr.**

### 2.2 Connection Profiles

The `newtmgr` tool works with connection profiles, such as serial, depending on how you wish to communicate with the device under test.

Before you can use `newtmgr` to program your Conexio Stratus kit, you will need to set up at least one connection profile, as described below, making it easier to update your device whenever needed. Open a terminal window and enter the following command:

{% tabs %}
{% tab title="Windows" %}
newtmgr conn add serial type=serial connstring="dev=COM5,baud=115200"
{% endtab %}

{% tab title="macOS/Linux" %}

```shell
newtmgr conn add serial type=serial connstring='dev=/dev/tty.SLAB_USBtoUART,baud=115200' 
```

{% endtab %}
{% endtabs %}

{% hint style="info" %}
Make sure that the COM port on Windows matches the one attached to the Stratus DK.
{% endhint %}

```bash
newtmgr conn show
Connection profiles:
  serial: type=serial, connstring='dev=/dev/tty.SLAB_USBtoUART,baud=115200'
```


# Building and Programming an Application

Follow the next few steps to successfully build and program applications for Conexio devices.


# Fetch Conexio Firmware SDK and Board Definition Files

<figure><img src="https://3229153654-files.gitbook.io/~/files/v0/b/gitbook-x-prod.appspot.com/o/spaces%2F-MXjGw-Z8_tCuNQB93OW%2Fuploads%2FHdpnn5qPY9B17rj9fKk1%2FScreenshot%202026-05-30%20at%201.59.55%E2%80%AFPM.png?alt=media&amp;token=bfdf95ee-b2aa-403a-822d-97d2445dbd5d" alt=""><figcaption></figcaption></figure>

All the sample applications for the Stratus board can be found in the [<mark style="color:red;">conexio-firmware-sdk</mark>](https://github.com/Conexiotechnologies/conexio-firmware-sdk) repository on GitHub. With the introduction of the Hardware Model v2 HWMv2 from NCS v2.7.x, a redesign of the way the Stratus board definition files and sample applications are fetched has been made. The [<mark style="color:red;">conexio-firmware-sdk</mark>](https://github.com/Conexiotechnologies/conexio-firmware-sdk) repository now contains both the example applications as well as the HWMv2 board definition files for all the Stratus devices.

It is a 3 step process:

1. Download or clone the Conexio SDK repository.
2. Place it at `ncs/v3.2.1/conexio-firmware-sdk/`
3. Apply the MCUBoot patch (see Applying the MCUBoot Patch below)

## 1: Fetching **Sample Applications for nRF Connect SDK**

1. Check out or clone the [main Git repo branch](https://github.com/Conexiotechnologies/conexio-firmware-sdk) for the sample applications supported by the nRF SDK v3.2.1.
2. Download the files, extract them, and place the extracted folder into:

`/nordic/ncs/v3.2.1`

Your nRF Connect SDK v3.2.1 folder structure should now look like this:

```
v3.2.1/
├─ bootloader/
├─ conexio-firmware-sdk/ <---------- downloaded SDK files directory
├─ mbedtls/
├─ modules/
├─ nrf/
├─ nrfxlib/
├─ test/
├─ toolchain/
├─ tools/
├─ zephyr/
```

## 2. Conexio Stratus Board Definition Files

Inside the `/conexio-firmware-sdk`you will find the custom board root directory for Conexio devices. These are the new Hardware Model v2 (HWMv2) for Conexio Stratus Pro nRF9161, nRF9151, and Stratus nRF9160, a redesign of the way Zephyr models boards and SOCs.

```
v3.2.1/
├─ conexio-firmware-sdk/
    ├─ boards/
        ├─ conexio/
            ├─ stratus_pro <---- Stratus Pro nRF9151 & nRF9161 MultiSoC board files
```

#### 2.1: Applying the MCUBoot Patch

{% hint style="danger" %}
Stratus Pro nRF9151 and nRF9161 use MCUBOOT as the main bootloader to properly execute and bootup applications. So make sure not to miss or ignore this step.
{% endhint %}

Conexio Stratus Pro requires two MCUBoot board configuration files to be present in the NCS tree at:

```
ncs/<version>/bootloader/mcuboot/boot/zephyr/boards/
  conexio_stratus_pro_nrf9151.conf
  conexio_stratus_pro_nrf9161.conf
```

These files are stored inside this SDK at `bootloader/mcuboot/` and need to be copied into the NCS tree once per installation. There are two ways to do this:

#### Method 1: Using the Patching Script (quickest/recommended)&#x20;

Execute the following to run the script:

```
bash conexio-firmware-sdk/scripts/patch_mcuboot.sh
```

or if you are in the `/opt/nordic/ncs/v3.2.1/conexio-firmware-sdk/scripts`

```
./patch_mcuboot.sh
```

Once the script executes successfully, you should see the following:

```
Conexio Stratus Pro MCUBoot patch
==================================
NCS root : /opt/nordic/ncs/v3.2.1
Source   : /opt/nordic/ncs/v3.2.1/conexio-firmware-sdk/bootloader/mcuboot
Dest     : /opt/nordic/ncs/v3.2.1/bootloader/mcuboot/boot/zephyr/boards

  [copy]   conexio_stratus_pro_nrf9151.conf
  [copy]   conexio_stratus_pro_nrf9161.conf
  [delete] conexio_stratus_pro.conf  (outdated — replaced by nrf9151/nrf9161 variants)

Conexio Stratus Pro MCUBoot patch applied: 2 file(s) copied to:
  /opt/nordic/ncs/v3.2.1/bootloader/mcuboot/boot/zephyr/boards
```

{% hint style="info" %}
**Run the patch once per NCS installation.** You do not need to re-run it on every build — only after a fresh NCS install or when the SDK is updated.
{% endhint %}

#### Method 2: Manually

Download the following two MCUBoot configuration files and place them in the following directory of the nRF Connect SDK (NCS):

> `ncs/v3.2.1/bootloader/mcuboot/boot/zephyr/boards`&#x20;

1. `conexio_stratus_pro_nrf9151.conf`&#x20;
2. `conexio_stratus_pro_nrf9161.conf`&#x20;

{% file src="/files/9pdr5e3u3xFNDMlvHKyw" %}
Stratus Pro nRF9151  MCUBoot configuration file
{% endfile %}

{% file src="/files/dm5LMEY4qHaHxnpVTf9D" %}
Stratus Pro nRF9161  MCUBoot configuration file
{% endfile %}

Next, delete the from outdated `conexio_stratus_pro.conf` from the `ncs/v3.2.1/bootloader/mcuboot/boot/zephyr/boards`&#x20;

**Both options produce identical results. Use whichever fits your workflow.**

### After Complete Setup <a href="#after-setup" id="after-setup"></a>

Your NCS folder structure should look like this:

```
ncs/v3.2.1/
├── bootloader/
│   └── mcuboot/boot/zephyr/boards/
│       ├── conexio_stratus_pro_nrf9151.conf  ← placed here by the patch
│       └── conexio_stratus_pro_nrf9161.conf  ← placed here by the patch
├── conexio-firmware-sdk/                     ← this repository
│   ├── boards/conexio/stratus_pro/
│   ├── samples/conexio_stratus/
│   ├── scripts/
│   │   └── patch_mcuboot.sh                  ← shell fallback
│   └── bootloader/mcuboot/                   ← source conf files
├── nrf/
├── zephyr/
└── ...
```

You have now met all the requirements for compiling applications for the Conexio Stratus Pro boards.


# Conexio Stratus Board Definition Files

Before we can compile and flash the application firmware to the Stratus device, we need to gather a few files for this board. First, we need to install the board definition files or the board’s devicetree in the ZephyrRTOS. Zephyr utilizes devicetree to describe the hardware available on its supported Boards, as well as that hardware’s initial configuration. An introduction to the devicetree is well documented [<mark style="color:red;">here</mark>](https://developer.nordicsemi.com/nRF_Connect_SDK/doc/latest/zephyr/guides/dts/intro.html).

## Stratus Pro nRF9161

### **Step 1: Fetching Conexio Stratus Pro Board Definition Files**

<figure><img src="https://3229153654-files.gitbook.io/~/files/v0/b/gitbook-x-prod.appspot.com/o/spaces%2F-MXjGw-Z8_tCuNQB93OW%2Fuploads%2FOlCi7m34kY7p0vPJuLZI%2Ftop-view.png?alt=media&amp;token=d8635e8f-04ce-4864-9972-9e8f7aa6eb0b" alt=""><figcaption><p>Stratus Pro</p></figcaption></figure>

Stratus developers are asked to directly download the board files in zip format below extract/unzip, and copy the `conexio_stratus_pro` folder and place it in the NCS directory:

### Option 1: Device Tree for nRF SDK v2.6.0

> ncs/v2.6.0/zephyr/boards/arm

{% file src="/files/AAUs9JTbXwcSj34vu04h" %}
Conexio Stratus Pro Board Definition Files for v2.6.0
{% endfile %}

You should now see a folder named `conexio_stratus_pro` among other supported board files. Using the board target as `conexio_stratus_pro_ns` you can build Zephyr applications for the Stratus Pro board in non-secure mode.

```
└── ncs/
    └── v2.6.0/
        ├── zephyr/
        │   └── boards/
        │       └── arm/
        │           ├── ...
        │           ├── ...
        │           ├── conexio_stratus_pro
        │           └── ...
        ├── bootloader
        ├── modules
        ├── nrf
        ├── tools
        ├── toolchain
        └── ...
```

### Option 2: Download the Stratus Pro Board Definition Files from Git repo

{% embed url="<https://github.com/Conexiotechnologies/conexio_stratus_pro_devicetree>" %}

### Step 2: Patch MCUBoot file for Stratus Pro Board

Stratus Pro uses MCUBOOT as the main bootloader to properly execute and bootup applications. Download the `conexio_stratus_pro.conf` file below and place it in the following directory of the NCS:

> ncs/v2.6.0/bootloader/mcuboot/boot/zephyr/boards

{% file src="/files/nYIYG5ydnqujYKiyN6f4" %}

###

## Stratus Gen 1

### **Fetching Conexio Stratus Board Definition Files**

<figure><img src="https://3229153654-files.gitbook.io/~/files/v0/b/gitbook-legacy-files/o/assets%2F-MXjGw-Z8_tCuNQB93OW%2F-MfzSNfCkHLwn1R6N_Vu%2F-MfzSZ8jGuQ9ZC49vv2Y%2Ftop.png?alt=media&amp;token=dbabdb3e-1b8a-482f-90c2-163274870317" alt=""><figcaption><p>Stratus</p></figcaption></figure>

Stratus developers are asked to directly download the board files in zip format below extract/unzip, and copy the `conexio_stratus` folder and place it in the NCS directory:

**Device Tree for nRF SDK v2.6.0**

> ncs/v2.6.0/zephyr/boards/arm

{% file src="/files/aVGJaZEQAsLOJl6c1qr0" %}
Conexio Stratus Board Definition Files for v2.5.0
{% endfile %}

You should now see a folder named `conexio_stratus` among other supported board files. Using the board target as `conexio_stratus_ns` you can build Zephyr applications for the Stratus board in non-secure mode.

```
└── ncs/
    └── v2.6.0/
        ├── zephyr/
        │   └── boards/
        │       └── arm/
        │           ├── ...
        │           ├── ...
        │           ├── conexio_stratus
        │           └── ...
        ├── bootloader
        ├── modules
        ├── nrf
        ├── tools
        ├── toolchain
        └── ...
```

### Download the Stratus Board Definition Files from Git repo

{% embed url="<https://github.com/Conexiotechnologies/conexio_stratus_devicetree>" %}


# Fetch Stratus Sample Applications

All the sample applications for the Stratus board can be found in the [<mark style="color:red;">conexio-firmware-sdk</mark>](https://github.com/Conexiotechnologies/conexio-firmware-sdk) repository on GitHub.&#x20;

**Sample Applications for nRF Connect SDK v2.6.0**

There are 2 ways to fetch the Conexio Stratus sample applications.

**Method 1**

Check out the main Git repo [**v2.6.0**](https://github.com/Conexiotechnologies/conexio-firmware-sdk) for the sample applications supported by the nRF SDK v2.6.0. Download the files, extract them, and place the extracted folder into: `/nordic/ncs/v2.6.0`

Your nRF Connect SDK v2.6.0 folder structure should now look like this:

```
v2.6.0/
├─ bootloader/
├─ conexio-firmware-sdk/
├─ mbedtls/
├─ modules/
├─ nrf/
├─ nrfxlib/
├─ test/
├─ toolchain/
├─ tools/
├─ zephyr/
```

**Method 2: Using nRF Connect SDK as a manifest repository**

Alternatively, add the following entry to `west.yml` file in `ncs/v2.6.0/nrf` subtree of the existing [west](https://docs.zephyrproject.org/3.0.0/guides/west/index.html) based project:

```yaml
# Conexio repository.
    - name: conexio
      path: conexio
      revision: main
      url: https://github.com/Conexiotechnologies/conexio-firmware-sdk.git
      import: west-nrf.yml
```

After updating the west.yml file, it should now look similar to this:

```yaml
...
    - name: openthread
      repo-path: sdk-openthread
      path: modules/lib/openthread
      revision: 0d19f9112101e87722ec80b3a247bc7a1c54b232
    # Conexio repository.
    - name: conexio
      path: conexio
      revision: main
      url: https://github.com/Conexiotechnologies/conexio-firmware-sdk.git
      import: west-nrf.yml

  # West-related configuration for the nrf repository.
  self:
    # This repository should be cloned to ncs/nrf.
    path: nrf
    # This line configures west extensions.
    west-commands: scripts/west-commands.yml
```

Now clone all the repositories, by issuing the following command:

```
west update
```

Your nRF Connect SDK v2.6.0 folder structure should now look like this:

```
v2.6.0/
├─ bootloader/
├─ conexio/ <- examples samples folder
├─ mbedtls/
├─ modules/
├─ nrf/
├─ nrfxlib/
├─ test/
├─ toolchain/
├─ tools/
├─ zephyr/
```

We have now met all the requirements for compiling applications for the Conexio Stratus.


# Compiling Applications with nRF Connect Extension for VS Code

{% hint style="warning" %}
Compiling Conexio Stratus applications using nRF Connect for VSCode is the recommended method.
{% endhint %}

To make zephyr-based application development a breeze, the Stratus board is also compatible with the newly released nRF Connect SDK extension for VS Code.&#x20;

## **1. Adding an existing application to nRF Connect for VS Code**

Once you are all set with the [<mark style="color:red;">nRF Connect Visual Studio Code Extension Pack</mark>](https://marketplace.visualstudio.com/items?itemName=nordic-semiconductor.nrf-connect-extension-pack) installation, start the extension in the VS Code.

{% hint style="success" %}
Installing the nRF Connect Visual Studio Code Extension Pack will also install all the required dependencies.
{% endhint %}

First, Open Existing Application:

<figure><img src="https://3229153654-files.gitbook.io/~/files/v0/b/gitbook-x-prod.appspot.com/o/spaces%2F-MXjGw-Z8_tCuNQB93OW%2Fuploads%2FnscmzecJVhl9fsjf9mkp%2Fopen-apps.png?alt=media&amp;token=b7f6ed37-3395-4f59-b664-b421f0de2cc1" alt=""><figcaption></figcaption></figure>

This will open the file browser on your machine. Navigate to the location where the `conexio-firmware-sdk` directory resides (`ncs/v3.2.1/conexio-firmware-sdk/samples/conexio_stratus`). Select a sample application and click **Open**.

<figure><img src="https://3229153654-files.gitbook.io/~/files/v0/b/gitbook-x-prod.appspot.com/o/spaces%2F-MXjGw-Z8_tCuNQB93OW%2Fuploads%2FkPXfy7QiR5VgKN1Y52vl%2F2.png?alt=media&amp;token=d26c15c5-9c74-40b6-8856-a00f52d6f3a7" alt=""><figcaption><p>Browse the sampe application</p></figcaption></figure>

You should now see the ported application under **APPLICATIONS** on the left pane.

## **2. Point the build system to the custom board root directory of Conexio boards**

By default, the build system in nRF Connect goes to specific folders to look for board definitions. Namely,`<SDK Installation Path>/zephyr/boards/arm/`and `<SDK Installation Path>/nrf/boards/arm/`.

We need to tell the build system to look at the directory for the custom Conexio Stratus boards. This is easy to do within the VS Code environment.

Navigate to the Settings of nRF Connect Extension. This can be done by navigating to File -> Preferences -> Settings -> Extensions -> nRF Connect -> Board Roots, then add the `conexio-firmware-sdk`directory path as shown below.

**For NCS v3.2.1**

```
/opt/nordic/ncs/v3.2.1/conexio-firmware-sdk
```

An example is shown below:

<figure><img src="https://3229153654-files.gitbook.io/~/files/v0/b/gitbook-x-prod.appspot.com/o/spaces%2F-MXjGw-Z8_tCuNQB93OW%2Fuploads%2FOLzMjdxkcYBH8qwa809v%2Fboard_root.png?alt=media&amp;token=e254dfa9-99ed-4ad5-a596-30142fe5d9a4" alt=""><figcaption><p>Board Root configuration for nRF Connect for VS Code -> NCS v3.2.1</p></figcaption></figure>

{% hint style="info" %}
The above directory path will be different on the Windows and Ubuntu machines.
{% endhint %}

## **3. Compiling an application using nRF Connect Extension**

Prior to compiling our sample application, we first need to generate the device build configuration for our project by clicking on the **Add Build Configuration (1)** option as shown below.

This opens a new tab, asking the user to select the board for which the build configurations will be generated. In our case, we will&#x20;

* (2) check the **Custom boards**

<figure><img src="https://3229153654-files.gitbook.io/~/files/v0/b/gitbook-x-prod.appspot.com/o/spaces%2F-MXjGw-Z8_tCuNQB93OW%2Fuploads%2Fl48IMwM7u5WeNFZyBxKh%2Fbuild-config.png?alt=media&amp;token=168f1844-5020-4aeb-aaa8-b57664c92a26" alt=""><figcaption><p>Adding build configuration for NCS</p></figcaption></figure>

(ii) then from the drop-down menu select the desired Conexio Stratus board

* &#x20;`conexio_stratus_pro/nrf9151/ns`for Stratus Pro nRF9151
* `conexio_stratus_pro/nrf9161/ns`for Stratus Pro nRF9161

<figure><img src="https://3229153654-files.gitbook.io/~/files/v0/b/gitbook-x-prod.appspot.com/o/spaces%2F-MXjGw-Z8_tCuNQB93OW%2Fuploads%2FuyAAtnZ4dqu9jOSpRNFN%2FConexio%20Board%20Targets.png?alt=media&amp;token=7a1d5856-3f40-4c4f-b059-9dcc6ee2d8fe" alt=""><figcaption><p>Conexio Board Targets</p></figcaption></figure>

**Note:** to generate the correct binary `zephyr.signed.bin`, select either **Build system default** or **Use sysbuild** under **System build (sysbuild)** as shown below.

<figure><img src="https://3229153654-files.gitbook.io/~/files/v0/b/gitbook-x-prod.appspot.com/o/spaces%2F-MXjGw-Z8_tCuNQB93OW%2Fuploads%2F583wibeG9jgGSwcVUXGY%2Fbuild_configs.png?alt=media&amp;token=621e0562-4417-4a13-b79f-94ed41ed3a71" alt=""><figcaption></figcaption></figure>

(3) click **Build Configuration** to start the Zephyr application build process.

Now, you should see the build process kicking in the background and generating the required files and binaries for the `led_blink` sample application.

<figure><img src="https://3229153654-files.gitbook.io/~/files/v0/b/gitbook-x-prod.appspot.com/o/spaces%2F-MXjGw-Z8_tCuNQB93OW%2Fuploads%2F62N3Hhn0qGblZ9sL39f8%2Fcompiling.png?alt=media&amp;token=75ff8699-3745-4a5d-85b8-db7e57de5ff9" alt=""><figcaption><p>Application Build In Progress</p></figcaption></figure>

Once the project is compiled successfully, in the project navigation panel, you will see all the generated files. The main program binary that will be flashed to the Stratus device is `zephyr.signed.bin`, located in your app directory -> `build/<project_name>/zephyr/zephyr.signed.bin.`

![Application Compiled Successfully](https://3229153654-files.gitbook.io/~/files/v0/b/gitbook-x-prod.appspot.com/o/spaces%2F-MXjGw-Z8_tCuNQB93OW%2Fuploads%2FvsJA00lgPTTLcwZ2M0yD%2Ffig_10.png?alt=media\&token=1acc802a-30a9-4b63-a80b-069f83b76d58)

Well done! You have successfully managed to compile the sample application using the nRF Connect extension.

## 4. Setting DFU Mode (Device Firmware Upgrade)

To program the Stratus device via USB, you will need to put the device into DFU mode first. This mode triggers the onboard bootloader that accepts firmware binary files. To enter DFU mode:

* Hold down BOTH buttons (BUTTON/MODE + RESET)
* Release only the RESET button, while holding down the MODE/USER button
* Wait for the white LED to turn on (steady-state)
* Release the MODE button

The device is now in DFU mode. 🚨

## **5. Flashing an application via USB**

To upload the Conexio Stratus Pro firmware, we now have to:

* Open the terminal within the nRF Connect extension and invoke the following firmware upload command, making sure the device is in DFU mode.
* `<project_name>` replace it with your project that you have just built.

```
newtmgr -c serial image upload build/<project_name>/zephyr/zephyr.signed.bin
```

<figure><img src="https://3229153654-files.gitbook.io/~/files/v0/b/gitbook-x-prod.appspot.com/o/spaces%2F-MXjGw-Z8_tCuNQB93OW%2Fuploads%2FMqUM45ja9hF94syxCjcS%2FScreenshot%202026-05-30%20at%202.09.51%E2%80%AFPM.png?alt=media&amp;token=c26b344b-39df-4b85-9583-8814db56788b" alt=""><figcaption></figcaption></figure>

## **5. Viewing the sample output in the terminal**

To view the data from the device in the serial terminal, you can open the nRF Serial Terminal in VS Code an select

```
dev=/dev/tty.SLAB_USBtoUART,baud=115200'
```

for macOS, it will emulate the device as such, while on the windows it will be different.

<figure><img src="https://3229153654-files.gitbook.io/~/files/v0/b/gitbook-x-prod.appspot.com/o/spaces%2F-MXjGw-Z8_tCuNQB93OW%2Fuploads%2F1uguqdAIVH5KOPdDHR0c%2FScreenshot%202026-05-30%20at%209.10.23%E2%80%AFPM.png?alt=media&amp;token=cff8683c-3d36-47d7-9bef-ca78994313fd" alt=""><figcaption></figcaption></figure>


# Building and Programming an Application using CLI and west

{% hint style="danger" %}
Only build using the WEST cli method if you have used it before and are comfortable using command line tools.
{% endhint %}

### Building an application: The Wild Wild **West** way :smile:

`west` is the Swiss army knife command-line tool for Zephyr. Zephyr provides several `west` extension commands for building, flashing, and interacting with Zephyr programs running on a device.

To build an application, navigate to the `conexio-firmware-sdk` directory that we installed [<mark style="color:red;">previously</mark>](/master/building-and-programming-an-application/fetch-stratus-sample-applications) and choose a sample application. Here, we will choose the `led_blink` sample.

> `/opt/nordic/ncs/v2.7.0/conexio_stratus_firmware/samples/conexio_stratus/led_blink`

This sample tests two different functionalities of the Stratus device:

1. The user-programmable LED on the mainboard.
2. The USB serial communications are working correctly and the log output gets printed on the terminal window.

To compile the application, open the terminal in the sample application directory as illustrated below and issue the following `west` command.

<figure><img src="https://3229153654-files.gitbook.io/~/files/v0/b/gitbook-x-prod.appspot.com/o/spaces%2F-MXjGw-Z8_tCuNQB93OW%2Fuploads%2FjA3P0fQC2QpHlGLpjR4a%2Fv2.7.x-open.png?alt=media&amp;token=195fa613-c0a1-4f82-ac4b-77152c6ad58c" alt=""><figcaption></figcaption></figure>

This will open the terminal in the installed directory of the nRF Connect SDK as indicated. In our case **nordic/ncs/v2.7.0**.

<figure><img src="https://3229153654-files.gitbook.io/~/files/v0/b/gitbook-x-prod.appspot.com/o/spaces%2F-MXjGw-Z8_tCuNQB93OW%2Fuploads%2F4HzQVnS4HapHHMFNEacB%2Fv2.7.x-terminal.png?alt=media&amp;token=0be0163b-2db5-4045-ad05-e613f18479b4" alt=""><figcaption></figcaption></figure>

Then, in the terminal change the working directory to the sample application you want to compile and flash. For instance, here we will choose the `led_blink` sample

> cd `conexio_stratus_firmware/samples/conexio_stratus/led_blink`

For the latest Gen 2 Stratus Pro nRF9161 device, you can build your application targeting this board by specifying the location of the Stratus Pro board information with the `-DBOARD_ROOT` parameter to the CMake build system:

> west build -b conexio\_stratus\_pro/nrf9161/ns -- -DBOARD\_ROOT=/opt/nordic/ncs/v2.7.0/conexio-firmware-sdk

or if using a system build

> west build -b conexio\_stratus\_pro/nrf9161/ns -- -DBOARD\_ROOT=/opt/nordic/ncs/v2.7.0/conexio-firmware-sdk --sysbuild

For the Gen 1 Stratus device, the build command is:&#x20;

> west build -b conexio\_stratus/nrf9160/ns -- -DBOARD\_ROOT=/opt/nordic/ncs/v2.7.0/conexio-firmware-sdk

## Updating Through USB

You can update the Stratus application firmware over USB using MCUboot, a secure bootloader that you can use to update applications without an external debugger.

### Flashing an application: DFU Mode (Device Firmware Upgrade)

Stratus device comes preprogrammed with the MCUBoot bootloader allowing users to directly update the firmware via the USB interface. **Each sample is already configured to enable the Zephyr application to be booted by the MCUBoot after resetting the board.**&#x200B;​&#x20;

This is handled internally by the Zephyr configuration system and is wrapped in the `CONFIG_BOOTLOADER_MCUBOOT` Kconfig variable, which is enabled in the application’s `prj.conf` file as&#x20;

> `CONFIG_BOOTLOADER_MCUBOOT=y`

More information can be found [<mark style="color:red;">here</mark>](https://developer.nordicsemi.com/nRF_Connect_SDK/doc/latest/mcuboot/readme-ncs.html).

{% hint style="info" %}
For Stratus Pro, MCUBoot is enabled by default in the device tree configuration and no extra action is needed by the developer at the application build level.
{% endhint %}

After the compilation has been completed, you will notice a `build` folder being generated, which will contain the following binary:

> build/zephyr/app\_update.bin

{% hint style="info" %}
&#x20;When an application is built with the option `CONFIG_BOOTLOADER_MCUBOOT` set, `app_update.bin`, a signed variant of the firmware in binary format (as opposed to intelhex) is automatically generated and can be used for firmware over-the-air (FOTA) upgrades.
{% endhint %}

To program the Stratus via USB, you will need to put the device into DFU mode first. This mode triggers the onboard bootloader that accepts firmware binary files. To enter DFU mode:

* Hold down both buttons (MODE/USER + RESET)
* Release only the RESET button, while holding down the MODE/USER button
* Wait for the white LED to turn on (steady-state)
* Release the MODE button

The device is now in the DFU mode. 🚨

Flash the compiled firmware using `newtmgr on macOS`:

> `newtmgr -c serial image upload build/zephyr/app_update.bin`

Use the following upload command on Ubuntu 24 system:\
`sudo newtmgr --conntype serial --connextra 'dev=/dev/ttyUSB0,baud=115200' image upload -e build/zephyr/app_update.bin`

Give it a few seconds for the transfer to complete and then, hit the `RESET` button. You should now see the LEDs blinking every second. If you have a serial logger such as TeraTerm, Putty, or similar, select the correct COM port and set the baud rate = 115200, hit the `RESET` button, and notice the following being printed on the console window:

```
SPM: NS image at 0x20200
SPM: NS MSP at 0x20015528
SPM: NS reset vector at 0x21a31
SPM: prepare to jump to Non-Secure image.
*** Booting nRF Connect SDK v2.6.0 ***
Hello from conexio_stratus_pro
```

Now you are all set! Stratus is alive and ready for development :clap:


# Sample Applications

We have provided various Conexio Stratus application examples and associated files to get started with creating and building your first application. The current sample applications are compatible with nRF Connect SDK (NCS) > v3.2.1 and can be found in our [<mark style="color:red;">Github repository</mark>](https://github.com/Conexiotechnologies/conexio-stratus-firmware/tree/main/samples).

We provide samples and application examples that specifically target the Conexio Stratus Kit and demonstrate how to implement typical use cases with NRF Connect SDK  libraries and drivers.

For the complete list of sample applications visit the [Conexio Stratus Pro — Sample Index Page](https://github.com/Conexiotechnologies/conexio-firmware-sdk/blob/main/samples/conexio_stratus/SAMPLE_INDEX.md).

<table data-view="cards"><thead><tr><th></th><th></th><th data-hidden data-card-target data-type="content-ref"></th></tr></thead><tbody><tr><td><mark style="color:green;"><strong>LED Blink</strong></mark></td><td>A simple application which blinks the user LED using the GPIO API.</td><td><a href="https://github.com/Conexiotechnologies/conexio-firmware-sdk/tree/main/samples/conexio_stratus/led_blink">https://github.com/Conexiotechnologies/conexio-firmware-sdk/tree/main/samples/conexio_stratus/led_blink</a></td></tr><tr><td><mark style="color:green;"><strong>Button</strong></mark></td><td>Demonstrates how to use the button on the Stratus kit and blink the LED.</td><td><a href="https://github.com/Conexiotechnologies/conexio-firmware-sdk/tree/main/samples/conexio_stratus/button">https://github.com/Conexiotechnologies/conexio-firmware-sdk/tree/main/samples/conexio_stratus/button</a></td></tr><tr><td><mark style="color:green;"><strong>AT Client</strong></mark></td><td>Send AT commands over UART to the nRF9151 modem.</td><td><a href="https://github.com/Conexiotechnologies/conexio-firmware-sdk/tree/main/samples/conexio_stratus/at_client">https://github.com/Conexiotechnologies/conexio-firmware-sdk/tree/main/samples/conexio_stratus/at_client</a></td></tr><tr><td><mark style="color:green;"><strong>Accelerometer</strong></mark></td><td>Application periodically reads accelerometer data from the LIS2DH sensor and displays it.</td><td><a href="https://github.com/Conexiotechnologies/conexio-firmware-sdk/tree/main/samples/conexio_stratus/accelerometer">https://github.com/Conexiotechnologies/conexio-firmware-sdk/tree/main/samples/conexio_stratus/accelerometer</a></td></tr><tr><td><mark style="color:green;"><strong>BME280</strong></mark></td><td>Sample periodically reads temperature, pressure, &#x26; humidity data from the BME280 sensor.</td><td><a href="https://github.com/Conexiotechnologies/conexio-firmware-sdk/tree/main/samples/conexio_stratus/bme280">https://github.com/Conexiotechnologies/conexio-firmware-sdk/tree/main/samples/conexio_stratus/bme280</a></td></tr><tr><td><mark style="color:green;"><strong>BME680</strong></mark></td><td>Sample periodically reads temperature, pressure, &#x26; humidity data from the BME680 sensor.</td><td><a href="https://github.com/Conexiotechnologies/conexio-firmware-sdk/tree/main/samples/conexio_stratus/bme680">https://github.com/Conexiotechnologies/conexio-firmware-sdk/tree/main/samples/conexio_stratus/bme680</a></td></tr><tr><td><mark style="color:green;"><strong>SHT4x</strong></mark></td><td>Application periodically measures the ambient temperature &#x26; humidity from an SHT4X sensor.</td><td><a href="https://github.com/Conexiotechnologies/conexio-firmware-sdk/tree/main/samples/conexio_stratus/sht4x">https://github.com/Conexiotechnologies/conexio-firmware-sdk/tree/main/samples/conexio_stratus/sht4x</a></td></tr><tr><td><mark style="color:green;"><strong>SHT3XD</strong></mark></td><td>Application periodically measures the ambient temperature &#x26; humidity from an SHT3X sensor.</td><td><a href="https://github.com/Conexiotechnologies/conexio-firmware-sdk/tree/main/samples/conexio_stratus/sht3xd">https://github.com/Conexiotechnologies/conexio-firmware-sdk/tree/main/samples/conexio_stratus/sht3xd</a></td></tr><tr><td><mark style="color:green;"><strong>DPS310</strong></mark></td><td>Application periodically measures temperature &#x26; pressure from a DPS310 sensor.</td><td><a href="https://github.com/Conexiotechnologies/conexio-firmware-sdk/tree/main/samples/conexio_stratus/dps310">https://github.com/Conexiotechnologies/conexio-firmware-sdk/tree/main/samples/conexio_stratus/dps310</a></td></tr><tr><td><mark style="color:green;"><strong>Modem Battery</strong></mark></td><td>Demonstrates how to obtain the battery information from the nRF91xx modem.</td><td><a href="https://github.com/Conexiotechnologies/conexio-firmware-sdk/tree/main/samples/conexio_stratus/cellular_modem_battery_monitor">https://github.com/Conexiotechnologies/conexio-firmware-sdk/tree/main/samples/conexio_stratus/cellular_modem_battery_monitor</a></td></tr><tr><td><mark style="color:green;"><strong>nPM1300 PMIC</strong></mark></td><td>Demonstrates how to calculate the battery state of charge using the fuel gauge.</td><td><a href="https://github.com/Conexiotechnologies/conexio-firmware-sdk/tree/main/samples/conexio_stratus/npm1300_fuel_gauge">https://github.com/Conexiotechnologies/conexio-firmware-sdk/tree/main/samples/conexio_stratus/npm1300_fuel_gauge</a></td></tr><tr><td><mark style="color:green;"><strong>Modem Infomation</strong></mark></td><td>Demonstrates how to fetch important Modem related information.</td><td><a href="https://github.com/Conexiotechnologies/conexio-firmware-sdk/tree/main/samples/conexio_stratus/device_info">https://github.com/Conexiotechnologies/conexio-firmware-sdk/tree/main/samples/conexio_stratus/device_info</a></td></tr><tr><td><mark style="color:green;"><strong>Datacake MQTT</strong></mark></td><td>Demonstrates how to easily connect the Conexio Stratus device to the Datacake MQTT broker.</td><td><a href="https://github.com/Conexiotechnologies/conexio-firmware-sdk/tree/main/samples/conexio_stratus/datacake">https://github.com/Conexiotechnologies/conexio-firmware-sdk/tree/main/samples/conexio_stratus/datacake</a></td></tr><tr><td><mark style="color:green;"><strong>Golioth IoT</strong></mark></td><td>Demonstrates how to easily connect to the Golioth IoT platform and TX/RX data.</td><td><a href="https://github.com/Conexiotechnologies/conexio-firmware-sdk/tree/main/samples/conexio_stratus/golioth_samples">https://github.com/Conexiotechnologies/conexio-firmware-sdk/tree/main/samples/conexio_stratus/golioth_samples</a></td></tr><tr><td><mark style="color:green;"><strong>UDP</strong></mark></td><td>Demonstrates how to transmit UDP packets to a UDP server and low power mode.</td><td><a href="https://github.com/Conexiotechnologies/conexio-firmware-sdk/tree/main/samples/conexio_stratus/udp">https://github.com/Conexiotechnologies/conexio-firmware-sdk/tree/main/samples/conexio_stratus/udp</a></td></tr><tr><td><mark style="color:green;"><strong>Low Power Mode</strong></mark></td><td>Demonstrates how to put the Stratus Pro in the active low power mode.</td><td><a href="https://github.com/Conexiotechnologies/conexio-firmware-sdk/tree/main/samples/conexio_stratus/low_power_mode">https://github.com/Conexiotechnologies/conexio-firmware-sdk/tree/main/samples/conexio_stratus/low_power_mode</a></td></tr><tr><td><mark style="color:green;"><strong>PWM</strong></mark></td><td>Demonstrates how to use the PWM API to generate signals on Stratus Pro.</td><td><a href="https://github.com/Conexiotechnologies/conexio-firmware-sdk/tree/main/samples/conexio_stratus/pwm">https://github.com/Conexiotechnologies/conexio-firmware-sdk/tree/main/samples/conexio_stratus/pwm</a></td></tr><tr><td><mark style="color:green;"><strong>Firmware Update</strong></mark></td><td>Demonstrates how to update the modem firmware over UART interface.</td><td><a href="https://github.com/Conexiotechnologies/conexio-firmware-sdk/tree/main/samples/conexio_stratus/full_modem_firmware_update">https://github.com/Conexiotechnologies/conexio-firmware-sdk/tree/main/samples/conexio_stratus/full_modem_firmware_update</a></td></tr></tbody></table>


# Datacake

To record the measurements to a specific Database Field of a Device, we will update the MQTT publish topics as follows: This section covers how to create your first device on Datacake and connect the Conexio Stratus running ZephyrRTOS to the Datacake platform via MQTT broker. **MQTT** is a lightweight publish/subscribe messaging protocol designed for low-bandwidth IoT devices.

Furthermore, the sample application used for this tutorial also demonstrates how to fetch the important Conexio Stratus device vitals such as the battery voltage, LTE signal strength, firmware version, device IMEI, and environmental data.

### **Required Toolchains**

This tutorial assumes that one has already installed and set up the nRF Connect SDK, the main toolchain required for building and compiling applications for the Stratus device. If not, please refer to this [<mark style="color:red;">section</mark>](/master/programming-and-debugging). So let’s dive in.

### Registration and Device setup on the Datacake Cloud <a href="#registration-and-device-setup-on-the-datacake-cloud" id="registration-and-device-setup-on-the-datacake-cloud"></a>

Register and create a user account on the Datacake platform [<mark style="color:red;">here</mark>](https://app.datacake.de/signup). Your first two devices are free.

Before any measurement readings can be stored via MQTT, we will need to set up a device on the Datacake platform. After registration and account activation, head over to the fleet view of your Datacake workspace.<br>

![](https://3229153654-files.gitbook.io/~/files/v0/b/gitbook-x-prod.appspot.com/o/spaces%2F-MXjGw-Z8_tCuNQB93OW%2Fuploads%2FhcWPu1xEe5hPRkqlyJtj%2Ffig_1.png?alt=media\&token=2acddfa0-8c26-4020-b06f-fbbfa3bcdc85)

Click **Add Device** in the upper right corner which will bring up the following pop-up window.

![](https://3229153654-files.gitbook.io/~/files/v0/b/gitbook-x-prod.appspot.com/o/spaces%2F-MXjGw-Z8_tCuNQB93OW%2Fuploads%2FAZhk0GKrXZevizowJuKp%2Ffig_2.png?alt=media\&token=504a9479-cb14-4a59-a860-5878aa018b43)

In **STEP 1**, select the device type as “**API**”, and under Datacake Product choose **New Product**. Then assign a name to your device under “**Product Name**”. For this tutorial, we named our product to be “**Conexio Stratus**”.

![](https://3229153654-files.gitbook.io/~/files/v0/b/gitbook-x-prod.appspot.com/o/spaces%2F-MXjGw-Z8_tCuNQB93OW%2Fuploads%2FYEFWIq5kIg8g8HNUGttq%2Ffig_3.png?alt=media\&token=380d8c0a-5cf8-4ad9-aa8a-539e4b5f56bf)

In **STEP 2**, you can add one or more API devices. Next, assign the device name and hit **Next**.

![](https://3229153654-files.gitbook.io/~/files/v0/b/gitbook-x-prod.appspot.com/o/spaces%2F-MXjGw-Z8_tCuNQB93OW%2Fuploads%2FLQ3UMSgrmO7WjaHvfXth%2Ffig_4.png?alt=media\&token=e3c77060-38b7-4cff-a668-d79caeabdee4)

Finally, in **STEP 3**, choose the Datacake plan. To create a device it is necessary to choose a payment plan. Since Datacake allows you to create up to two devices for free, you can choose the “**Free**” plan and click “**Add 1 device**”.

Hooray! Your device has now been registered to the Datacake platform and should appear under devices in the “**Fleet**” view. Click on your registered device and it will take you to its workspace.

### **Adding Database Fields**

All right. At this point, we need to define fields in the database of the device, which will host the measured values that are sent from the Stratus device via MQTT. You can read more about the Datacake fields and types [<mark style="color:red;">here</mark>](https://docs.datacake.de/device/database/fields).<br>

![](https://3229153654-files.gitbook.io/~/files/v0/b/gitbook-x-prod.appspot.com/o/spaces%2F-MXjGw-Z8_tCuNQB93OW%2Fuploads%2FdPpFPYeNe69Re4ofW6FV%2Ffig_5.png?alt=media\&token=84920bb3-630a-4967-9080-834f19e234b7)

In the Datacake, navigate to the “**Configuration**” tab and scroll down to the **Fields** section and click the “**Add Field**” button.

![](https://3229153654-files.gitbook.io/~/files/v0/b/gitbook-x-prod.appspot.com/o/spaces%2F-MXjGw-Z8_tCuNQB93OW%2Fuploads%2Fw6wopUdsXJItw07ltaX2%2Ffig_6.png?alt=media\&token=398da364-1b54-4f1f-b606-435181c6fdce)

This will open a modal with a variety of data types. For this tutorial, we will add multiple fields starting with the **temperature** of type “**Float**”. The Datacake will automatically fill in the “**identifier**” field. See the snippet below for details.

![](https://3229153654-files.gitbook.io/~/files/v0/b/gitbook-x-prod.appspot.com/o/spaces%2F-MXjGw-Z8_tCuNQB93OW%2Fuploads%2FMQEG6iLmmbABZCZ5DXv4%2Ffig_7.png?alt=media\&token=e9ed9009-1374-4e07-b560-4235cd0eb73e)

Once the field details are complete, click “**Add Field**” and you’re done with this field. Below you will see all the different fields we have added for this sample application. These fields include:

* RSRP: the LTE signal strength value
* Battery: for recording the voltage of the connected LiPo battery
* IMEI: the Conexio Stratus International Mobile Equipment Identity (IMEI) number
* Version: Firmware version running on the device
* Temperature: environmental temperature readings from the SHT40 sensor
* Humidity: relative humidity readings from the SHT40 sensor

![](https://3229153654-files.gitbook.io/~/files/v0/b/gitbook-x-prod.appspot.com/o/spaces%2F-MXjGw-Z8_tCuNQB93OW%2Fuploads%2Fqt8wQ0ImL1oqubmJyNl9%2Ffig_8.png?alt=media\&token=793caba1-76ad-43ff-a866-719930a9bebe)

### **Adding Integrations**

Next, just below the Fields section, you will find the **Integrations** section. For forwarding data from your devices via MQTT, a connection to Datacake must be established. Click **Configure** and the **MQTT Integration** information window will pop up.

![](https://3229153654-files.gitbook.io/~/files/v0/b/gitbook-x-prod.appspot.com/o/spaces%2F-MXjGw-Z8_tCuNQB93OW%2Fuploads%2FHxZ6VCnCeJNQGmFzuVz8%2Ffig_9.png?alt=media\&token=a5b65e48-5703-46f1-997f-48bcef28da2d)

The Datacake platform offers an MQTT broker with TLS encryption, which allows both subscription and recording of data. With the help of this broker, you can:

* Forward incoming device data to external services via MQTT
* Store data via MQTT into the Datacake Cloud

For recording measurements into the Datacake Cloud, we will publish the data to the respective topic structure as shown in the MQTT Integration window.

![](https://3229153654-files.gitbook.io/~/files/v0/b/gitbook-x-prod.appspot.com/o/spaces%2F-MXjGw-Z8_tCuNQB93OW%2Fuploads%2FmhAgCPaIXGYhLTmAZ3CI%2Ffig_10.png?alt=media\&token=b51265ec-e390-4207-a4bd-3a87e7e5295f)

{% hint style="info" %}
Copy the above broker name and the topic which we will use later in our firmware configuration.
{% endhint %}

The MQTT topic prefix for Datacake follows the following structure:

> `dtck-pub/<product_slug>/<device_id>/<field_name>`

Head over to [<mark style="color:red;">Datacake’s MQTT documentation</mark>](https://docs.datacake.de/api/internal-mqtt/mqtt) to read more about this structure. The last element in the topic structure is the field name of the measured value, as it appears in the database field that we created earlier above. The field (identifier) is where we will publish different measurements from the Stratus device.

![](https://3229153654-files.gitbook.io/~/files/v0/b/gitbook-x-prod.appspot.com/o/spaces%2F-MXjGw-Z8_tCuNQB93OW%2Fuploads%2FTXHX7Z8dp4keag5hqjMR%2Ffig_11.png?alt=media\&token=6e5982a5-3c89-4754-be04-af0f108af4f4)

![](https://3229153654-files.gitbook.io/~/files/v0/b/gitbook-x-prod.appspot.com/o/spaces%2F-MXjGw-Z8_tCuNQB93OW%2Fuploads%2FxYu3DhO9GxHaQf19k4ea%2Ffig_12.png?alt=media\&token=55e471f5-ea1b-4100-b144-b6e6a57ae578)

To view your access token, click “**Show**”. Now copy this access token in a safe place as we will need it later.

At this point, we have all the required details to connect and publish data from our Conexio Stratus device to the Datacake. Let’s now head over to the device firmware side.

## MQTT Application Code <a href="#mqtt-application-code" id="mqtt-application-code"></a>

\
We have extended the sample MQTT application provided in the nRF Connect SDK to easily connect the Stratus kit to the MQTT broker, send, and receive data from the Datacake platform.

The extended sample application connects to the Datacake and publishes the data to the configured publish topic. On a button press event, the application publishes the device vitals to the Datacake and periodically publishes the environmental data such as temperature and humidity.

The full application can be found in the [<mark style="color:red;">conexio-stratus-firmware</mark>](https://github.com/Conexiotechnologies/conexio-stratus-firmware/tree/main/samples/datacake) repo on GitHub.

### **Add Datacake credentials to the Application Code**

First, we will have to add the Datacake access token to the application code. You will need to edit `conexio_stratus_firmware/samples/datacake/prj.conf` with your Datacake access token. Update the following parameters.

```c
# MQTT application configuration authentication
CONFIG_MQTT_PASS="DATACAKE_ACCESS_TOKEN"
CONFIG_MQTT_USER="DATACAKE_ACCESS_TOKEN"
```

{% hint style="info" %}
The username and password are the same.
{% endhint %}

### **MQTT Broker Configuration**

Next, we need to configure the MQTT broker hostname and the port. Update the Datacake broker configuration with the following:

```c
# MQTT broker configuration
CONFIG_MQTT_BROKER_HOSTNAME="mqtt.datacake.co"
CONFIG_MQTT_BROKER_PORT=8883
```

We will be using Port **8883** which uses a CA-signed server certificate.

To record the measurements to a specific Database Field of a Device, we will update the MQTT publish topics as follows:

```c
# MQTT topics for recording measurement values
# Change this as per your Datacake MQTT Integration and fields
CONFIG_MQTT_PUB_TOPIC_TEMP="dtck-pub/<product_slug>/<device_id>/TEMPERATURE"
CONFIG_MQTT_PUB_TOPIC_HUM="dtck-pub/<product_slug>/<device_id>/HUMIDITY"
CONFIG_MQTT_PUB_TOPIC_VER="dtck-pub/<product_slug>/<device_id>/VERSION"
CONFIG_MQTT_PUB_TOPIC_IMEI="dtck-pub/<product_slug>/<device_id>/IMEI"
CONFIG_MQTT_PUB_TOPIC_BAT="dtck-pub/<product_slug>/<device_id>/BATTERY"
CONFIG_MQTT_PUB_TOPIC_RSRP="dtck-pub/<product_slug>/<device_id>/RSRP"
CONFIG_MQTT_PUB_TOPIC_BUTTON="dtck-pub/<product_slug>/<device_id>/BUTTON"

# MQTT subscription topics
CONFIG_MQTT_SUB_TOPIC="dtck/conexio-stratus/<product_slug>/<device_id>/+"
```

For instance, with the Product-Slug **my-product**, the Device-ID **6b98a3bb-9ae1-418f-9375-f23091a849cd**, and the Field-Identifier `TEMPERATURE`, will publish a message to:

> `dtck-pub/my-product/6b98a3bb-9ae1-418f-9375-f23091a849cd/TEMPERATURE`

The payload will hold the value which you want to be recorded into that specific database-Field.

> `publish("dtck-pub/my-product/6b98a3bb-9ae1-418f-9375-f23091a849cd/TEMPERATURE", 25.00)`

Now we are all set in terms of the MQTT parameter configurations.

### **Building and Flashing the application**

To compile the application, open a terminal window in the application directory and issue the following `west` command

```
west build -b conexio_stratus_ns
```

Once the application is compiled successfully, connect the Stratus device and put it into the DFU mode.

Flash the compiled firmware using newtmgr:

```
newtmgr -c serial image upload build/zephyr/app_update.bin
```

Open up a serial console and reset the Stratus device. The following serial UART output will be displayed in the terminal. If you are connecting your Stratus device for the first time, give it a few minutes to register to the network and establish the LTE connection with the tower. No extra SIM activations are required as the Stratus device comes preconfigured for automatically connecting to the LTE network.

```bash
[2021-11-21 16:31:38] *** Booting Zephyr OS build v2.6.99-ncs1  ***
[2021-11-21 16:31:39] [00:00:00.213,592] <inf> mqtt_app: Stratus MQTT Datacake sample started, version: v1.0.0
[2021-11-21 16:31:39] [00:00:00.213,623] <inf> watchdog: Watchdog timeout installed. Timeout: 60000
[2021-11-21 16:31:39] [00:00:00.213,653] <inf> watchdog: Watchdog started
[2021-11-21 16:31:39] [00:00:00.213,653] <dbg> watchdog.watchdog_feed_enable: Watchdog feed enabled. Timeout: 30000
[2021-11-21 16:31:39] [00:00:00.213,684] <inf> mqtt_app: Provisioning certificates
[2021-11-21 16:31:39] [00:00:00.398,468] <inf> mqtt_app: Disabling PSM and eDRX
[2021-11-21 16:31:39] [00:00:00.399,353] <inf> mqtt_app: LTE Link Connecting...
[2021-11-21 16:31:40] +CEREG: 2,"412D","03382810",7
[2021-11-21 16:31:40] +CSCON: 1
[2021-11-21 16:31:41] +CEREG: 5,"412D","03382810",7,,,"11100000","11100000"
[2021-11-21 16:31:41] %CESQ: 35,1,10,1
[2021-11-21 16:31:42] [00:00:03.091,156] <inf> mqtt_app: LTE Link Connected!
[2021-11-21 16:31:42] [00:00:03.123,840] <dbg> mqtt_app.modem_rsrp_handler: Incoming RSRP status message, RSRP value is 35
[2021-11-21 16:31:42] [00:00:03.368,347] <inf> mqtt_app: IPv4 Address found 144.126.245.197
[2021-11-21 16:31:42] [00:00:03.369,140] <inf> mqtt_app: client_id: 352656103852334
[2021-11-21 16:31:42]
[2021-11-21 16:31:42] [00:00:03.369,140] <inf> mqtt_app: TLS enabled
[2021-11-21 16:31:42] [00:00:03.369,201] <inf> env_sensors: Environmental sensors initialized
[2021-11-21 16:31:46] [00:00:06.870,300] <inf> mqtt_app: MQTT client connected
[2021-11-21 16:31:46] [00:00:06.870,330] <inf> mqtt_app: Subscribing to: dtck/conexio-stratus/4fbfe839-c8aa-4882-a890-02f981753f6d/+ len 59
[2021-11-21 16:31:46] [00:00:07.249,328] <inf> mqtt_app: SUBACK packet id: 1234
[2021-11-21 16:31:47] [00:00:08.378,997] <inf> mqtt_app: Publishing: 26.06
[2021-11-21 16:31:47] [00:00:08.379,028] <inf> mqtt_app: to topic: dtck-pub/conexio-stratus/4fbfe839-c8aa-4882-a890-02f981753f6d/TEMPERATURE len: 73
[2021-11-21 16:31:47] [00:00:08.388,702] <inf> mqtt_app: Publishing: 23.24
[2021-11-21 16:31:47] [00:00:08.388,702] <inf> mqtt_app: to topic: dtck-pub/conexio-stratus/4fbfe839-c8aa-4882-a890-02f981753f6d/HUMIDITY len: 70
[2021-11-21 16:31:47] [00:00:08.910,614] <inf> mqtt_app: PUBACK packet id: 43056
[2021-11-21 16:31:47] [00:00:09.183,288] <inf> mqtt_app: PUBACK packet id: 62515
[2021-11-21 16:31:47] [00:00:09.205,596] <inf> mqtt_app: MQTT PUBLISH result=0 len=5
[2021-11-21 16:31:47] [00:00:09.206,390] <inf> mqtt_app: Received: 26.06
[2021-11-21 16:31:47] [00:00:09.252,532] <inf> mqtt_app: MQTT PUBLISH result=0 len=5
[2021-11-21 16:31:47] [00:00:09.253,234] <inf> mqtt_app: Received: 23.24
```

Once the LTE connection is established, you will notice that the Stratus connects to the Datacake MQTT broker after which it publishes the sensor data to the configured topics. Your Stratus device is now ALIVE and communicating to the Datacake cloud 🎉.

### **Visualize Data on Datacake Dashboard**

Head back to the Datacake dashboard and add graphical widgets to your workspace.

![](https://3229153654-files.gitbook.io/~/files/v0/b/gitbook-x-prod.appspot.com/o/spaces%2F-MXjGw-Z8_tCuNQB93OW%2Fuploads%2FT9Lx1C5n05X6gVF7NA7Y%2Ffig_13.png?alt=media\&token=cbc785da-c272-4e64-8ecc-7a02a166ceb0)

You will now see the device data flowing into the Datacake and beautiful graphs being populated. Below is the sample dashboard that we have created. Fast and Simple!

![](https://3229153654-files.gitbook.io/~/files/v0/b/gitbook-x-prod.appspot.com/o/spaces%2F-MXjGw-Z8_tCuNQB93OW%2Fuploads%2FItvCK1RyQTOrQzWmBWme%2Ffig_14.png?alt=media\&token=5ee60959-ea28-4cce-a1e1-337233ea8a6e)


# Golioth

This section covers connecting your Conexio Stratus device to the Golioth platform. Specifically, this post will demonstrate how to:

* Set up the toolchains and the Golioth SDK.
* Connect the Stratus kit to the Golioth cloud, periodically send environmental data, and monitor the device.
* Perform Stratus Device Firmware Upgrade (DFU) procedure over the cellular network.

We have a lot to cover, so let’s dive in.

### **Setting Up the Toolchains**

Golioth SDK is built around ZephyrRTOS and comes as a separate module. Since the Stratus device requires [<mark style="color:red;">nRF Connect SDK</mark>](https://www.nordicsemi.com/Software-and-tools/Software/nRF-Connect-SDK) for cellular connectivity, we first need to initialize the nRF Connect SDK as per the [<mark style="color:red;">Golioth docs</mark>](https://github.com/golioth/zephyr-sdk). To do so, we need to add the following entry to `west.yml` file in `manifest/projects` subtree of existing nRF SDK [west](https://docs.zephyrproject.org/3.0.0/guides/west/index.html) based project located in:

> /opt/nordic/ncs/v2.1.1/nrf

```yaml
    # Golioth repository.
    - name: golioth
      path: modules/lib/golioth
      revision: main
      url: https://github.com/golioth/golioth-zephyr-sdk.git
      import: west-external.yml
```

After updating the west.yml file, it should now look similar to this:

```yaml
...
    - name: openthread
      repo-path: sdk-openthread
      path: modules/lib/openthread
      revision: 0d19f9112101e87722ec80b3a247bc7a1c54b232
    # Golioth repository.
    - name: golioth
      path: modules/lib/golioth
      revision: main
      url: https://github.com/golioth/golioth-zephyr-sdk.git
      import: west-external.yml

  # West-related configuration for the nrf repository.
  self:
    # This repository should be cloned to ncs/nrf.
    path: nrf
    # This line configures west extensions.
    west-commands: scripts/west-commands.yml
```

Now clone all the required repositories, by issuing the following command:

```
west update
```

Depending on your network speed, this will take several minutes so sit back tight until the process completes. Upon successful completion, you should see the `golioth` directory under

> ncs/v2.1.1/modules/lib/golioth

Bravo. For now, our SDK is all set. Let’s head over to the Golioth cloud to create an account.

### Registration and Device Setup on the Golioth Cloud

Join the Golioth and create a user account [<mark style="color:red;">here</mark>](https://console.golioth.io/). And yes, for now joining Golioth is Free.

![](https://3229153654-files.gitbook.io/~/files/v0/b/gitbook-x-prod.appspot.com/o/spaces%2F-MXjGw-Z8_tCuNQB93OW%2Fuploads%2FU7aNZGWADGa2p31VT9gg%2Ffig_1.png?alt=media\&token=0e7b94b8-f58e-4b6d-9ff2-65bc51b24614)

Once your account is created, head over to the “**Projects**” menu on the left-hand pane and **Create a Project** as shown:

![](https://3229153654-files.gitbook.io/~/files/v0/b/gitbook-x-prod.appspot.com/o/spaces%2F-MXjGw-Z8_tCuNQB93OW%2Fuploads%2FuJP4mSHAnPNrOqelmUbB%2Ffig_2.png?alt=media\&token=4b76b94b-4d6b-4ef6-8abb-4e439c2711a2)

Give your device a name and click **Save**.

{% hint style="info" %}
One can also achieve the steps shown here using the Golioth command-line tools (CLI) as outlined in the [documentation](https://docs.golioth.io/getting-started/create-project). For this tutorial, we will use the Golioth console for setting up our devices and for faster provisioning.
{% endhint %}

Next, we need to provision our devices and acquire the credentials to connect it to the Golioth platform. Expand the “**Management**” menu and click **Devices**. Then, on the right-hand top view, click **Create** and select **Provision with Credentials**.

![](https://3229153654-files.gitbook.io/~/files/v0/b/gitbook-x-prod.appspot.com/o/spaces%2F-MXjGw-Z8_tCuNQB93OW%2Fuploads%2FLbyGs1L8lJDpjiiZAnxq%2Ffig_3.png?alt=media\&token=0e7c3201-9b9a-4fde-9703-9d7e09fb3231)

This will pop up a **Device fast path Provision** window as shown:

![](https://3229153654-files.gitbook.io/~/files/v0/b/gitbook-x-prod.appspot.com/o/spaces%2F-MXjGw-Z8_tCuNQB93OW%2Fuploads%2FNpjx3SEekwDfi23vvMBB%2Ffig_4.png?alt=media\&token=a94e327a-e952-4489-b99d-eb18de5304ba)

Next, choose a name for your device, give your device a tag label (read more about Golioth tags [here](https://blog.golioth.io/organizing-thousands-of-connected-devices/)), choose an identity (ID), or keep the default one generated automatically. Finally, add your pre-shared key (PSK) as per your liking and click **Save**. Later, we will need this ID and the PSK to authenticate our Stratus device with the Golioth platform.

At this point, we have all the required details to connect and publish data from our Conexio Stratus device to the Golioth. Let’s head over to the device firmware side.

### Stratus Sample Application

We have extended the `Light DB stream` the sample application provided in the Golioth SDK to connect the Stratus kit to the Golioth and stream sensory data. The extended application periodically samples the environmental data from the onboard SHT4x sensor and publishes it to the `/temp` and `/humidity` Light DB stream path. For the first part of this post, the full application can be found in the [<mark style="color:red;">conexio-stratus-firmware/samples/golioth/stratus\_lightdb\_stream</mark>](https://github.com/Conexiotechnologies/conexio-stratus-firmware/tree/main/samples/golioth/stratus_lightdb_stream) repo on GitHub. Copy the project folder and place it in your Golioth SDK samples directory.

> `golioth-sdk/modules/lib/golioth/samples`

Below is the snapshot of the code’s main loop:

```c
void main(void)
{
	LOG_INF("Stratus < > Golioth Light DB sensor stream sample started");

	const struct device *sht = DEVICE_DT_GET_ANY(sensirion_sht4x);
	
	if (!device_is_ready(sht)) {
		LOG_ERR("Device %s is not ready.\n", sht->name);
		return;
	}

	if (IS_ENABLED(CONFIG_GOLIOTH_SAMPLES_COMMON)) {
		net_connect();
	}

	client->on_connect = golioth_on_connect;
	golioth_system_client_start();

	k_sem_take(&connected, K_FOREVER);

	while (true) {
		
		/* Fetch latest environmental data from SHT4X sensor */
		fetch_sensor_data(sht);
        
		/* Send data using Synchronous mode */
		LOG_DBG("Sending temp: %d.%06d; humidity: %d.%06d", 
			temp.val1, abs(temp.val2), hum.val1, abs(hum.val2));

		env_data_push_sync(temp.val1, temp.val2, hum.val1, hum.val2);

		k_sleep(K_SECONDS(5));

		/* Send data using Callback-based */
		LOG_DBG("Sending temp: %d.%06d; humidity: %d.%06d", 
			temp.val1, abs(temp.val2), hum.val1, abs(hum.val2));

		env_data_push_async(temp.val1, temp.val2, hum.val1, hum.val2);

		k_sleep(K_SECONDS(5));
	}
}
```

### **Add Golioth credentials to the Application Code**

First, we will have to add the Golioth credentials (ID and PSK) that we configured above using the Golioth console into the application code. You will need to edit `samples/stratus_lightdb_stream/prj.conf` with your credentials and update the following parameters.

```c
# Golioth credentials
CONFIG_GOLIOTH_SYSTEM_CLIENT_PSK_ID="my-psk-id@my-project"
CONFIG_GOLIOTH_SYSTEM_CLIENT_PSK="my-psk"
```

Next, compile and flash the application to the Stratus board.

Open up a serial console with a baud rate of 115200 and reset the Stratus device. The following serial UART output will be displayed in the terminal.

```bash
<inf> regulator_fixed: sensor-pwr-ctrl sync: 0
uart:~$ *** Booting Zephyr OS build v3.1.99-ncs1  ***
<inf> lis2dh: fs=2, odr=0x4 lp_en=0x0 scale=9576
<inf> golioth_system: Initializing
<inf> golioth_lightdb_stream: Stratus < > Golioth Light DB sensor stream sample started
<inf> golioth_samples: Waiting for interface to be up
<inf> golioth_system: Starting connect
<inf> golioth_system: Client connected!
<dbg> golioth_lightdb_stream: main: Sending temp: 23.184176; humidity: 13.123367
<inf> golioth_lightdb_stream: Environmental data successfully pushed
<dbg> golioth_lightdb_stream: main: Sending temp: 23.184176; humidity: 13.123367
<dbg> golioth_lightdb_stream: env_data_push_handler: Data successfully pushed to the Golioth Cloud
<dbg> golioth_lightdb_stream: main: Sending temp: 23.352407; humidity: 12.842971
<inf> golioth_lightdb_stream: Environmental data successfully pushed
<dbg> golioth_lightdb_stream: main: Sending temp: 23.352407; humidity: 12.842971
<dbg> golioth_lightdb_stream: env_data_push_handler: Data successfully pushed to the Golioth Cloud
```

Once the device is connected to the Golioth cloud, it will start sending the environmental data. To confirm that the Stratus device is actually connected and communicating to the Golioth backend, head over to the Golioth console, and your device **Status** should now indicate “**online**”.

![](https://3229153654-files.gitbook.io/~/files/v0/b/gitbook-x-prod.appspot.com/o/spaces%2F-MXjGw-Z8_tCuNQB93OW%2Fuploads%2Frw4Yrn6IoGOQQOnTiUCL%2Ffig_7.png?alt=media\&token=03016ea3-39c9-457a-a19d-e0a75bab74e2)

To observe the incoming data from the Stratus device, on the left-hand under the **Monitor** menu, click **Light DB Stream** and the **Query Response** window will appear. One should now see the incoming data from the device as shown below.

If you do “**Houston, we have lift-off**”… 🚀. Your device is now connected and communicating with the Golioth cloud.

Explore the console to see other features currently offered by the Golioth platform.


# Memfault

This section covers how to connect the versatile Conexio Stratus device to the Memfault platform. Specifically, this post will demonstrate how to:

* Setup the toolchains and the Memfault API using the RF Connect SDK.
* Connect the Stratus kit to the Memfault cloud.
* Trigger fault cases and send crash data to the Memfault’s backend over the cellular network.

### Registration and Device Setup on the Memfault Cloud <a href="#registration-and-device-setup-on-the-memfault-cloud" id="registration-and-device-setup-on-the-memfault-cloud"></a>

Sign up for the Memfault cloud and create a user account [<mark style="color:red;">here</mark>](https://memfault.com/register/).

![](https://3229153654-files.gitbook.io/~/files/v0/b/gitbook-x-prod.appspot.com/o/spaces%2F-MXjGw-Z8_tCuNQB93OW%2Fuploads%2FP3aOR4XOKrKcJuLX4ypa%2Ffig_1.png?alt=media\&token=657402fd-6532-4cf8-9d8a-05a9178fd942)

Once your account is created, create a new project in Memfault by navigating to the project selector in the left-hand sidebar. You can find an option to **Create Project** below your list of existing projects. More information regarding how to use the Memfault platform can be found [<mark style="color:red;">here</mark>](https://docs.memfault.com/docs/platform/projects-and-fleets).

![](https://3229153654-files.gitbook.io/~/files/v0/b/gitbook-x-prod.appspot.com/o/spaces%2F-MXjGw-Z8_tCuNQB93OW%2Fuploads%2FGZNfj1eolgxbJNLkRIWi%2Ffig_2.png?alt=media\&token=39edef91-3ea7-473a-a673-06c9714c4c53)

Click **Create Project** and give your project a preferred **Name**, followed by the MCU type. In our case, it will be the **Embedded MCU** with **nRF91** as the Primary chip type. Then click **Next** to choose the OS options.

![](https://3229153654-files.gitbook.io/~/files/v0/b/gitbook-x-prod.appspot.com/o/spaces%2F-MXjGw-Z8_tCuNQB93OW%2Fuploads%2F9fP4YfN8sJJnUsTo5rXL%2Ffig_3.png?alt=media\&token=d46e6836-4903-423b-b5ea-3e676caaeb28)

Under OS, we will select **Zephyr** as the main OS for our device. Hit Next and select the connectivity type.

![](https://3229153654-files.gitbook.io/~/files/v0/b/gitbook-x-prod.appspot.com/o/spaces%2F-MXjGw-Z8_tCuNQB93OW%2Fuploads%2FXg6cuDFVBHd6iYcwXQqd%2Ffig_4.png?alt=media\&token=cc7da129-8e69-4430-9ecd-c96f4229fc97)

For connectivity, Conexio Stratus is a **Cellular/LTE** device.

![](https://3229153654-files.gitbook.io/~/files/v0/b/gitbook-x-prod.appspot.com/o/spaces%2F-MXjGw-Z8_tCuNQB93OW%2Fuploads%2FG54jJt4JJGS1yA30vBEk%2Ffig_5.png?alt=media\&token=aa26df64-66a6-4f9a-b521-491a71a79252)

For the **Tooling**, we will select **GCC** as the main compiler and **CMake** as the toolchain used by the ZephyrOS. Finally, complete the project creation by hitting **Create**.

![](https://3229153654-files.gitbook.io/~/files/v0/b/gitbook-x-prod.appspot.com/o/spaces%2F-MXjGw-Z8_tCuNQB93OW%2Fuploads%2F55lPr5HzmDlIP2UIugeY%2Ffig_6.png?alt=media\&token=1ec94768-0b6d-4da2-a5fc-1cd679790f7b)

Once the project is created, head down to the **Settings** tab and click **General**. Here, you should see your Memfault Project Key on the right-hand box.

![](https://3229153654-files.gitbook.io/~/files/v0/b/gitbook-x-prod.appspot.com/o/spaces%2F-MXjGw-Z8_tCuNQB93OW%2Fuploads%2FOzI8PLgZJf7CJ3S68qJV%2Ffig_7.png?alt=media\&token=e1e51e69-6d57-4e8e-9131-2801cb6c3151)

Copy this key as later we will need this to authenticate our Stratus device with the Memfault platform.

At this point, we have all the required details to connect and publish data from our Conexio Stratus device to the Memfault backend. Let’s head over to the device firmware setup and configuration side.

## Stratus Sample Application <a href="#stratus-sample-application" id="stratus-sample-application"></a>

We have extended the memfault sample application provided in the nRF Connect SDK to connect the Stratus kit to the Memafult and stream device diagnostics data. The complete source code for this tutorial can be found in this [<mark style="color:red;">GitHub repo</mark>](https://github.com/Conexiotechnologies/conexio-stratus-firmware/tree/main/samples/memfault). This sample application allows capturing:

* LTE metrics, specifically, the time to connect to the LTE network.
* Core dumps by triggering crash via button press or through shell commands.
* Offloading all the captured data to the Memfault backend.

### **Add Memfault credentials to the Application Code**

First, we will have to add the Memfault Project Key that we copied above into the application code. To do so, edit the `conexio_stratus_firmware/samples/memfault/prj.conf` with your project key and update the following parameters.

```
CONFIG_MEMFAULT_NCS_PROJECT_KEY="YOUR-MEMFAULT-PROJECT-KEY"
```

To correctly fetch the device hardware version and type together with the IMEI, the following configurations need to be added for the Stratus device:

```
# Add Conexio Stratus hardware configurations
CONFIG_MEMFAULT_NCS_HW_VERSION="stratus"
CONFIG_MEMFAULT_NCS_FW_TYPE="nrf91ns-fw"
CONFIG_MEMFAULT_NCS_DEVICE_ID_IMEI=y
```

In addition, we will also enable the periodic upload of the device diagnostics and heartbeat data over HTTP protocol by enabling:

```
CONFIG_MEMFAULT_HTTP_PERIODIC_UPLOAD=y
```

This allows sending the data that has been captured by the device to the memfault cloud periodically with an interval defined by:

```
CONFIG_MEMFAULT_HTTP_PERIODIC_UPLOAD_INTERVAL_SECS
```

You can browse other configurations in the `prj.conf` file. Now we are all set to compile and upload our firmware to the device.

### **Compiling the Sample Application using `West`**

To compile the application using west, open a terminal window in the application directory and issue the following command:

```
west build -b conexio_stratus_ns
```

In case you do not want to recall the west commands simply command the following in the terminal, and the included python script in the project directory will take care of the rest.

### **Flashing the Sample Application**

Once the application is compiled successfully, connect the Stratus device to the USB port and put it into the DFU mode.

Then flash the compiled firmware using **newtmgr**:

```
newtmgr -c serial image upload build/zephyr/app_update.bin
```

Open up a serial console with a baud rate of 115200, hit the reset button on the Stratus device, and the following serial UART output will be displayed in the terminal.

```
uart:~$ *** Booting Zephyr OS build v2.6.99-ncs1  ***
<inf> <mflt>: Reset Reason, RESETREAS=0x1
inf> <mflt>: Reset Causes:
<inf> <mflt>:  Pin Reset
<inf> <mflt>: GNU Build ID: 098b8b74929371d5ad655dfe0d8df6cf8e59cd91
Conexio Stratus Memfault sample has started
<inf> memfault_sample: Connecting to LTE network, this may take several minutes...
<inf> memfault_sample: Active LTE mode changed: LTE-M
<inf> memfault_sample: Network registration status: Connected - roaming
<inf> memfault_sample: Connected to LTE network. Time to connect: 2301 ms
```

Once the device is booted up and connected to the available LTE network, it will then display the time-to-connect metric (`Ncs_LteTimeToConnect`) on the terminal. Subsequently, all the captured Memfault data including the reset reason will be sent to the Memfault cloud.

```
<inf> memfault_sample: Sending already captured data to Memfault
uart:~$ <dbg> <mflt>: Response Complete: Parse Status 0 HTTP Status 202!
<dbg> <mflt>: Body: Accepted
<dbg> <mflt>: Response Complete: Parse Status 0 HTTP Status 202!
<dbg> <mflt>: Body: Accepted
<dbg> <mflt>: No more data to send
```

### **Uploading Symbol Files**

In order to properly decode and parse the uploaded device data such as core dumps, Memfault needs to be able to find the Symbol File (ELF) that corresponds to the software that produced the uploaded data. Without an exact match, Memfault will not be able to decode the uploaded data.

To upload the symbol file generated from your project build to your Memfault account, go to the Memfault console and select the project that you created earlier and navigate to the **Software > Symbol Files** in the left menu. Then click **Upload Symbol File** in the top right-hand corner.

![](https://3229153654-files.gitbook.io/~/files/v0/b/gitbook-x-prod.appspot.com/o/spaces%2F-MXjGw-Z8_tCuNQB93OW%2Fuploads%2Fe9bfDzKfbkbgbA9CvPA7%2Ffig_8.png?alt=media\&token=efe3302a-46e8-4e96-bb39-30b12726001b)

Select the Software Type and Version for your device and then click Select File. Browse and navigate to your project directory and select `zephyr.elf` file: `conexio_stratus_firmware/samples/memfault/build/zephyr/zephyr.elf`

Finally, click **Add** to upload the Symbol file.

![](https://3229153654-files.gitbook.io/~/files/v0/b/gitbook-x-prod.appspot.com/o/spaces%2F-MXjGw-Z8_tCuNQB93OW%2Fuploads%2FDYdrfqFsHRR4MqB7ONtO%2Ffig_9.png?alt=media\&token=77f62b97-0e13-417d-b133-0df48861f5cd)

### Exploring the Memfault Console <a href="#exploring-the-memfault-console" id="exploring-the-memfault-console"></a>

After uploading the symbol file, we can now see the parsed data on the Memfault console. Let’s explore the console and how we can see various metrics and the overall fleet information.

First, let’s see the connectivity status of our device. To view, click on the **Fleet > Devices** on the left-hand pane. Under **Cohort** (i.e., the grouping of devices), select default, and for the **Device Serial** select the IMEI number of the Stratus device. Next, it should display the device information of the connected devices. Here, we can see the firmware version running on the device (`0.0.1+098b8b`), the hardware version (`stratus`), and the last time device communicated to the Memfault cloud. If you see your device here, it confirms that it is able to successfully connect and offload the device data to the cloud backend.

![](https://3229153654-files.gitbook.io/~/files/v0/b/gitbook-x-prod.appspot.com/o/spaces%2F-MXjGw-Z8_tCuNQB93OW%2Fuploads%2FOpedDGw5V0SNNWY3gK7A%2Ffig_10.png?alt=media\&token=83da3318-f5db-4190-a449-ec7dfca91e10)

Next, in the Dashboard tab, clicking **Overview** should display the overall fleet status such as the number of active devices, software versions running on those devices, fault traces, issues, and the reboot reasons.

![](https://3229153654-files.gitbook.io/~/files/v0/b/gitbook-x-prod.appspot.com/o/spaces%2F-MXjGw-Z8_tCuNQB93OW%2Fuploads%2FABpJ6Um5F5FCnUk87unc%2Ffig_11.png?alt=media\&token=651c0208-4d61-4abe-b161-37e1f7c03ece)

Device reboots can provide one of the vital insights to the IoT administrators as to what might be the root cause of issues on your device if it’s constantly failing or rebooting too often. This is usually a good starting point for troubleshooting. Device reboots can be caused due to mechanical or physical issues on the device such as power supply, faulty components, batteries, or software lockups, i,e., watchdog timers failing to kick, issues with drivers, etc.

Memafult is able to capture these issues and much more in detail.

![](https://3229153654-files.gitbook.io/~/files/v0/b/gitbook-x-prod.appspot.com/o/spaces%2F-MXjGw-Z8_tCuNQB93OW%2Fuploads%2FVNMf2EgoYLVdhc28r3N9%2Ffig_12.png?alt=media\&token=c249f5f7-9505-4b9f-a38f-788c14638422)

Let’s head over to the **Metrics** pane to view some of the metrics that we have captured using our sample application running on the Stratus device, i.e., LTE connectivity time and the stack usage metrics. Connectivity status provides good insights as to how long the devices across the fleet are taking to connect to the available LTE network. Longer connectivity times are a good indication for the poor cellular networks and whether devices in that particular region should utilize external or internal antennas for improving the connection - useful information for hardware design engineers.

![](https://3229153654-files.gitbook.io/~/files/v0/b/gitbook-x-prod.appspot.com/o/spaces%2F-MXjGw-Z8_tCuNQB93OW%2Fuploads%2FGndLcAY2G4c6v3RBLBEI%2Ffig_13.png?alt=media\&token=4181714a-11d1-4319-9916-b0d4a3f1df24)

Explore around the console to view other detailed analyses of faults reported by the device under the **Issues** tab.

### **Manual Coredump Collection**

The sample application enables the Memfault shell by default which provides a serial terminal interface that can be used to issue commands to the device such as `mflt crash` to generate a coredump and `mflt post_chunks` to upload the coredump.

```
CONFIG_MEMFAULT_SHELL=y
```

These coredumps can also be triggered by pressing **button 1** (Mode button) on the Stratus device which triggers a stack overflow.

The shell offers multiple commands to test a wide range of functionality offered by the Memfault SDK. Run the command `mflt help` in the terminal for more information on the available commands. The list of available Memfault test commands is shown below.

![](https://3229153654-files.gitbook.io/~/files/v0/b/gitbook-x-prod.appspot.com/o/spaces%2F-MXjGw-Z8_tCuNQB93OW%2Fuploads%2F1Iaqy3gMJgI09RCNfCbN%2Ffig_14.png?alt=media\&token=ca9bd8d4-a82c-43da-9dbe-8b12af7922b3)

For instance, running `mflt get_device_info` displays all the relevant information of the connected device.

{% hint style="success" %}
This is the same information that we have seen captured by the Memfault cloud previously in their console under the devices tab.
{% endhint %}

```
uart:~$ mflt get_device_info
mflt get_device_info
<inf> <mflt>: S/N: 352656103852334
<inf> <mflt>: SW type: nrf91ns-fw
<inf> <mflt>: SW version: 0.0.1+098b8b
<inf> <mflt>: HW version: stratus
```

Now to trigger a device crash and submit the trace to the Memfault backend, we will submit `mflt crash` command. The crash causes the usage fault as shown below after which the device will reset and send the crash data to the Memfault cloud for further inspection and analysis.

![](https://3229153654-files.gitbook.io/~/files/v0/b/gitbook-x-prod.appspot.com/o/spaces%2F-MXjGw-Z8_tCuNQB93OW%2Fuploads%2FcoHJqDeqYIXB8joSfaE1%2Ffig_15.png?alt=media\&token=5647bb44-cec0-4735-a0e4-096ac8385db5)

To view the device crash detail, head over to the **Issues** tab in the console and you should see the list of issues captured from this device. Here, the manual crash is registered as **Assert at memfault\_demo\_cli\_cmd\_crash**. Click on this issue to inspect it in detail.

![](https://3229153654-files.gitbook.io/~/files/v0/b/gitbook-x-prod.appspot.com/o/spaces%2F-MXjGw-Z8_tCuNQB93OW%2Fuploads%2FJ2aeQ3wgKGYclp1hcEiz%2Ffig_16.png?alt=media\&token=862e9eae-a1a7-4cfd-ac27-9cca04d7dc16)

The detailed analysis allows us to get an in-depth view of the fault down to the register level. This is pretty interesting and helpful at the same time providing a readable and comprehensive view than what we would see with the gdb server.

![](https://3229153654-files.gitbook.io/~/files/v0/b/gitbook-x-prod.appspot.com/o/spaces%2F-MXjGw-Z8_tCuNQB93OW%2Fuploads%2FrVPY8ylNAR7SpytljKJD%2Ffig_17.png?alt=media\&token=e153d53d-36c5-4886-863f-91ea80b220fc)

And that wraps up this tutorial.


# Machine Learning with Edge Impulse

This section walks through how to build and run machine learning models using the Stratus kit and Edge Impulse studio. The [<mark style="color:red;">Conexio Stratus</mark>](http://conexiotech.com/) from Conexio Technologies is a versatile cellular IoT platform built around Nordic Semi’s nRF9160 with Cortex-M33. With 1 MB of Flash, 256 KB of RAM, and 500 MB of cellular data it’s the perfect board for edge computing and executing machine learning models right on the platform without needing any external MCU or carrier boards.

The complete source code for this tutorial including the accelerometer data injector, ML model, and classification code can be found in this [<mark style="color:red;">GitHub repo</mark>](https://github.com/Conexiotechnologies/conexio-stratus-firmware/tree/main/samples/edge_impulse).

### **Required Toolchains**

This tutorial assumes that one has already installed and set up the nRF Connect SDK v1.7.0 or later, the main toolchain required for building and compiling applications for the Stratus device. If not, please refer to this tutorial for [<mark style="color:red;">getting up and running with the Stratus platform</mark>](https://www.rajeevpiyare.com/posts/stratus-getting-started/)<mark style="color:red;">.</mark>

On the software side, create an account and a new project with Edge Impulse and also install the `edge-impulse-cli`, by running the following command in a terminal

```
npm install -g edge-impulse-cli
```

The [<mark style="color:red;">Edge Impulse CLI</mark>](https://docs.edgeimpulse.com/docs/cli-installation) is used to control local devices, acts as a proxy to synchronize data for devices that don’t have an internet connection, and uploads and converts local files.

{% hint style="warning" %}
&#x20;The edge-impulse-cli requires [Node.js v12](https://nodejs.org/) or later.
{% endhint %}

### Forwarding Data from Stratus to Edge Impulse <a href="#forwarding-data-from-stratus-to-edge-impulse" id="forwarding-data-from-stratus-to-edge-impulse"></a>

Before we can start training or generating any ML models, we need to collect some data and create labels first. For this, we will utilize the Edge Impulse data forwarder to relay sensor data from Stratus to the Edge Impulse studio over serial. The Stratus kit already comes with an onboard LIS2DH accelerometer sensor from ST microelectronics. We will use the accelerometer data to create a simple classification model for analyzing movement over a period of time using one of the following gestures:

* Idle (no motion)
* Circle
* Motion in the shape of the letter “W”

### **Overview of the Data Forwarder**

The [<mark style="color:red;">sample data forwarder application</mark>](https://github.com/Conexiotechnologies/conexio-stratus-firmware/tree/main/samples/edge_impulse) periodically performs the following operations:

* Samples and reads the accelerometer sensor data for X, Y, and Z axes at a pre-defined sampling frequency.
* Forwards this data to the Edge Impulse studio through the UART interface using the protocol specified by Edge Impulse’s data forwarder.

### **Building and Running the Data Forwarder Application**

The data forwarder sample can be found under the

```
conexio_stratus_firmware/samples/edge_impulse/data_forwarder
```

To compile the application, open a terminal window in the application directory and issue the following west command

```
west build -b conexio_stratus_ns
```

In case, you do not want to recall the west commands every time, we have also included a python script (`generate_firmware.py`) to generate the Stratus device firmware. Simply command the following in the terminal and it will take care of the rest.

```
python3 ./generate_firmware.py
```

Once the application is compiled successfully, connect the Stratus device and put it into the DFU mode.

Flash the compiled binary using newtmgr:

```
newtmgr -c serial image upload build/zephyr/app_update.bin
```

Next, open up a serial console with a baud rate of 115200 and reset the Stratus device. The following serial UART output will be displayed in the terminal indicating that the Stratus has started sampling the accelerometer sensor.

```
[2021-11-28 18:49:24] SPM: NS image at 0x20200
[2021-11-28 18:49:24] SPM: NS MSP at 0x20015d78
[2021-11-28 18:49:24] SPM: NS reset vector at 0x23945
[2021-11-28 18:49:24] SPM: prepare to jump to Non-Secure image.
[2021-11-28 18:49:24] -0.04,-0.04,10.07
[2021-11-28 18:49:24] -0.04,0.08,10.00
[2021-11-28 18:49:24] 0.00,0.08,10.11
[2021-11-28 18:49:25] -0.11,0.08,10.00
[2021-11-28 18:49:25] -0.08,0.08,9.92
[2021-11-28 18:49:25] -0.04,0.04,10.00
[2021-11-28 18:49:25] -0.08,0.04,10.04
[2021-11-28 18:49:25] -0.15,0.19,10.15
[2021-11-28 18:49:25] -0.08,0.00,10.07
[2021-11-28 18:49:25] -0.11,-0.04,10.04
[2021-11-28 18:49:25] -0.11,0.00,10.00
[2021-11-28 18:49:25] -0.08,0.00,10.04
[2021-11-28 18:49:25] -0.08,0.00,9.96
[2021-11-28 18:49:25] -0.08,0.04,10.11
[2021-11-28 18:49:26] -0.04,0.00,10.07
[2021-11-28 18:49:26] -0.08,0.08,9.96
[2021-11-28 18:49:26] -0.08,0.00,10.00
```

The next step is to forward these readings to the Ege Impulse Studio to capture various gestures that we want to label and classify. To do so, we will start the Edge Impulse forwarder using the command-line tool. To start, run the following command from a terminal:

```
edge-impulse-data-forwarder
```

and follow the step-by-step prompts to log into your Edge Impulse account.

![](https://3229153654-files.gitbook.io/~/files/v0/b/gitbook-x-prod.appspot.com/o/spaces%2F-MXjGw-Z8_tCuNQB93OW%2Fuploads%2Fc5t0H55QV3BEvQdbJdRP%2Ffig_1.png?alt=media\&token=f917d3e7-4437-4cab-8670-fc4c4f0d1224)

After log-in, select a project and assign names to the 3 sensor axes as **x**,**y**, and **z**. This represents the format in which data is streamed from the accelerometer sensor.

Now head over to the Edge Impulse Studio, and under **Devices**, you should see your device with a status “<mark style="color:green;">Green</mark>” indicating it’s active and communicating to the studio.

![](https://3229153654-files.gitbook.io/~/files/v0/b/gitbook-x-prod.appspot.com/o/spaces%2F-MXjGw-Z8_tCuNQB93OW%2Fuploads%2FNehIshiECbiaihVemeBS%2Ffig_2.png?alt=media\&token=02ccc7f0-4d17-466e-944c-6606860024e2)

Next, go to the **Data acquisition** tab, and in the “**Record new data**” window, select the **Stratus** under “**Device**”, set the label for your gesture, and the “**Sample length(ms)**”. For this example, we have chosen one of the labels as a “circle” with a sample length of 2000 ms (2 seconds). After you are happy with the configuration, click “**Start sampling**” to acquire the raw data from the Stratus device.

![](https://3229153654-files.gitbook.io/~/files/v0/b/gitbook-x-prod.appspot.com/o/spaces%2F-MXjGw-Z8_tCuNQB93OW%2Fuploads%2FEqkRCPOjx279ZSC28ntx%2Ffig_3.png?alt=media\&token=7f28aa65-6207-4e74-bc04-81151e5493db)

At this point, the Edge Impulse Studio sends a command down to the forwarder (CLI) running on your machine and instructs it to capture a 2s sample from the Stratus accelerometer as shown:

![](https://3229153654-files.gitbook.io/~/files/v0/b/gitbook-x-prod.appspot.com/o/spaces%2F-MXjGw-Z8_tCuNQB93OW%2Fuploads%2F1WwSjPunsOvHJ4nPEBYf%2Ffig_4.png?alt=media\&token=aa01d493-ce3b-4d5b-a6b1-68c2bf57fdcc)

Once the sample is acquired and uploaded, you will observe the received sample data on the raw data graph as follows:

![](https://3229153654-files.gitbook.io/~/files/v0/b/gitbook-x-prod.appspot.com/o/spaces%2F-MXjGw-Z8_tCuNQB93OW%2Fuploads%2Fn8ObEqpKsinymHA3dLKf%2Ffig_5.png?alt=media\&token=44f31c39-5781-457e-90e8-851b83670193)

Before building and training your machine learning model, capture enough data for each gesture that you want to classify in your application. The richer the dataset, the better your ML model will be. For this example, we have collected over 120s of data.

### Building and Training ML Model <a href="#building-and-training-ml-model" id="building-and-training-ml-model"></a>

After collecting enough datasets, you’re now ready to design and build your ML model in the Edge Impulse Studio. To do so, under the **Impulse design** menu, click **Create impulse**. An impulse simply takes the raw data, slices it up in smaller windows, uses signal processing blocks to extract features, and then uses a learning block to classify new data.

For this tutorial, we’ll use the ‘**Spectral Analysis**’ processing block. This block applies a filter, performs spectral analysis on the signal, and extracts frequency and spectral power data. To add this block, click **Add a processing block**, select and add Spectral Analysis.

![](https://3229153654-files.gitbook.io/~/files/v0/b/gitbook-x-prod.appspot.com/o/spaces%2F-MXjGw-Z8_tCuNQB93OW%2Fuploads%2FmQyQn8aSIn8Ms3HwLnb9%2Ffig_6.png?alt=media\&token=511bc6c4-d5f3-4c12-a002-43ebc9489b88)

Then, for classification, we’ll use the “**Classification (Keras)**” block that takes these spectral features and learns to distinguish between the three classes (idle, circle, “W”).

![](https://3229153654-files.gitbook.io/~/files/v0/b/gitbook-x-prod.appspot.com/o/spaces%2F-MXjGw-Z8_tCuNQB93OW%2Fuploads%2FwCdsrNhj36QxKUhh5K5m%2Ffig_7.png?alt=media\&token=54d214a8-e738-43cd-899b-3b323b740ee5)

Once the impulse pipeline is complete, click **Save Impulse**.

![](https://3229153654-files.gitbook.io/~/files/v0/b/gitbook-x-prod.appspot.com/o/spaces%2F-MXjGw-Z8_tCuNQB93OW%2Fuploads%2FTh1991aGPXQcD7fM006O%2Ffig_8.png?alt=media\&token=4934c4d2-c26f-4b1d-8f87-cbdb9e3d2a87)

Next, under the “**Spectral features**” tab we will keep the default parameters and click **Save parameters**.

![](https://3229153654-files.gitbook.io/~/files/v0/b/gitbook-x-prod.appspot.com/o/spaces%2F-MXjGw-Z8_tCuNQB93OW%2Fuploads%2FczEeigBwj8V5hCulQyOD%2Ffig_9.png?alt=media\&token=b47aed3e-e193-4832-90ab-9d7dd269b62b)

This will then take you to the **Training set** window. Click **Generate features** to start the process. Once the features are generated, **Feature explorer** will load up as shown:

![](https://3229153654-files.gitbook.io/~/files/v0/b/gitbook-x-prod.appspot.com/o/spaces%2F-MXjGw-Z8_tCuNQB93OW%2Fuploads%2Fc1FrRFu0xbigVprU7fNt%2Ffig_10.png?alt=media\&token=6066b5ae-2391-42e7-9f1c-2bafa700ed93)

The plot will show all the extracted features against all the generated windows. Here you can pan, zoom, and scroll around the plot to drill into your sensor data.

Once you are happy, it’s time to start training a neural network. Next, click on the “**NN Classifier**” and set the **Number of training cycles** to `300` and the **Learning rate** to `0.0005`. And then click **Start training**. It may take a while so sit back and relax while the Edge Impulse Studio does all the heavy lifting.

![](https://3229153654-files.gitbook.io/~/files/v0/b/gitbook-x-prod.appspot.com/o/spaces%2F-MXjGw-Z8_tCuNQB93OW%2Fuploads%2Fc5MJUjLR2H8KA7VgLtXz%2Ffig_11.png?alt=media\&token=6b649ab6-d249-4406-b93b-72a7d2cc4878)

Once the training is complete, the performance of your model will be displayed together will the **On-device performance**.

![](https://3229153654-files.gitbook.io/~/files/v0/b/gitbook-x-prod.appspot.com/o/spaces%2F-MXjGw-Z8_tCuNQB93OW%2Fuploads%2FAJjgzIBEYQGY2rSDnCSp%2Ffig_12.png?alt=media\&token=563e59ac-fcc7-4e15-b9a4-af2b7bed6671)

Hip hip hooray! You have now successfully generated and trained your ML model.

### **Classifying New Data**

We will now test how well the trained model works against the new data. For this, we will utilize the **Live Classification** feature of the Edge Impulse Studio. Make sure your Stratus device is connected and the Edge Impulse data forwarder CLI running. In the Edge Impulse Studio click the **Live Classification** menu, select the Stratus device, and set the “**Sample length**”, click **Start sampling** and start performing gestures. Afterward, you will get the full report on what the network thought that you did against the model.

![](https://3229153654-files.gitbook.io/~/files/v0/b/gitbook-x-prod.appspot.com/o/spaces%2F-MXjGw-Z8_tCuNQB93OW%2Fuploads%2FRhzj06QEna17Ciu1bDX3%2Ffig_13.png?alt=media\&token=41c500d8-9dab-4bf9-bd02-252542407732)

### Deploying the Model to Conexio Stratus <a href="#deploying-the-model-to-conexio-stratus" id="deploying-the-model-to-conexio-stratus"></a>

With the working model in place, we are now ready to deploy this model back to the Stratus device. This makes the model run locally on the embedded device without internet connectivity.

To export the model, click on the **Deployment** in the left-hand side menu. Then under **Create library** select **C++ library** and click **Build**. Edge Impulse will build a model package containing the Edge Impulse C++ SDK, your impulse, and all the required external dependencies. Once prompted, download the .zip file and place the contents in the folder

```
conexio_stratus_firmware/samples/edge_impulse/standalone-inferencing
```

The final standalone-inferencing folder structure should now look like this:

```
standalone-inferencing
 ├── CMakeLists.txt
 ├── edge-impulse-sdk
 ├── model-parameters
 ├── prj.conf
 ├── README.md
 ├── sample.yaml
 ├── src
 ├── tflite-model
 └── utils
```

At this point, we need to make some minor changes to our inference application to work with the Edge Impulse SDK. To verify that the Zephyr application performs the same classification when running locally on your board, we need to use the same raw inputs as those provided to the **Live classification** for any given timestamp. To do so, click on the Copy to clipboard button next to ‘**Raw features**’. This will copy the raw values from this validation file before any signal processing or inferencing happened.

![](https://3229153654-files.gitbook.io/~/files/v0/b/gitbook-x-prod.appspot.com/o/spaces%2F-MXjGw-Z8_tCuNQB93OW%2Fuploads%2FGe7OnMujIq4hW6w7kS8r%2Ffig_14.png?alt=media\&token=3cb087d5-ef67-4d7a-b9b4-78f43c9f2853)

Next, open the `src/main.cpp` in the `conexio_stratus_firmware/samples/edge_impulse/standalone-inferencing` directory and paste the raw features inside the `static const float features[]` definition.

For example:

```
static const float features[] = {
    0.4100, 0.5600, 0.5100, 0.5200, ...
}
```

Then command `west build -b conexio_stratus_ns` to build the application.

Once the application is compiled successfully, connect the Stratus device and put it into the DFU mode.

Flash the compiled firmware using newtmgr:

```
newtmgr -c serial image upload build/zephyr/app_update.bin
```

Open up a serial console, set the baud rate to 115200, and reset the Stratus device. The serial UART output will be displayed in the terminal showing the signal processing pipeline and the results of the classification. This output should match the values that you got in the Edge Impulse Studio under Live classification.

Congratulations! 🎉


# Stratus Pro Power Analysis

Lower power design is critical for battery-powered IoT devices, ensuring long operational lifetimes without frequent maintenance or recharging. At Conexio, we have meticulously engineered the **Stratus Pro** with ultra-low-power hardware, leveraging efficient power regulators, optimized RF circuitry, and intelligent component selection. Our firmware is designed to maximize energy efficiency by implementing **aggressive power management strategies**, dynamic duty cycling, and deep sleep states.&#x20;

As a result, the **Stratus Pro nRF9151  HW Rev v1.4 (2026 Edition)** achieves an industry-leading **<5µA** power consumption in active sleep mode—one of the best in the market. This seamless integration of hardware and firmware innovations enables our device to operate for **years on a single charge**, making it ideal for remote and industrial IoT applications where power efficiency is paramount.

### Low Power Mode

The [low power mode sample application ](https://github.com/Conexiotechnologies/conexio-firmware-sdk/tree/main/samples/conexio_stratus/low_power_mode)demonstrates how to put the Stratus Pro nRF9151-LACA-A1A in the active low power mode and measure the device current consumption using the Nordic's Power Profiler Kit II.

This application also demonstrates the low power hardware design of the entire cellular kit while constantly powered by the nPM1300 PMIC, without having to shut nPM1300 down or put it into shipment mode.

Some of the main firmware components that allow to put the nRF91 into low power state are:

* disabling the serial and logs in the `prj.conf`&#x20;

```bash
CONFIG_SERIAL=n
CONFIG_LOG=n
```

* disabling the UART receiver in the platform device tree.

```cmake
 &uart0 {
	status = "okay";
	/delete-property/ rx-pin;
};
```

<figure><img src="https://3229153654-files.gitbook.io/~/files/v0/b/gitbook-x-prod.appspot.com/o/spaces%2F-MXjGw-Z8_tCuNQB93OW%2Fuploads%2Fn5RwGDE4fs5UwZ1gE0Mh%2FScreenshot%202026-05-19%20at%206.52.51%E2%80%AFPM.png?alt=media&amp;token=fbd788fe-e91d-4d62-8657-fbd8a2e6294f" alt=""><figcaption></figcaption></figure>


# nRF91xx Modem Firmware (MFW) Update via SWD Port

{% hint style="danger" %}
Not Recommended for new users as this can delete the bootloader on the device. Reach out to us before setting it up for correct wiring.&#x20;

Incorrect SWD cable connection can also damage the kit.
{% endhint %}

Conexio Stratus Pro comes with the latest version of the nRF91xx SiP hardware, preloaded with the latest modem firmware, and with a sample application that blinks the device LED and prints the output to the terminal.

## Updating the Modem Firmware

{% hint style="danger" %}
Downgrading the modem firmware is not recommended for the Stratus device.&#x20;
{% endhint %}

If needed, one can update Modem Firmware (MFW) or flash the application image using an external programmer and a 10-pin SWD cable using either [<mark style="color:red;">nRF5340</mark>](https://www.nordicsemi.com/Products/Development-hardware/nrf5340-dk) or [<mark style="color:red;">nRF91xx development kit</mark>](https://www.nordicsemi.com/Products/Development-hardware/nrf9160-dk), following the steps outlined below.

{% hint style="info" %}
To supply continuous power via the debugger port to the Stratus device, make sure to solder the **SB47** jumper on the nRF5340 DK or the **SB16** on the nRF91 DK. This is located near the Debug out port on the DK.
{% endhint %}

<figure><img src="https://3229153654-files.gitbook.io/~/files/v0/b/gitbook-x-prod.appspot.com/o/spaces%2F-MXjGw-Z8_tCuNQB93OW%2Fuploads%2FljaxgV9pOCjqdMR3umZN%2FIMG_4125.jpg?alt=media&amp;token=e9e33c9b-28ae-438a-b111-f9a8255a0c59" alt=""><figcaption></figcaption></figure>

* First, download the latest nRF91xx LTE SiP modem firmware from the [<mark style="color:red;">Nordic Semiconductor website</mark>](https://nsscprodmedia.blob.core.windows.net/prod/software-and-other-downloads/sip/nrf91x1-sip/nrf91x1-lte-modem-firmware/mfw_nrf91x1_2.0.2.zip) under the download firmware section.
* Connect the Conexio Stratus dev kit to the nRFxx development kit via the SWD cable. Then connect the nRF Dev kit to the laptop with a USB cable.

![](https://3229153654-files.gitbook.io/~/files/v0/b/gitbook-x-prod.appspot.com/o/spaces%2F-MXjGw-Z8_tCuNQB93OW%2Fuploads%2F9IrSzwSM4OsmFPTiScza%2FIMG_4902.jpg?alt=media\&token=02fc0220-248b-4993-b709-1015408b8fbd)

* Make sure the direction of the SWD cable on the Stratus Pro kit is correct. Reversing this can damage the board due to reverse polarity.&#x20;
* For the nRF9151-LACA-A1A kits, take a note of the SWD connector and the notch as shown in the image below. The SWD cable should connect in the right direction.

<figure><img src="https://3229153654-files.gitbook.io/~/files/v0/b/gitbook-x-prod.appspot.com/o/spaces%2F-MXjGw-Z8_tCuNQB93OW%2Fuploads%2FXRqZ3jJ6HGylmBzk4Cb8%2FScreenshot%202026-05-30%20at%202.44.09%E2%80%AFPM.png?alt=media&amp;token=da15f530-e2f0-46a9-9426-0e182ea79b4a" alt=""><figcaption></figcaption></figure>

* Connect either the LiPo battery or USB power to power the Stratus Pro device.
* Next, to program the latest modem firmware, issue the following command. This requires that you have [nrfutil ](https://www.nordicsemi.com/Products/Development-tools/nRF-Util)tool installed on your machine. Refer to the [nrfutil documentation](https://docs.nordicsemi.com/bundle/nrfutil/page/guides/installing.html#prerequisites) for more.

```
nrfutil 91 modem-firmware-upgrade --firmware mfw_nrf91x1_2.0.4.zip --serial-number serial_number_of_your_nrf_dev_kit 
```

{% hint style="info" %}
Do not extract the modem firmware zip file and choose the correct modem firmware depending on your nRF91 devices.
{% endhint %}

## Flashing an Application Image using SWD port

To flash an application image to Stratus Pro over the SWD port, follow these steps:

* Compile the application firmware using the nRF Connect Plugin for VSCode as [outlined here](/getting-started-with-conexio-blitz/conexio-blitz-overview/programming-and-debugging/building-and-programming-an-application/compiling-applications-with-nrf-connect-extension-for-vs-code).
* Then open the nRF Terminal from an application within VSCode as shown below:

<figure><img src="https://3229153654-files.gitbook.io/~/files/v0/b/gitbook-x-prod.appspot.com/o/spaces%2F-MXjGw-Z8_tCuNQB93OW%2Fuploads%2FpERWkRrdEiCLXsRkG8pN%2FScreenshot%202025-09-22%20at%209.25.05%E2%80%AFPM.png?alt=media&amp;token=b8bdd78f-b5cf-4e38-ab00-0e32a17cb0fd" alt=""><figcaption></figcaption></figure>

* Connect the Conexio Stratus dev kit to the nRFxx development kit via the SWD cable as outlined above. Then connect the nRF Dev kit to the laptop with a USB cable. You should now see the device recognized under **Connected Devices in the** nRF Connect Plugin.
* Next issue the  following west flash command in the terminal:

```
west flash --recover
```

```bash
-- west flash: rebuilding
[0/10] Performing build step for 'mcuboot'
ninja: no work to do.
[1/10] Performing build step for 'multi_sensor'
[0/14] Performing build step for 'tfm'
ninja: no work to do.
[8/10] cd /opt/nordic/ncs/v2.9.0/conexio-firmware-sdk/samples/conexio_stratus/multi_sensor/build/_sysbuild && /opt/nordic/ncs/toolchains/b8efef2ad5/Cellar/cmake/3.21.0/bin/cmake -E true
-- west flash: using runner nrfjprog
-- runners.nrfjprog: reset after flashing requested
Using board 1051274754
-- runners.nrfjprog: Recovering and erasing all flash memory.
Recovering device. This operation might take 30s.
Restored application UICR.HFXOSRC and UICR.HFXOCNT.
Erasing user code and UICR flash areas.
Writing image to disable ap protect.
-- runners.nrfjprog: Flashing file: /opt/nordic/ncs/v2.9.0/conexio-firmware-sdk/samples/conexio_stratus/multi_sensor/build/merged.hex
[ #################### ]   3.738s | Erase file - Done erasing                                                          
[ #################### ]   0.914s | Program file - Done programming                                                    
[ #################### ]   0.878s | Verify file - Done verifying                                                       
Applying pin reset.
-- runners.nrfjprog: Board with serial number 1051274754 flashed successfully.
```

* Once the command starts executing, one should see the above logs in the terminal window, where the nrf programmer (nrfjprog) will rebuild the app and then automatically flash it to the Stratus device.
* Once successfully flashed, the pin reset will be triggered.
* That's it.


# nRF Connect LTE Link Monitor

[<mark style="color:red;">LTE Link Monitor</mark>](https://infocenter.nordicsemi.com/index.jsp?topic=%2Fug_link_monitor%2FUG%2Flink_monitor%2Flm_intro.html) is an essential tool when it comes to debugging the cellular network connectivity and status.

To install the LTE Link Monitor:

1. Open the nRF Connect for Desktop app.
2. Find the LTE Link Monitor in the list of apps and click **Install**.
3. Once the app is installed, launch it by clicking **Open**.

![Launching the LTE Link Monitor App](https://3229153654-files.gitbook.io/~/files/v0/b/gitbook-x-prod.appspot.com/o/spaces%2F-MXjGw-Z8_tCuNQB93OW%2Fuploads%2FgfeCK47x8Ei5YyEj4jLV%2F1.png?alt=media\&token=d515be7a-cb6d-49c0-8f0d-f279201b8ebb)

Build and flash the [<mark style="color:red;">at\_client</mark> ](https://github.com/Conexiotechnologies/conexio-stratus-firmware/tree/main/samples/at_client)sample application to the Stratus dev kit. The AT Client sample acts as a proxy for sending directives to the nRF9160 modem via AT commands. This facilitates the reading of responses or analyzing of events related to the nRF9160 modem.

Connect the Stratus kit to the USB port, then uncheck (1) **Show only supported devices**, (2) **Flow control**, and click on the (3) **SELECT DEVICE** drop-down list.

![Selecting connected devices](https://3229153654-files.gitbook.io/~/files/v0/b/gitbook-x-prod.appspot.com/o/spaces%2F-MXjGw-Z8_tCuNQB93OW%2Fuploads%2FuShFAzpOx9eehatW6GJ8%2F2.png?alt=media\&token=1f2d3369-3237-4245-90d2-1599236fac06)

Then from the connected devices list, click on the **CP2101N USB to UART Bridge** which is for the Conexio Stratus device.

![Selecting the Stratus device](https://3229153654-files.gitbook.io/~/files/v0/b/gitbook-x-prod.appspot.com/o/spaces%2F-MXjGw-Z8_tCuNQB93OW%2Fuploads%2FRTn6SYEjl6sF1UHw3jDt%2F3.png?alt=media\&token=df48e4a4-8640-4029-b64e-b8c636670ad4)

Once selected, under **MODEM PORT**, choose **tty/SLAB\_USBtoUART** port. In the terminal window of the LTE Link Monitor, you should see **Modem port is opened** message being printed. Stratus device is now successfully connected to the link monitor app.

![LTE Link Monitor terminal view](https://3229153654-files.gitbook.io/~/files/v0/b/gitbook-x-prod.appspot.com/o/spaces%2F-MXjGw-Z8_tCuNQB93OW%2Fuploads%2FzBG4GND08cIU7gWqFjB0%2F4.png?alt=media\&token=1d172f11-0006-4b0c-9732-6927aad52e2b)

To interact with the nRF9160 modem and initiate a network connection, click (1) **AT** command, then  (2) **AT+CFUN=1**, followed by **AT+CFUN?**.\
These AT commands turn on the modem and start the network connection procedure with the cell tower. You should see all the commands that are sent to the modem in the terminal as shown below. Once the modem completes the network handshake procedure, you will see the stats and the name of the connected network on the left-hand pane.

![](https://3229153654-files.gitbook.io/~/files/v0/b/gitbook-x-prod.appspot.com/o/spaces%2F-MXjGw-Z8_tCuNQB93OW%2Fuploads%2FHX0NKJL6cyQdD0knLIzK%2F5.png?alt=media\&token=acc80787-ee77-4cac-85c7-29322e3de03d)

Now you can explore other features of the LTE Link Monitor. Read more on viewing and sending AT commands at the [<mark style="color:red;">Nordic Semi infocenter</mark>](https://infocenter.nordicsemi.com/index.jsp?topic=%2Fug_link_monitor%2FUG%2Flink_monitor%2Flm_intro.html).


# Connectivity

### LTE

Conexio Stratus has been tested and verified with the following IoT Sim providers:

* [<mark style="color:red;">1NCE</mark>](https://1nce.com/en-us/) <mark style="color:blue;">\[Our current MVNO Partner]</mark>
* [<mark style="color:red;">Telit</mark>](https://www.telit.com/connectivity-solutions/)&#x20;
* [<mark style="color:red;">Hologram</mark>](https://www.hologram.io/)
* [<mark style="color:red;">Soracom</mark>](https://www.soracom.io/)
* [<mark style="color:red;">iBasis</mark>](https://ibasis.com/solutions/iot-connectivity/)


# Regulatory & Compliance

FCC regulatory notice

The following regulatory notices apply to the Conexio Stratus Pro Development Kit based on nRF9151, nRF9161, and nRF9160.&#x20;

This kit has not been authorized under the rules of the FCC and is designed to allow:&#x20;

• Product developers to evaluate electronic components, circuitry, or software associated with the kit to determine whether to incorporate such items in a finished product.&#x20;

• Software developers to write software applications for use with the end product.&#x20;

This kit is not a finished product and when assembled may not be resold or otherwise marketed unless all required FCC equipment authorizations are first obtained. Operation is subject to the condition that this product does not cause harmful interference to licensed radio stations and that this product accepts harmful interference. Unless the assembled kit is designed to operate under part 15, part 18, or part 95 of 47 CFR Chapter I - FCC, the operator of the kit must operate under the authority of an FCC license holder or must secure experimental authorization under part 5 of the latter chapter.

### FCC Pre-certification and Markings <a href="#fcc-pre-certification-and-markings" id="fcc-pre-certification-and-markings"></a>

When designing or incorporating the Conexio Stratus into your projects, there are some marking requirements. The host device shall be properly labeled to identify the modules within the host device and you must have this written on your product somewhere:

* Contains FCC ID: 2ANPO00NRF9160
* Contains IC: 24529-NRF9160

### FCC Supplier's Declaration of Conformity (SDoC) <a href="#fcc-pre-certification-and-markings" id="fcc-pre-certification-and-markings"></a>

This equipment complies with FCC and ISED radiation exposure limits set forth for an uncontrolled environment.&#x20;

* The antenna should be installed and operated with a minimum distance of 20 cm between the radiator and your body.&#x20;

* This transmitter must not be co-located or operating in conjunction with any other antenna or transmitter.

* [nRF9151 SiP Global and Regulatory](https://www.nordicsemi.com/Products/Wireless/Low-power-cellular-IoT/nRF91-Series-certifications/nRF9151-Global-and-regulatory?lang=en#infotabs)

* EU Declaration of Conformity (DoC)

{% file src="/files/QeOsQe03eQlzeDAr891y" %}

* UKCA Declaration of Conformity (DoC)

{% file src="/files/gyxdt49Sq4u3VRmtY9k3" %}


# Expansion Dock

Unleash your IoT creativity with Stratus Pro and Expansion Dock

Start your product development with our Expansion Dock for Stratus Pro fast and easy. The Expansion Dock offers two QWIIC connectors, two Grove sockets, a mikroBUS™ socket, an nRF7002 Expansion board socket to add Wi-Fi location capabilities, and a SeeedStudio Xiao socket allowing you to create various wireless applications with one host board. It can't get any better than this.

<figure><img src="https://3229153654-files.gitbook.io/~/files/v0/b/gitbook-x-prod.appspot.com/o/spaces%2F-MXjGw-Z8_tCuNQB93OW%2Fuploads%2Fnx3tPhhmubjh6IKpI9zx%2FExpansion-Dock.webp?alt=media&amp;token=a994640f-7e32-4791-99ea-8abe685cce4a" alt=""><figcaption><p>Expansion Dock features</p></figcaption></figure>

<figure><img src="https://3229153654-files.gitbook.io/~/files/v0/b/gitbook-x-prod.appspot.com/o/spaces%2F-MXjGw-Z8_tCuNQB93OW%2Fuploads%2FIWhg3R3BzR2dKwD45h6X%2Fexpansion_dock_pinouts.webp?alt=media&amp;token=12de34e6-484f-467f-9ade-9aa75cdf5ea2" alt=""><figcaption><p>Expansion Dock Connectivity</p></figcaption></figure>


# Purchase Conexio Devices

![Conexio Logo](https://3229153654-files.gitbook.io/~/files/v0/b/gitbook-x-prod.appspot.com/o/spaces%2F-MXjGw-Z8_tCuNQB93OW%2Fuploads%2FT2MCmvk5MoLFjhFb9iao%2Fconexio%203D%20Logo%20Mockup%20light%20\(1\).png?alt=media\&token=023de551-7ce2-47d7-b93f-89c163bd4955)

Currently, you can purchase the Conexio Stratus Pro nRF9151 kit, Expansion dock, and accessories from:

* [<mark style="color:red;">Conexio's Webstore</mark>](https://conexiotech.com/products/)
* [<mark style="color:red;">CrowdSupply</mark>](https://www.crowdsupply.com/conexio)
* [<mark style="color:red;">Mouser Electronics</mark>](https://www.mouser.com/c/?m=Conexio%20Technologies)

#### Ordering Through Conexio Technologies

Orders placed directly through the Conexio webstore are processed, packed, and shipped by our team from our headquarters in **Chicago, Illinois, USA**. This allows us to provide direct support regarding order status, shipping updates, and any special customer requirements.

#### Ordering Through Crowd Supply or Mouser

Orders placed through Crowd Supply are fulfilled by its parent company, Mouser Electronics. As a result, we do not have access to order status, inventory allocation, shipping information, or fulfillment details for purchases made through either Crowd Supply or Mouser.

For any questions regarding orders placed through those channels, customers should contact the respective vendor's support team directly.

#### Which Option Should You Choose?

If you would like direct access to the Conexio team, faster communication regarding your order, or have special shipping or project requirements, we recommend purchasing through the Conexio webstore. For customers who prefer to purchase through established distribution channels or corporate procurement systems, Crowd Supply and Mouser remain excellent options.

We appreciate your support and are committed to providing the best possible experience regardless of where you choose to purchase our products.

### Volume Discounts/Pricing

Please reach out directly to \[<info@conexiotech.com>] for volume discounts and wholesale pricing.

### Design and Customization

We specialize in custom hardware design based on Stratus Pro and the nRF91xx series. If you have a project in mind and need expert hardware and firmware development, we’re here to help. Share your requirements with us, and let’s bring your vision to life!


# Support

For any questions related to the Conexio Stratus and or application development, please post your query on the [<mark style="color:red;">discussion forum</mark>](https://github.com/Conexiotechnologies/conexio-stratus-firmware/discussions) or contact us at <mark style="color:red;"><info@conexiotech.com></mark>.

## Stratus Discord Channel

{% embed url="<https://discord.gg/2CZJTrt6Z5>" %}

Other useful links:

* [<mark style="color:red;">Conexio Stratus Firmware Repo</mark>](https://github.com/Conexiotechnologies/conexio-stratus-firmware)
* [<mark style="color:red;">Conexio Stratus Board Definition Files</mark>](https://github.com/Conexiotechnologies/conexio_stratus_devicetree) <mark style="color:red;">Repo</mark>
* [<mark style="color:red;">Conexio Stratus Board Schematics</mark>](https://github.com/Conexiotechnologies/conexio-stratus-board-schematics)


# Getting Started with Conexio BLITZ

Dual Connectivity: nRF5340 BLE 5.4 + nRF7002 WiFi 6 development kit.

### What is Conexio BLITZ? <a href="#what-is-conexio-stratus" id="what-is-conexio-stratus"></a>

<figure><img src="https://3229153654-files.gitbook.io/~/files/v0/b/gitbook-x-prod.appspot.com/o/spaces%2F-MXjGw-Z8_tCuNQB93OW%2Fuploads%2Fm2imKVB6IyTRoJoYYnjB%2Fconexio-blitz-scale-01-removebg.png?alt=media&amp;token=25a957f2-fd4e-4a3b-9be2-7e280c723d4a" alt=""><figcaption></figcaption></figure>

**Conexio BLITZ** is a versatile all-in-one IoT prototyping companion designed for enthusiasts, by enthusiasts. It has been engineered to suit a wide range of IoT applications, including smart home automation, health and wellness monitoring, industrial IoT, inventory management in retail, and so much more.

Thanks to its powerful **nRF5340** SoC and plentiful I/O, even demanding edge computing use cases like anomaly detection in industrial equipment are possible with BLITZ. Developers and hobbyists alike can connect their existing projects to the cloud or other local endpoints without worrying about infrastructure costs.

### Supports Most Popular Wireless Protocols <a href="#supports-most-popular-wireless-protocols" id="supports-most-popular-wireless-protocols"></a>

BLITZ supports an extensive range of wireless protocols. It supports Bluetooth Low Energy 5.4 standard and can Bluetooth Direction Finding. In addition, it supports LE Audio, a high-throughput 2 Mbps data transfer, advertising extensions, and long-range mode. Run protocols like Bluetooth Mesh, Thread, and Zigbee concurrently with Bluetooth LE for provisioning, commissioning, or configuring mesh networks. Unlock the potential of sub-1 GHz with BLITZ, as it also supports 802.15.4 and 2.4 GHz proprietary protocols.

In the digital age, WiFi is a powerful tool. And let’s be honest, who wouldn’t want onboard WiFi? With Nordic Semiconductor’s latest **nRF7200** WiFi chipset, BLITZ delivers high-speed, reliable wireless internet connectivity and seamless local device communication, ensuring your IoT projects and products are at the forefront of technological advancements.

### Convenient Feather Form Factor <a href="#convenient-feather-form-factor" id="convenient-feather-form-factor"></a>

Designed to be adaptable, BLITZ also embraces modularity. Its [QWIIC](https://www.sparkfun.com/qwiic) connector and feather-compatible 28 header pins are ready to integrate with compatible modules, allowing you to extend its functionality with additional hardware like cameras, thermometers, or ultrasonic distance sensors. This extensibility makes BLITZ a foundation for innovative hardware interfacing.

In addition, Conexio BLITZ is equipped with a USB Type-C port, enhancing its connectivity options. This port allows for easy connection with a wide range of devices and accessories, battery charging, debugging, and programming.

Thanks for exploring BLITZ :)

### BLITZ Sample Applications Repo <a href="#stratus-sample-applications-repo" id="stratus-sample-applications-repo"></a>

{% embed url="<https://github.com/Conexiotechnologies/conexio-firmware-sdk/tree/main>" %}


# Conexio BLITZ Overview

nRF5340 BLE 5.4 + nRF7WiFi 6 development kit.

## Board Layout

<figure><img src="https://3229153654-files.gitbook.io/~/files/v0/b/gitbook-x-prod.appspot.com/o/spaces%2F-MXjGw-Z8_tCuNQB93OW%2Fuploads%2FQmIwa16v4gQi4eH3zZIf%2FConexio_BLITZ_topview.png?alt=media&amp;token=b5e30831-20be-4f50-bec0-5cad69d30634" alt=""><figcaption><p>Conexio BLITZ Board Overview</p></figcaption></figure>

## Pinouts

<figure><img src="https://3229153654-files.gitbook.io/~/files/v0/b/gitbook-x-prod.appspot.com/o/spaces%2F-MXjGw-Z8_tCuNQB93OW%2Fuploads%2FWFYfRWkSlQiyCXY4lgcr%2FConexio_BLITZ_pinouts.png?alt=media&amp;token=fa34b224-3292-4ac3-9c62-b87c65920f7a" alt=""><figcaption><p>Conexio BLITZ Pinouts</p></figcaption></figure>

### Technical specifications and features <a href="#technical-specifications-and-features" id="technical-specifications-and-features"></a>

**Main MCU**: Nordic nRF5340 Microcontroller with ARM Cortex M33

* Dual-core Bluetooth 5.4 SoC
* 1MB Flash
* 512kB RAM
* ARM® TrustZone®
* ARM® Cryptocell 312
* High-speed USB, SPI, QSPI, I2C, and UART with Easy DMA
* I2S w/ EasyDMA
* 4x PWM with EasyDMA
* 12bit SADC with EasyDMA
* 2x RTC
* PPI (Programmable peripheral interconnect) interface
* Supports Thread, Matter, ZigBee, Bluetooth Mesh, and ANT
* Pre-programmed MCUBoot bootloader

**Wi-Fi 6 Companion IC**: nRF7002

* 2.4 GHz and % GHz dual-band
* Supports Target Wake Time (TWT)
* Wi-Fi connectivity and locationing  (SSID sniffing of local Wi-Fi hubs)
* Supports Matter and BLE for commissioning

**Power Management IC**: nPM1300

* 800 mA battery charger
* Dual 200 mA buck DC-DC regulator
* Battery charge status and protection (controlled via I2C)
* Operating range 1.8 to 5.5 V
* 2-pin JST LiPo battery connection
* Maximum output current: 800 mA

**Output Voltages**: (Accessible via Headers)

* 1.8 V
* 3.3 V
* 5 V (VUSB)
* VBAT

**Debugger & Programmer**

* Supports J-Link and CMSIS-DAP-based programmers
* 10-pin 0.05" (1.27mm) pin connector

**Other I/O**

* 1x USB Type-C for serial, DFU, application firmware programming, plus LiPo battery charging
* 1x QWIIC connector
* Feather-compatible header
* 22 user-programmable GPIOs
* 2x push buttons (1 x Reset, 1 x user-programmable)
* 1x user-programmable LED
* 1x U.FL for WiFi antenna
* 1x onboard PCB antenna for Bluetooth Low Energy

**Size and weight**

* 55.30 mm x 27.63 mm
* Weight: \~5 grams

<br>


# Build Environment Setup

This section describes the steps to setup the build environment for compiling and flashing the Conexio BLITZ device firmware.

### Minimum Requirements

Make sure you have all the required hardware and that your computer has one of the supported operating systems.

### Hardware

* Conexio BLITZ kit
* USB-C cable
* Computer (macOS, Ubuntu Linux, or MS Windows)


# nRF Connect SDK Installation

![](https://3229153654-files.gitbook.io/~/files/v0/b/gitbook-x-prod.appspot.com/o/spaces%2F-MXjGw-Z8_tCuNQB93OW%2Fuploads%2FeiyF6cwEKDmbR4YoLC34%2Fnrfconnect.png?alt=media\&token=6c316a78-5d9d-46a6-8dce-a279ed7b5219)

The Conexio devices currently only support [<mark style="color:red;">ZephyrRTOS</mark>](https://www.zephyrproject.org/). To access all the features and capabilities, Nordic Semiconductor has developed the [<mark style="color:red;">nRF Connect SDK</mark>](https://developer.nordicsemi.com/nRF_Connect_SDK/doc/latest/nrf/introduction.html) (NCS) that enables you to develop applications for nRF53, and nRF91 Series devices that powers Conexio devices.

To make nRF Connect SDK installation a breeze, follow the following steps.

* Download and install a cross-platform tool [<mark style="color:red;">nRF Connect for Desktop</mark>](https://www.nordicsemi.com/Products/Development-tools/nrf-connect-for-desktop) for your operating system.
* Install and run the nRF Connect tool on your machine.
* Click I**nstall** next to the Toolchain manager as shown below.

![The Toolchain Manager window](https://3229153654-files.gitbook.io/~/files/v0/b/gitbook-x-prod.appspot.com/o/spaces%2F-MXjGw-Z8_tCuNQB93OW%2Fuploads%2F8YPXXMjNvrYr6w6fSMqC%2Finstall.png?alt=media\&token=05bb8abc-04a8-4320-bf91-bab2e2d21042)

* Once the Toolchain manager is installed, click open.

![The Toolchain Manager window](https://3229153654-files.gitbook.io/~/files/v0/b/gitbook-x-prod.appspot.com/o/spaces%2F-MXjGw-Z8_tCuNQB93OW%2Fuploads%2F97zLEKKWcPNovsgvBRMG%2FScreen%20Shot%202021-10-30%20at%208.38.24%20PM.png?alt=media\&token=0cef5717-6543-4a46-9f05-16fa58a3e4c4)

{% hint style="info" %}
The Conexio BLITZ sample applications are currently compatible with **nRF Connect SDK V2.6.0 and above.**&#x20;
{% endhint %}

* Select **nRF Connect SDK v2.6.0** and click **Install**. Depending on your internet speed, it may take a few tens of minutes, so go and grab yourself a cup of coffee **☕**

![The Toolchain Manager window](https://3229153654-files.gitbook.io/~/files/v0/b/gitbook-x-prod.appspot.com/o/spaces%2F-MXjGw-Z8_tCuNQB93OW%2Fuploads%2FfdFiVBIvz4D7hbiVzwKS%2Fncs-2.6.0.png?alt=media\&token=f9d101cf-6363-4d7e-8ab1-c8fedcfbf2c5)

* Once the installation is complete, click the dropdown menu and hit **Open Terminal**.

![The Toolchain Manager dropdown menu options](https://3229153654-files.gitbook.io/~/files/v0/b/gitbook-x-prod.appspot.com/o/spaces%2F-MXjGw-Z8_tCuNQB93OW%2Fuploads%2FGl7XfWKtB9a5I5znTDKh%2FScreenshot%202024-03-30%20at%2010.45.17%E2%80%AFPM.png?alt=media\&token=78c2f281-230d-4029-8e2d-27cef88b696b)

* This will open the terminal in the installed directory of the nRF Connect SDK as indicated. In our case **nordic/ncs/v2.6.0**.

![](https://3229153654-files.gitbook.io/~/files/v0/b/gitbook-x-prod.appspot.com/o/spaces%2F-MXjGw-Z8_tCuNQB93OW%2Fuploads%2FYD0TcuHfTnu9tM6XT6L9%2FScreenshot%202024-03-30%20at%2010.47.06%E2%80%AFPM.png?alt=media\&token=4fb95c65-6231-4333-b976-1fa0fcc5a6dc)

Hooray🎉 . You have completed the first milestone.

**References**

1. [nRF Connect SDK](https://developer.nordicsemi.com/nRF_Connect_SDK/doc/latest/nrf/gs_assistant.html#gs-app-tcm) installation documentation by the Nordic Semiconductor.


# newtmgr Setup

## Flashing the Firmware through USB

You will be required to flash a new firmware to your Conexio BLITZ device in one of the following cases:

* Developing and testing the application firmware (e.g. adding features to the application firmware or bug fixes)
* Updating the dual-core firmware (e.g. updating the main app or network firmware)
* Updating the device bootloader firmware.

To do so successfully, follow these steps.

## newtmgr

`newtmgr` is an image management tool that can be used to interact with the bootloader and images on the device. `newtmgr` will be used to load the application firmware via the USB serial interface to the BLITZ device. For full details on the newtmgr tool and the entire command set, see the [<mark style="color:red;">official newtmgr documentation</mark>](https://mynewt.apache.org/latest/newtmgr/index.html).

{% hint style="info" %}
`newtmgr` will be used to load the application firmware via the USB serial interface to the BLITZ device.
{% endhint %}

### Installing newtmgr

For details on installing the newtmgr tool on your operating system of choice see:

* [<mark style="color:red;">macOS installation</mark>](https://mynewt.apache.org/latest/newt/install/newt_mac.html).
* [<mark style="color:red;">Linux installation</mark>](https://mynewt.apache.org/latest/newt/install/newt_linux.html).
* [<mark style="color:red;">Windows installation</mark>](https://mynewt.apache.org/latest/newt/install/newt_windows.html).

If the above macOS installation does not work, follow these simple steps to get the newtmgr up and running.

{% file src="/files/Bw4tiYPw83UQT6AafatR" %}

Download the above-zipped folder, extract, and place the newtmgr executable inside the directory: **/usr/local/bin/.**

&#x20;**/usr/local/bin/** is normally hidden. To view, it go to **MAC OS HDD** and inside here press command+shift+. to view the hidden **usr** folder.

Then navigate to usr/local/bin. After doing the above steps, in the terminal when you will issue the command: **which newtmgr** should display: **/usr/local/bin/newtmgr.**

### Connection Profiles

The `newtmgr` tool works with connection profiles, such as serial, depending on how you wish to communicate with the device under test.

Before you can use `newtmgr` to program your Conexio BLITZ kit, you will need to set up at least one connection profile, as described below, making it easier to update your device whenever needed. Open a terminal window and enter the following command:

{% tabs %}
{% tab title="Windows" %}
newtmgr conn add serial type=serial connstring="dev=COM5,baud=115200"
{% endtab %}

{% tab title="macOS/Linux" %}

```shell
newtmgr conn add serial type=serial connstring='dev=/dev/tty.SLAB_USBtoUART,baud=115200' 
```

{% endtab %}
{% endtabs %}

{% hint style="info" %}
Make sure that the COM port on Windows matches the one attached to the BLITZ DK.
{% endhint %}

```bash
newtmgr conn show
Connection profiles:
  serial: type=serial, connstring='dev=/dev/tty.SLAB_USBtoUART,baud=115200'
```


# Building and Programming an Application


# Conexio BLITZ Board Definition Files

Before we can compile and flash the application firmware to the BLITZ device, we need to gather a few files for this board. First, we need to install the board definition files or the board’s devicetree in the ZephyrRTOS. Zephyr utilizes devicetree to describe the hardware available on its supported Boards, as well as that hardware’s initial configuration. An introduction to the devicetree is well documented [<mark style="color:red;">here</mark>](https://developer.nordicsemi.com/nRF_Connect_SDK/doc/latest/zephyr/guides/dts/intro.html).

### **Fetching Conexio BLITZ Board Definition Files**

<figure><img src="https://3229153654-files.gitbook.io/~/files/v0/b/gitbook-x-prod.appspot.com/o/spaces%2F-MXjGw-Z8_tCuNQB93OW%2Fuploads%2FLM1zxS3BaCJCeUA8Jpp8%2Fblitz-top-view.png?alt=media&amp;token=7e96eb67-f59a-40d3-8787-94a7ddb509cf" alt="" width="375"><figcaption><p>Conexio BLITZ</p></figcaption></figure>

BLITZ developers are asked to directly download the board files in zip format below extract/unzip, and copy the `conexio_blitz` folder and place it in the NCS directory:

&#x20;**Device Tree for nRF SDK v2.6.0**

> ncs/v2.6.0/zephyr/boards/arm

Coming soon...

You should now see a folder named `conexio_blitz` among other supported board files. Using the board target as `conexio_blitz_cpuapp` you can now build Zephyr applications for the BLITZ board.

```
└── ncs/
    └── v2.6.0/
        ├── zephyr/
        │   └── boards/
        │       └── arm/
        │           ├── ...
        │           ├── ...
        │           ├── conexio_blitz
        │           └── ...
        ├── bootloader
        ├── modules
        ├── nrf
        ├── tools
        ├── toolchain
        └── ...
```

### Download the BLITZ Board Definition Files from Git repo

Coming soon...

### Patch MCUBoot file for Stratus Pro Board

Coming soon...


# Fetch BLITZ Sample Applications

All the sample applications for the BLITZ board can be found in the [<mark style="color:red;">conexio-firmware-sdk</mark>](https://github.com/Conexiotechnologies/conexio-firmware-sdk) repository on GitHub.&#x20;

**Sample Applications for nRF Connect SDK v2.6.0**

There are 2 ways to fetch the Conexio BLITZ sample applications.

**Method 1**

Check out the main Git repo [**v2.6.0**](https://github.com/Conexiotechnologies/conexio-firmware-sdk) for the sample applications supported by the nRF SDK v2.6.0. Download the files, extract them, and place the extracted folder into: `/nordic/ncs/v2.6.0`

Your nRF Connect SDK v2.6.0 folder structure should now look like this:

```
v2.6.0/
├─ bootloader/
├─ conexio-firmware-sdk/
├─ mbedtls/
├─ modules/
├─ nrf/
├─ nrfxlib/
├─ test/
├─ toolchain/
├─ tools/
├─ zephyr/
```

**Method 2: Using nRF Connect SDK as a manifest repository**

Alternatively, add the following entry to `west.yml` file in `ncs/v2.6.0/nrf` subtree of the existing [west](https://docs.zephyrproject.org/3.0.0/guides/west/index.html) based project:

```yaml
# Conexio repository.
    - name: conexio
      path: conexio
      revision: main
      url: https://github.com/Conexiotechnologies/conexio-firmware-sdk.git
      import: west-nrf.yml
```

After updating the west.yml file, it should now look similar to this:

```yaml
...
    - name: openthread
      repo-path: sdk-openthread
      path: modules/lib/openthread
      revision: 0d19f9112101e87722ec80b3a247bc7a1c54b232
    # Conexio repository.
    - name: conexio
      path: conexio
      revision: main
      url: https://github.com/Conexiotechnologies/conexio-firmware-sdk.git
      import: west-nrf.yml

  # West-related configuration for the nrf repository.
  self:
    # This repository should be cloned to ncs/nrf.
    path: nrf
    # This line configures west extensions.
    west-commands: scripts/west-commands.yml
```

Now clone all the repositories, by issuing the following command:

```
west update
```

Your nRF Connect SDK v2.5.0 folder structure should now look like this:

```
v2.6.0/
├─ bootloader/
├─ conexio/ <- examples samples folder
├─ mbedtls/
├─ modules/
├─ nrf/
├─ nrfxlib/
├─ test/
├─ toolchain/
├─ tools/
├─ zephyr/
```

We have now met all the requirements for compiling applications and getting started with the Conexio BLITZ.


# Building and Programming an Application

### Building an application: the wild wild **West** way :smile:

`west` is the swiss-army knife command-line tool for Zephyr. Zephyr provides several `west` extension commands for building, flashing, and interacting with Zephyr programs running on a device.

To build an application, navigate to the `conexio-firmware-sdk` directory that we installed [<mark style="color:red;">previously</mark>](/master/building-and-programming-an-application/fetch-stratus-sample-applications) and choose a sample application. Here we will choose the `led_blink` sample.

> `/opt/nordic/ncs/v2.6.0/conexio_firmware_sdk/samples/conexio_blitz/led_blink`

This sample tests two different functionalities of the BLITZ device:

1. The user-programmable LED on the mainboard.
2. That the USB serial communications are working correctly and the log output gets printed on the terminal window.

To compile the application, open the terminal in the sample application directory as described [<mark style="color:red;">here</mark>](/master/programming-and-debugging/installing-nrf-connect-sdk-ncs-v3.2.1)  and issue the following `west` command.

For the BLITZ device, the build command is:&#x20;

> `west build -b conexio_blitz_cpuapp`

## Updating Through USB

You can update the BLITZ application firmware over USB by using MCUboot, which is a secure bootloader that you can use to update applications without an external debugger.

### Flashing an application: DFU Mode (Device Firmware Upgrade)

BLITZ device comes preprogrammed with the MCUBoot bootloader allowing users to directly update the firmware via the USB interface. **Each sample is already configured to enable the Zephyr application to be booted by the MCUBoot after resetting the board.**&#x200B;​&#x20;

This is handled internally by the Zephyr configuration system and is wrapped in the `CONFIG_BOOTLOADER_MCUBOOT` Kconfig variable, which is enabled in the application’s `prj.conf` file as&#x20;

> `CONFIG_BOOTLOADER_MCUBOOT=y`

More information can be found [<mark style="color:red;">here</mark>](https://developer.nordicsemi.com/nRF_Connect_SDK/doc/latest/mcuboot/readme-ncs.html).

After the compilation has been completed, you will notice a `build` folder being generated, which will contain the following binary:

> build/zephyr/app\_update.bin

{% hint style="info" %}
&#x20;When an application is built with the option `CONFIG_BOOTLOADER_MCUBOOT` set, `app_update.bin`, a signed variant of the firmware in binary format (as opposed to intelhex) is automatically generated and can be used for firmware over-the-air (FOTA) upgrades.
{% endhint %}

To program the BLITZ via USB, you will need to put the device into DFU mode first. This mode triggers the onboard bootloader that accepts firmware binary files. To enter DFU mode:

* Hold down BOTH the buttons
* Release only the RESET button, while holding down the MODE/USER button
* Wait for the white LED to turn on (steady-state)
* Release the MODE button

The device now is in DFU mode. 🚨

Flash the compiled firmware using `newtmgr`:

> `newtmgr -c serial image upload build/zephyr/app_update.bin`

Give it a few seconds for the transfer to complete and then, hit the `RESET` button. You should now see the LEDs blinking every second. If you have a serial logger such as TeraTerm, Putty, or similar, select the correct COM port and set the baud rate = 115200, hit the `RESET` button, and notice the following being printed on the console window:

```
SPM: NS image at 0x20200
SPM: NS MSP at 0x20015528
SPM: NS reset vector at 0x21a31
SPM: prepare to jump to Non-Secure image.
*** Booting nRF Connect SDK v2.6.0 ***
Hello from conexio_blitz
```

Now you are all set! Stratus is alive and ready for development :clap:


# Compiling Applications with nRF Connect Extension for VS Code

To make zephyr-based application development a breeze, the BLITZ board is also compatible with the newly released nRF Connect SDK extension for the VS Code.&#x20;

### **Adding an existing application to nRF Connect for VS Code**

Once you are all set with the [<mark style="color:red;">nRF Connect Visual Studio Code Extension Pack</mark>](https://marketplace.visualstudio.com/items?itemName=nordic-semiconductor.nrf-connect-extension-pack) installation, start the extension in the VS Code.

{% hint style="success" %}
Installing nRF Connect Visual Studio Code Extension Pack will also install all the required dependencies.
{% endhint %}

First, Open Existing Application:

<figure><img src="https://3229153654-files.gitbook.io/~/files/v0/b/gitbook-x-prod.appspot.com/o/spaces%2F-MXjGw-Z8_tCuNQB93OW%2Fuploads%2F3TqeIgqHHhykUQJXf8Tf%2F1.png?alt=media&amp;token=0679d5fd-5ab7-4dc0-b7c6-95f86b731591" alt=""><figcaption><p>Open Existing Application</p></figcaption></figure>

This will open the file browser on your machine. Navigate to the location where the `led_blink` sample application resides (`ncs/v2.6.0/conexio-firmware-sdk/samples/conexio_blitz/led_blink`) and click **open**.

<figure><img src="https://3229153654-files.gitbook.io/~/files/v0/b/gitbook-x-prod.appspot.com/o/spaces%2F-MXjGw-Z8_tCuNQB93OW%2Fuploads%2FkPXfy7QiR5VgKN1Y52vl%2F2.png?alt=media&amp;token=d26c15c5-9c74-40b6-8856-a00f52d6f3a7" alt=""><figcaption><p>Browse the sampe application</p></figcaption></figure>

On the left pane, under **APPLICATIONS**, you should now see the ported application.

### **Compiling an application using nRF Connect Extension**

Prior to compiling our sample application, we need to first generate the device build configuration for our project, by clicking on **Add Build Configuration (1)** option as shown below.

This opens a new tab, asking the user to select the board for which the build configurations will be generated. In our case, we will&#x20;

* (2) check the **All boards**
* (3) then search for `conexio_blitz_cpuapp` .
* (4) click **Build Configuration** to start the Zephyr application build process.

![Add Build Configuration](https://3229153654-files.gitbook.io/~/files/v0/b/gitbook-x-prod.appspot.com/o/spaces%2F-MXjGw-Z8_tCuNQB93OW%2Fuploads%2Fqrdd6bTyV8247z6LdSpy%2F3.png?alt=media\&token=3b0b2884-ec68-4f5b-89f7-097e7184289f)

&#x20;Now, you should see the build process kicking in the background and generating the required files and binaries for the `led_blink` sample application.

![Application Build In Progress](https://3229153654-files.gitbook.io/~/files/v0/b/gitbook-x-prod.appspot.com/o/spaces%2F-MXjGw-Z8_tCuNQB93OW%2Fuploads%2Fmk7SL2v7cWzgybN3X45N%2F4.png?alt=media\&token=3d7f3b79-5a43-4bbc-8d51-a2c53a0ff6cf)

Once the project is compiled successfully, in the project navigation panel, you will see all the generated files.

![Application Compiled Successfully](https://3229153654-files.gitbook.io/~/files/v0/b/gitbook-x-prod.appspot.com/o/spaces%2F-MXjGw-Z8_tCuNQB93OW%2Fuploads%2FvsJA00lgPTTLcwZ2M0yD%2Ffig_10.png?alt=media\&token=1acc802a-30a9-4b63-a80b-069f83b76d58)

Well done! You have successfully managed to compile the sample application within the nRF Connect extension.

### **Flashing an application**

To upload the Conexio Stratus Pro firmware, we now have to:

* Open the terminal within the nRF Connect extension and invoke the `newtmgr -c serial image upload build/zephyr/app_update.bin` as shown, making sure the device is in DFU mode.

![Uploading the Firmware to the Device](https://3229153654-files.gitbook.io/~/files/v0/b/gitbook-x-prod.appspot.com/o/spaces%2F-MXjGw-Z8_tCuNQB93OW%2Fuploads%2FZxs6hANiHei9Afow4aHj%2Ffig_11.png?alt=media\&token=8e19b85d-e5f6-40ae-943d-a9a79f54bade)